15
NOTE:
1. Do not put the connecting duct weight on
the indoor unit.
2. When connecting the duct, use an
nonflammable canvas tie-in to prevent
vibrating.
3. When connecting duct, install in place
prone to takedown for maintenance.
4. Change the fan motor static pressure
corresponding to external duct static
pressure.
5. If installed in place like meeting room
where noise is easy to be perceived, design
isolation booth and internal duct underlayer
to mue the duct system and weaken the
air encounter noise in the duct.
There are three methods:
Step 5: Motor and drain pump, Pump
maintainance.
Remove four screws from the drain pump.
Unplug the pump power supply and water
level switch cable.
Detach the pump.
1.
2.
3.
Pump
Motor maintain:
• Loosen the four bolts
and two screws which
used to fasten the
front side plate.
• Remove the cord of
motor, take o the
front side plate and
repair the motor.
Type 3:
Repair it directly (only applicable to plastic scroll
and fan wheel)
Type 2:
Remove the front side
plate from the bottom.
• Remove the bottom
base as shown.
• Loosen the four
bolts and two
screws which
used to fasten
the front side
plate(Be careful,
the front side plate
may fall down)
• Remove the cord
of motor, take o
the front side plate
and repair the motor.
• Take o the chassis assembly and filter .
• Take o the volute. • Take o the motor.
Motor
Volute
Filter
Chassis assembly
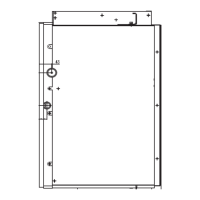
Step 4: Duct and accessories installation
Step 3: Installing the main body
1. The air inlet and air outlet duct should be far
enough apart enough to prevent air outlet
entering Air Inlet.
2. There is dust filter on the indoor unit.
3.
Please attach the outside air duct to the indoor
air outlet/inlet flange by using the type
ST3.9 x 10 screw.
4. Connect the duct according to the following
diagram:
Canvas tie-in
Canvas tie-in
Air
outlet
Isolation
booth
Isolation booth
checking
orifice
Air inlet
Air dust filter
Installing the dust proof net and canvas air
passage
1. Install the dust proof net according to the
installation manual;
2. Install the canvas air passage underneath the
dust proof net.
Type 1:
Remove the front
side plate from the top.
• Remove the top cover
as shown.

 Loading...