EasyManuals Logo

Midea MOX133-09HFN8-QRD0GW User Manual

Midea MOX133-09HFN8-QRD0GW
172 pages
To Next Page IconTo Next Page
To Previous Page IconTo Previous Page
Page #99 background imageLoading...
Page #99 background image
Outdoor Unit Disassembly 43
3. PCB board 9
Procedure Illustration
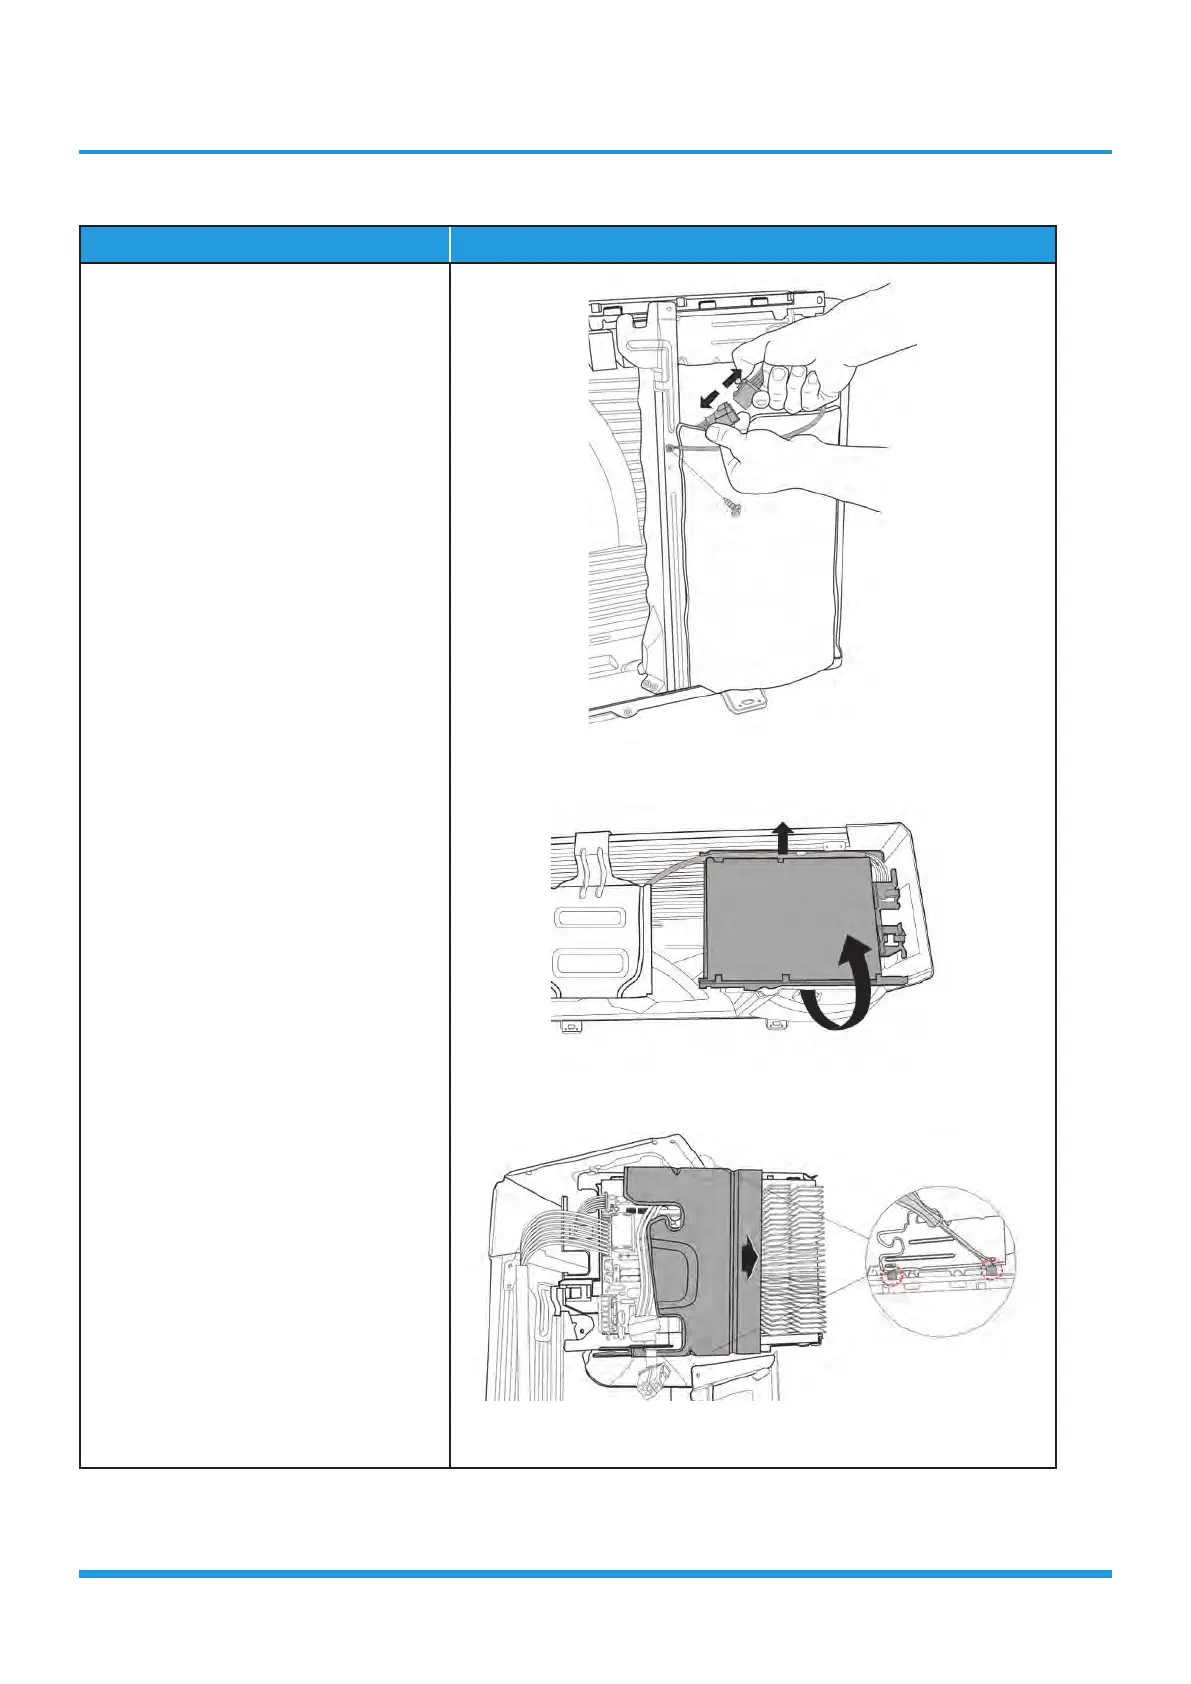
1) Disconnect the connector for
compressor and release the ground
wire(1 screw). (see CJ_ODU_
PCB_009-1).
2) Pull out the wires from electrical
supporting plate and turn over the
electronic control assembly. (see
CJ_ODU_PCB_009-2).
3) Remove the electronic installing box
subassembly (4 hooks) (see CJ_ODU_
PCB_009-3).
CJ_ODU_PCB_009-1
CJ_ODU_PCB_009-2
CJ_ODU_PCB_009-3
Note: This section is for reference only. Actual unit appearance may vary.

Table of Contents

Questions and Answers:

Question and Answer IconNeed help?

Do you have a question about the Midea MOX133-09HFN8-QRD0GW and is the answer not in the manual?

Midea MOX133-09HFN8-QRD0GW Specifications

General IconGeneral
BrandMidea
ModelMOX133-09HFN8-QRD0GW
CategoryInverter
LanguageEnglish

Related product manuals