Midtronics Inc. 7000 Monroe Street Willowbrook, IL 60527
www.midtronics.com
12
1 – Introduction & Overview Toyota/Lexus DCA-8000
Initial Setup
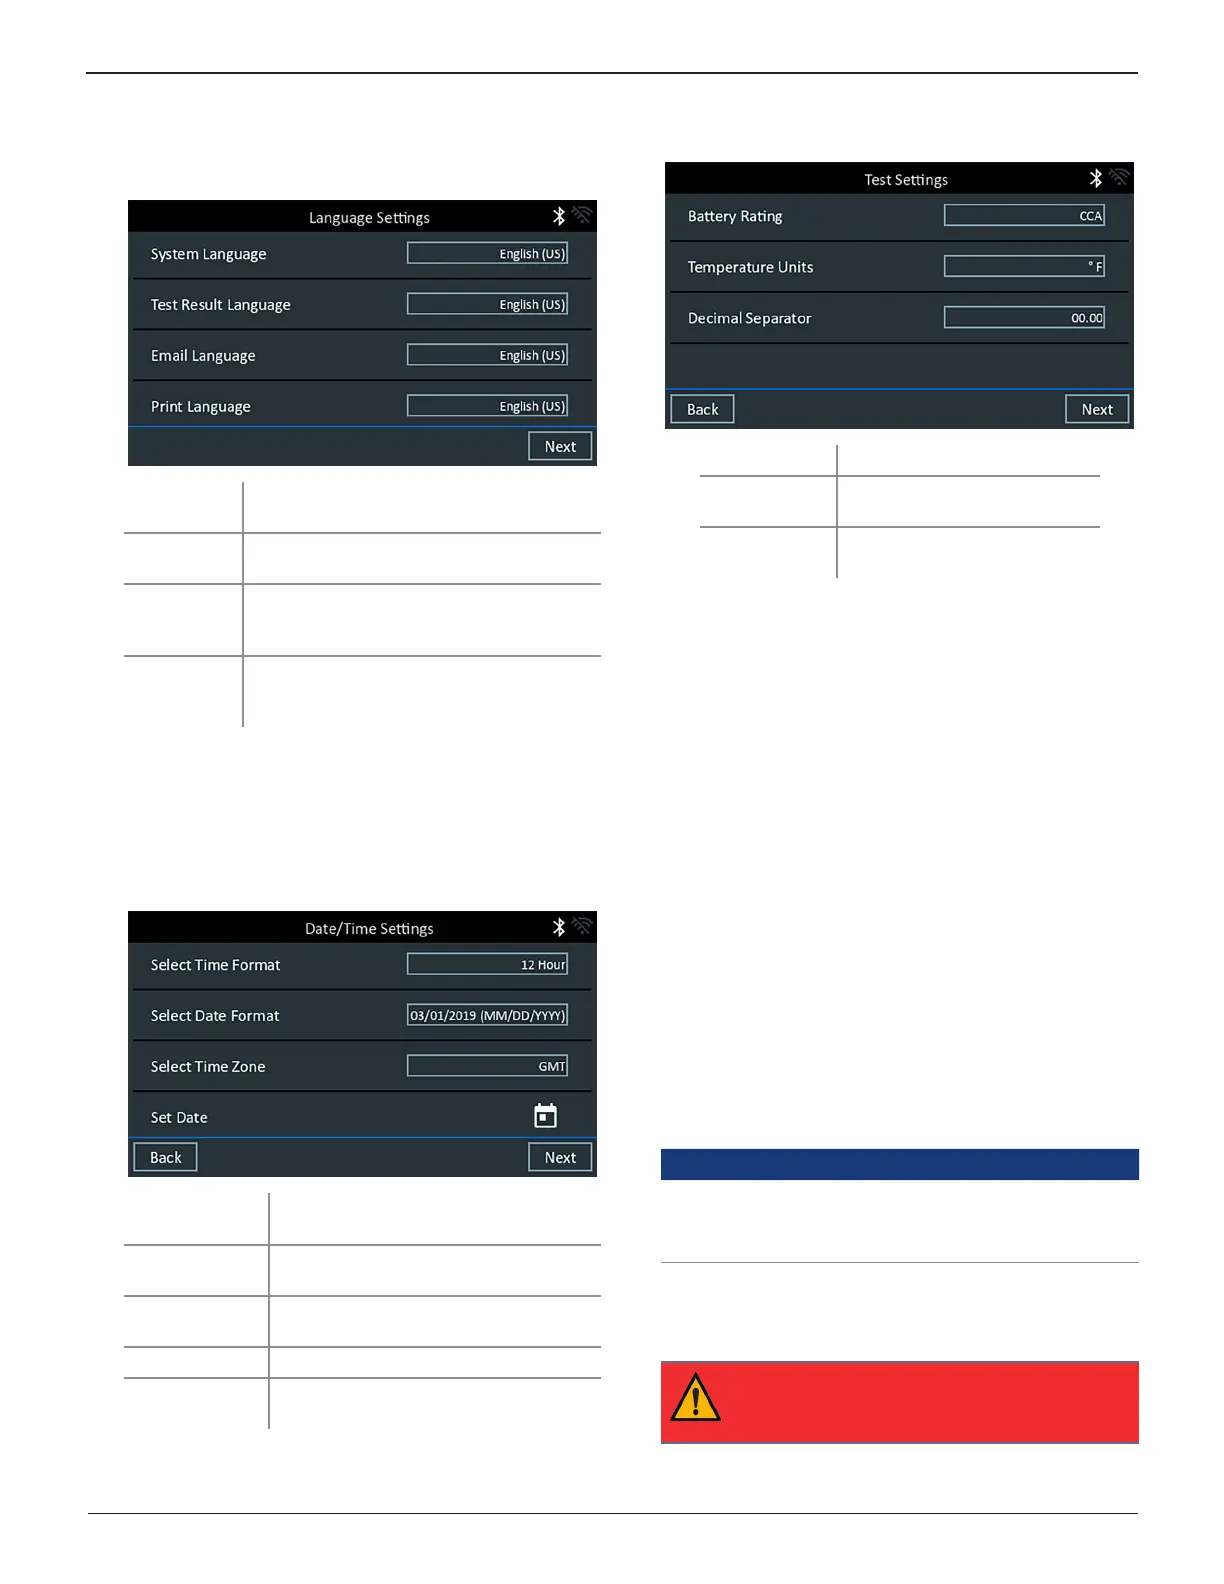
1. Upon initial power-up, the Language Settings screen is
displayed. Tap Next to continue.
System
Language
Select the Controller default language
displayed on the screen.
Test Result
Language
Select the Controller default language for
all displayed tests and test results.
Email
Language
Select the default standard language for
the analyzer to use for all tests and results
sent via email.
Print
Language
Select the default standard language for
the analyzer to use for all tests and results
printed using a networked printer.
2. A Consent to collect data screen is displayed. Read the
terms for collecting data, tap the Consent check box and
then tap Next to continue.
3. Select the appropriate logo: Toyota or Lexus.
4. The Date/Time Settings are displayed. Tap Next to con-
tinue after making any adjustments.
Select Time
Format:
12-hour or 24-hour format
Select Date
Format:
DD/MM/YYYY, MM/DD/YYYY, or YYYY/
MM/DD
Select Time
Zone:
Time zone offset from Greenwich Mean
Time
Set Date: Set the current date
Set Time: Set the current time in the selected
time zone
5. The Test Settings are displayed. Tap Next to continue after
making any adjustments.
Battery Rating CCA (Cold Cranking Amps)
Temperature
Units
Select Fahrenheit or Celsius
Decimal
Separator
Select decimal point or comma
6. A list of detected Congured WiFi networks is displayed.
To select a network: For initial setup, no networks will be
displayed here yet.
To add a network: Tap the plus (+) sign, then select from
one of the displayed detected networks.
To manually add a network, tap the plus (+) sign again.
Follow the on-screen instructions to select the Network
SSID, Security, and IP Settings. Tap Next when nished.
Use the onscreen keypad to manually enter the Network
SSID, security type, and IP settings. If necessary, enter the
WiFi network password. Tap Next when nished.
A conrmation screen is displayed when the analyzer has
successfully connected to the WiFi network.
To delete a network: Tap a displayed network to select it.
Tap trash can icon (
3
) to delete it.
7. Select the country in which the tool will be used (U.S. or
Canada).
8. The BMIS (Battery Management Information System) Ac-
count screen is displayed. If the username and password
are not displayed, enter the correct username and pass-
word from the following table.
Country Username Password
U.S. Toyota toyota@dca8000.com Toyota1!
Toyota
Canada
toyotacanada@dca8000.com Toyota1!
U.S. Lexus
lexus@dca8000.com LexusMdx1!
Lexus
Canada
lexuscanada@dca8000.com LexusMdx1!
IMPORTANT:
If no WiFi connnection has been
made, follow the procedure in the WiFi section
of Chapter 9: Settings in the Instruction Manual.