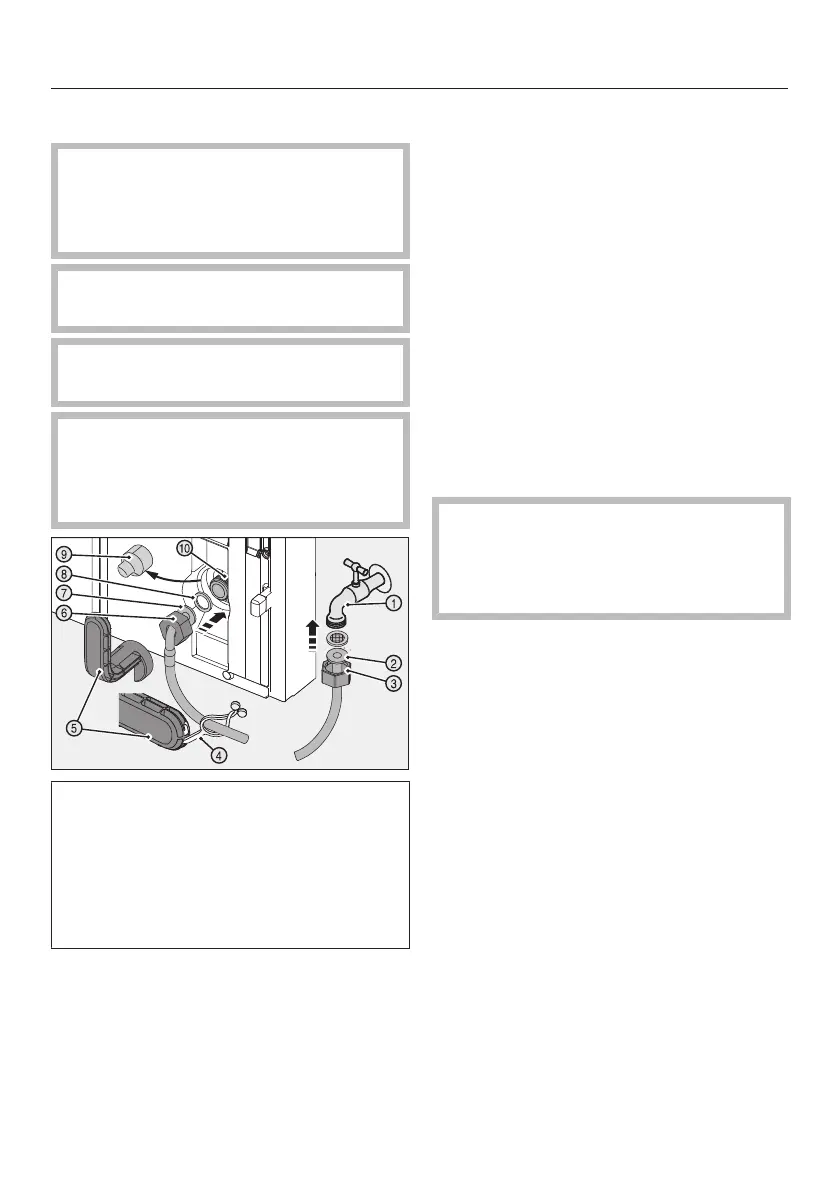
Mains water connection
71
Connecting the water supply
Before establishing the mains water
connection, ensure that the
appliance is disconnected from the
power supply.
Ensure that it is screwed into
position correctly.
Ensure that the connections are tight
and leak-proof.
Before using the appliance for the
first time, the water supply pipework
should be purged of air by a qualified
and competent person.
A stopcock with a metric R3/4
thread must be incorporated when
connecting to the water supply.
The solenoid valve is located at the
back of the appliance at the bottom. It
also has a metric R3/4 connection.
Unscrew safety cap from nut on
the straight end of the hose.
Connect this nut using the tool
supplied to the stopcock. Tighten
the nut by turning it clockwise until
the maximum torque is reached and
the tool is over-torqued.
Briefly open the stopcock to vent
the pipework, and fill the pipework
with water. Place the end of the hose
in a bucket when doing this.
Pull cover off of the solenoid
valve.
Push nut over the angled end of
the hose as far as it will go,
holding the nut securely.
Moisten the seal, then press the
seal into the nut.
The seal should lie flush with the angled
end of the hose and held lightly in
position.
Take care not to damage the
thread in the solenoid valve.
Position the nut carefully and screw it
into position.
Connect the hose by the angled end
to the solenoid valve.
Tighten the nut with the tool
supplied by turning it clockwise
until the maximum torque is reached
and the tool is over-torqued.
Slowly open the stopcock, and
check the whole water system for
leaks.
Fold the tab on the toolin, and
secure the tool to the stainless steel
hose for safe-keeping.