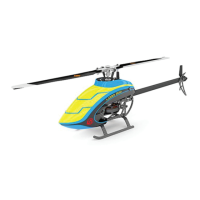
LOGO 200—Quick Start Guide
Congratulations on the purchase of your new Mikado LOGO 200!
To ensure the best experience for you, this model has been pre setup and test own by Mikado Factory Team members.
Follow these few steps, and you will be ying in no time at all!
Step 1 —Update your Radio to the latest version
Since the LOGO 200 uses a special version of 6.4 software, you will need to make sure to update your VBC or VBCT ra-
dio to the latest version in order to have proper function, and access to the menu options which are specic for this heli.
So, please make sure you update your radio to the latest version before attempting to adjust parameters in the model.
Step 2 —Binding the model
We always recommend REMOVING THE MAIN BLADES, AND THE TAIL ROTOR PROPELLER, when doing initial
binding. Turn your VBC radio on, and ENSURE THE MOTOR SWITCH IS SET TO OFF. In Idle the tail motor will turn on
so your motor switch must be in OFF. Then, plug in the main battery to the helicopter. Wait approximately 10
seconds until the LED on the VBar NEO mini starts ashing green and red. At this point you can click into the Bind option
on your VBC radio and select on the LOGO 200 model. After this, the model is bound and ready for ight.
Step 3 - GO FLY!
DEFAULT FLIGHT SETTINGS
TIPS FOR ADJUSTING FLIGHT SETTINGS
The LOGO 200 comes set up with 3 preset ight banks/rpms. These ight modes range from “Mild to Wild”. We hope
that you will be able to nd a bank which suits your ying style.
Bank 1— This bank is set up for very smooth ying and beginners. RPM is set to 3,800, with slow and stable ight
settings. This bank is great for right side up, and inverted, hovering and forward ight maneuvers. Also it is great for
indoor and outdoor ying. When ying indoors, mind a sensible safety distance to the model, to others, to obstacles.
Bank 2— This bank is set up for sport ying and light 3D. RPM is set to 4,800, with medium and moderate ight settings.
This bank is great for sport ying, ips, and most smooth 3D maneuvers. We recommend this bank for outdoor ying
only, unless you are an accomplished pilot in which case it can be own indoors as well.
Bank 3— This bank is setup for aggressive 3D ying. RPM is set to 5,800 with fast and aggressive ight settings. This
bank is perfect for all aggressive 3D maneuvers. We recommend this bank for outdoor ying only.
Due to the size of the LOGO 200 and it’s wide RPM range, and the separate tail motor (which makes the tail
authority independent of the main rotor rpm), some ight settings are very specic to the RPM of the main
rotor blades. We have tuned all settings to work optimally in each bank at their respective default RPMs.
The settings will work well around approximately +/– 500 RPM from the default value.
If you wish to adjust drastically the RPMs in each bank to you own style, we DO NOT RECOMMEND
adjusting only the RPM value more then +/– 500 RPM from the default value. This can cause some other “RPM
Specic Settings” to become not tuned properly, and will result in poor performance. If you wish to make such
changes, we highly recommend upgrading your VBar NEO mini to the Pro or Pro+Rescue Version.
RESTRICTED RPM RANGES—The LOGO 200 has a very wide RPM range of around
3,000–6,500 rpm. However, we have found there are certain RPM ranges in which the model
resonates, resulting in wobbles and poor performance. These RPM ranges are around
3950–4250 RPM and 4950–5250 RPM. We DO NOT RECOMMEND setting your RPM in these
specic ranges.
The LOGO 200 comes default with a special version of “Express” VBar NEO 6.4 software. There is limited adjustability in
this mode, as we do not want customers to preoccupy about, or accidentally set wrong values. Here are the adjustable
values.
Cyclic Adjustments
Expo
Center aggresiveness of
cyclic inputs
Agility
Rotation rate of cyclic
Gain
Gyro Gain of cyclic
Style
Adjusts the feel of cyclic
Higher = Robotic
Lower = Vivid
Tail Adjustments
Expo
Center aggresive-
ness of tail inputs
Yaw Rate
Rotation rate of tail
Gain
Gyro Gain of tail
Governor Adjustment
Headspeed
Main Rotor RPM
All other values, even if visible, are
not changable on the LOGO 200
“Express” Software.
Changing them will have no actual
effect.
For unlimited adjustability, please
upgrade to the Pro or
Pro+Rescue Version of
software!
Manual

 Loading...