2.4 LED Patterns
PIR is triggered (network unregistered)
PIR is triggered (network registered)
Send join network requests
Joined the network successfully
Press and hold the reset button for more than 3s
Press and hold the reset button for more than 10s
3. Operation Guide
3.1 NFC Configuration
WS202 can be configured via an NFC-enabled smartphone.
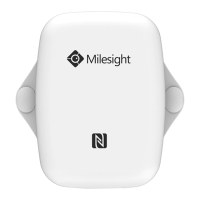
1. Pull out the battery insulating sheet to power on the device. The indicator will light up in green for 3
seconds when the device turns on.
2. Download and install “Milesight ToolBox” App from Google Play or App Store.
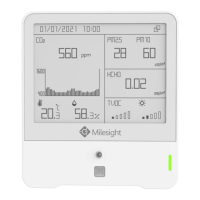
3. Enable NFC on the smartphone and open Milesight ToolBox.
4. Attach the smartphone with NFC area to the device to read device information.
5. Basic information and settings of the device will be shown on ToolBox if it’s recognized
successfully. You can read and configure the device by tapping the Read/Write device on the
App. In order to protect the security of the device, password validation is required when
configuring via a new smartphone. The default password is 123456.
Note: