EasyManua.ls Logo

Miller Bobcat 225 - User Manual

Miller Bobcat 225
78 pages
Print Icon
To Next Page IconTo Next Page
Loading...
Bobcat 225
Processes
Description
Non-Critical TIG (GTAW)
Welding
Stick (SMAW) Welding
MIG (GMAW) Welding
Flux Cored (FCAW) Welding
Engine Driven Welding Generator
OM-4434 218 653P
201004
Visit our website at
www.MillerWelds.com
File: Engine Drive

Table of Contents

Questions and Answers

  • J
    Jessica CarterSep 10, 2025
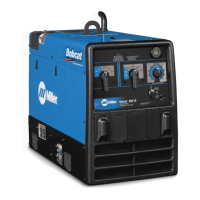
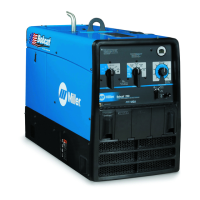
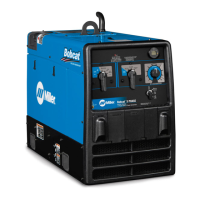
    How to fix low power output at AC receptacles on a Miller Welding System?
    • A
      Anna RoweSep 10, 2025
      If you are experiencing low power output at the AC receptacles on your Miller Welding System, check fuse F2 and replace it if it's open. Increase the Fine control R1 setting to the maximum.
  • J
    John CoxAug 22, 2025
    Why is the weld output too high on my Miller Welding System?
    • T
      Taylor VillarrealAug 22, 2025
      If the weld output on your Miller Welding System is too high, first check the control settings. Also, check the engine speed and adjust it if necessary.
  • J
    Joann SerranoAug 25, 2025
    How to fix low or no weld output on a Miller Bobcat 225 Welding System?
    • J
      James PerryAug 25, 2025
      If your Miller Welding System shows low or no weld output while the generator power output at AC receptacles is okay, begin by checking the control settings and weld connections. If the issue persists, inspect fuse F1 and replace it if it's open. For further troubleshooting, it is recommended to have a Factory Authorized Service Agent check the brushes, slip rings, capacitor C1, and integrated rectifiers SR2 and SR3.
  • U
    ucamposAug 26, 2025
    What to do if Miller Bobcat 225 has erratic weld output?
    • H
      Harry ParkerAug 26, 2025
      If your Miller Welding System shows erratic weld output, there are several things you can check. First, review the control settings. Ensure connections to the electrode and workpiece are tightened and clean. Use dry, properly stored electrodes for Stick and TIG welding. Remove excessive coils from weld cables and clean and tighten connections both inside and outside the welding generator. Also, verify and adjust the engine speed if necessary. If the problem continues, have a Factory Authorized Service Agent check the brushes, slip rings, and integrated rectifiers SR2 and SR3.
  • T
    Tiffany GilbertAug 27, 2025
    What to do if Miller Bobcat 225 has no weld or generator output?
    • V
      vramosAug 27, 2025
      If your Miller Welding System has no weld output or generator power output at AC receptacles, ensure all equipment is disconnected from the receptacles when starting the unit. Check fuses F1 and F2, replacing them if they are open. Also, check the connection of plug PLG6. If these steps do not resolve the issue, have a Factory Authorized Service Agent check the brushes, slip rings, capacitor C1, and integrated rectifiers SR2 and SR3.
  • J
    Julia MccannAug 29, 2025
    How to troubleshoot low weld output on a Miller Welding System?
    • Y
      ythomasAug 29, 2025
      If your Miller Welding System is producing low weld output, start by checking fuse F1 and replace it if it is open. Also, check the control settings and adjust if needed. Verify the engine speed and adjust if necessary. Service the air cleaner according to the engine manual. If the issue persists, have a Factory Authorized Service Agent check the brushes, slip rings, capacitor C1, and integrated rectifiers SR2 and SR3.
  • K
    Karen LopezSep 18, 2025
    Why is the Miller Bobcat 225 weld output erratic?
    • V
      veronicasnyderSep 18, 2025
      Erratic weld output in your Miller Welding System can stem from several factors. Here's what to check: * First, verify your control settings. * Ensure connections to the electrode and workpiece are tightened and clean. * Use dry, properly stored electrodes for Stick and TIG welding. * Remove any excessive coils from the weld cables. * Clean and tighten connections both inside and outside the welding generator. * Check the engine speed and adjust if necessary. If these steps don't resolve the issue, have a Factory Authorized Service Agent check the brushes, slip rings, and integrated rectifiers SR2 and SR3.
  • T
    Tiffany HallSep 12, 2025
    How to reduce high power output at AC receptacles on a Miller Welding System?
    • V
      Vanessa HowardSep 12, 2025
      If your Miller Welding System has high power output at the AC receptacles, check the engine speed, and adjust it if necessary.
  • T
    timothyburkeSep 8, 2025
    What to do if Miller Bobcat 225 Welding System engine stopped during normal operation?
    • T
      Tracy EscobarSep 8, 2025
      If your Miller Welding System's engine stopped during normal operation, check the fuel level and oil level. Also, check the low oil pressure shutdown switch.
  • W
    William DouglasSep 5, 2025
    Why does my Miller Bobcat 225 Welding System engine start then stop?
    • R
      robinsmithSep 5, 2025
      If your Miller Welding System's engine starts but stops when the Engine Control switch returns to the Run position, check the oil level and refill the crankcase with the proper viscosity oil for the operating temperature, if necessary. Also, check the low oil pressure shutdown switch.

Summary

SECTION 1 - SAFETY PRECAUTIONS - READ BEFORE USING

1-1. Symbol Usage

Explanation of safety symbols and their meanings.

1-2. Arc Welding Hazards

Dangers related to arc welding processes and electrical shock.

1-3. Engine Hazards

Hazards associated with the engine, including fuel and battery.

1-4. Hydraulic Hazards

Risks associated with hydraulic systems and fluids.

1-5. Compressed Air Hazards

Dangers related to compressed air equipment and usage.

1-6. Additional Symbols For Installation, Operation, And Maintenance

Symbols covering fire, falling equipment, and overheating hazards.

1-7. California Proposition 65 Warnings

Warnings regarding chemicals known to cause cancer or birth defects.

1-8. Principal Safety Standards

References to key safety standards and organizations.

1-9. EMF Information

Information on electromagnetic fields and medical implants.

SECTION 4 - SPECIFICATIONS

4-1. Weld, Power, and Engine Specifications

Technical details on welding output, power ratings, and engine models.

4-2. Dimensions, Weights, And Operating Angles

Physical measurements, weight, and tilt limits of the unit.

4-4. Duty Cycle

Percentage of time the unit can operate at rated load without overheating.

4-7. Volt-Ampere Curves

Graphs showing voltage and amperage output capabilities for different modes.

SECTION 5 - INSTALLATION

5-2. Installing Welding Generator

Guidelines for properly mounting and securing the welding generator.

5-3. Grounding Generator To Truck Or Trailer Frame

Procedures for grounding the generator for electrical safety.

5-4. Engine Prestart Checks (Subaru-Powered Units)

Steps to check engine fluids and condition before starting a Subaru engine.

5-5. Engine Prestart Checks (Kohler-Powered Units)

Steps to check engine fluids and condition before starting a Kohler engine.

5-10. Selecting Weld Cable Sizes*

Guide for choosing appropriate weld cable sizes based on current and length.

SECTION 6 - OPERATING THE WELDING GENERATOR

6-1. Front Panel Controls

Overview and function of the generator's front panel controls.

6-3. Typical Stick Welding Connections And Control Settings

Recommended settings and connections for stick welding.

6-4. Typical MIG Welding Connections And Settings

Recommended settings and connections for MIG welding.

SECTION 7 - OPERATING AUXILIARY EQUIPMENT

7-1. Standard Receptacles

Description and function of the unit's standard AC receptacles.

7-2. Optional Generator Power Receptacles

Information on optional GFCI and CSA receptacles.

SECTION 8 - MAINTENANCE

8-2. Routine Maintenance

Schedule for regular maintenance tasks and checks.

8-6. Changing Engine Oil, Oil Filter, and Fuel Filter (Subaru-Powered Units)

Steps for changing oil and filters on Subaru engines.

8-7. Changing Engine Oil, Oil Filter, and Fuel Filter (Kohler-Powered Units)

Steps for changing oil and filters on Kohler engines.

8-8. Adjusting Engine Speed (Subaru-Powered Units)

Procedures for adjusting engine idle and weld/power speeds for Subaru engines.

SECTION 9 - TROUBLESHOOTING

9-1. Welding Troubleshooting

Common welding problems and their solutions.

9-2. Generator Power Troubleshooting

Common generator power issues and their resolutions.

9-3. Engine Troubleshooting

Common engine problems and troubleshooting steps.

SECTION 12 - GENERATOR POWER GUIDELINES

12-1. Selecting Equipment

Guidance on selecting appropriate electrical equipment for use.

12-2. Grounding Generator To Truck Or Trailer Frame

Instructions for grounding the generator when mounted on vehicles.

12-4. How Much Power Does Equipment Require?

Calculating power requirements for various types of equipment.

12-11. Selecting Extension Cord (Use Shortest Cord Possible)

Guide for selecting extension cords based on load and length.

SECTION 13 - STICK WELDING (SMAW) GUIDELINES

13-1. Stick Welding Procedure

Step-by-step guide for performing stick welding.

13-2. Electrode and Amperage Selection Chart

Chart for selecting electrodes and amperage based on material.

13-3. Striking an Arc

Techniques for initiating and maintaining a stable welding arc.

13-13. Troubleshooting

Solutions for common stick welding problems like porosity and spatter.

SECTION 14 - MIG WELDING (GMAW) GUIDELINES

14-1. Typical MIG Process Connections Using A Voltage-Sensing Wire Feeder

Setup for MIG welding with a voltage-sensing wire feeder.

14-7. Troubleshooting - Excessive Spatter

Solutions for excessive spatter during MIG welding.

14-8. Troubleshooting - Porosity

Solutions for porosity defects in MIG welds.

14-12. Troubleshooting - Burn-Through

Solutions for burn-through defects in MIG welds.

WARRANTY

Owners Record

For Service

Miller Bobcat 225 Specifications

General IconGeneral
Duty Cycle100%
EngineKohler CH730
Fuel TypeGasoline
Fuel Tank Capacity12 gallons
TypeEngine Driven Welder
Rated Output225 A at 25 V
Generator Power8000 Watts Peak, 7000 Watts Continuous
Welding Amperage Range40 - 225 A
Power SourceEngine Driven
Welding ProcessesStick (SMAW), Flux Cored (FCAW)
Auxiliary Power120/240V
Dimensions20 in
Engine Horsepower23 HP

Related product manuals