OM-256 016 Page 10
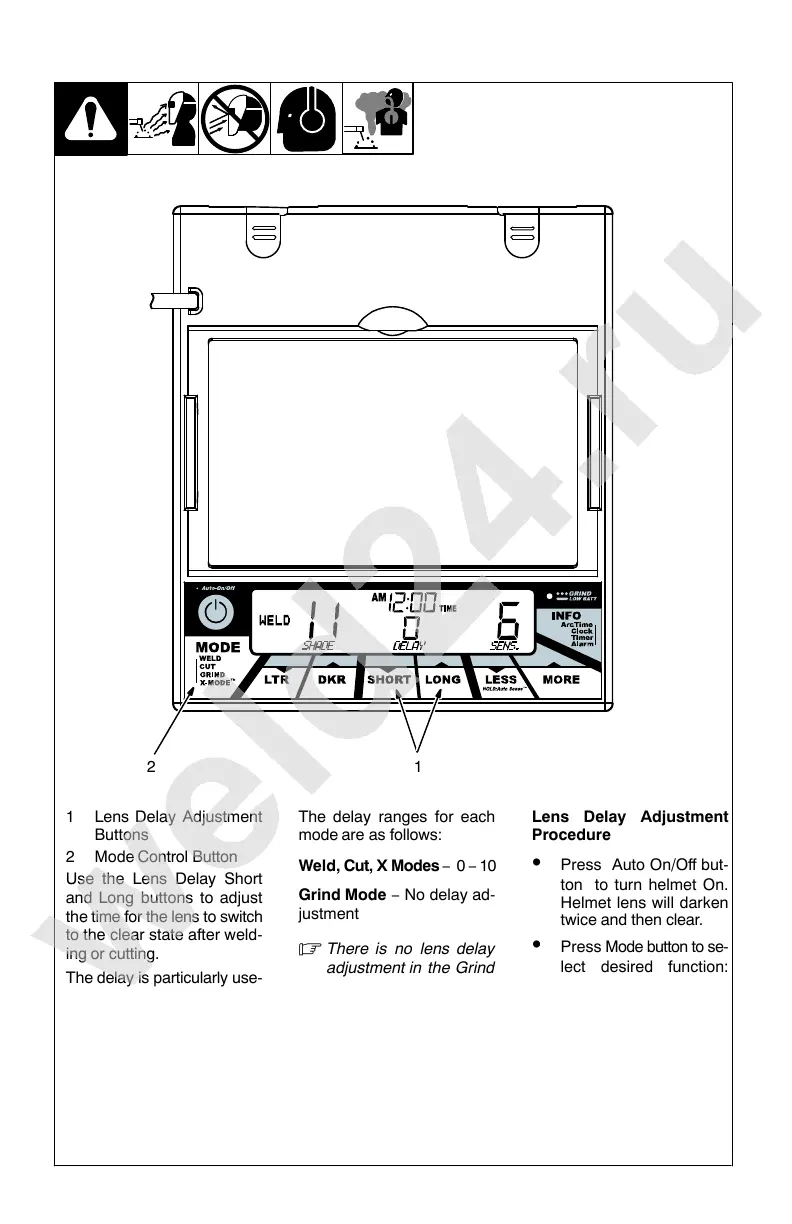
3-6. Lens Delay Control (Titanium 7300 And 9400 Series Helmets)
1
1 Lens Delay Adjustment
Buttons
2 Mode Control Button
Use the Lens Delay Short
and Long buttons to adjust
the time for the lens to switch
to the clear state after weld-
ing or cutting.
The delay is particularly use-
ful in eliminating bright af-
ter-rays present in higher
amperage applications
where the molten puddle re-
mains bright momentarily af-
ter welding. Use the Lens
Delay Control buttons to ad-
just delay from 0 to 10 (0.1 to
1.0 second).
The delay ranges for each
mode are as follows:
Weld, Cut, X Modes − 0 − 10
Grind Mode − No delay ad-
justment
There is no lens delay
adjustment in the Grind
mode.
Lens Delay Adjustment
Procedure
Press Auto On/Off but-
ton to turn helmet On.
Helmet lens will darken
twice and then clear.
Press Mode button to se-
lect desired function:
Weld, Cut, or X-Mode.
Use Short and Long ad-
justment buttons to se-
lect desired delay.
Begin welding or contin-
ue with other lens adjust-
ments.
2