Chapter 2 Printing
50
2.1 Print Process
1.
Turn on the power.
"Turning On the Power"(P. 33)
2.
Connect a RIP PC to the product.
"Using a USB 2.0 Interface Cable"(P. 36)
"Using a LAN Cable"(P. 36)
3.
Set up the RIP software.
"Installing RIP Software"(P. 39) (required first time only)
"Obtaining Color Profiles"(P. 39)
"Setting Up RIP Software"(P. 41) (required first time only)
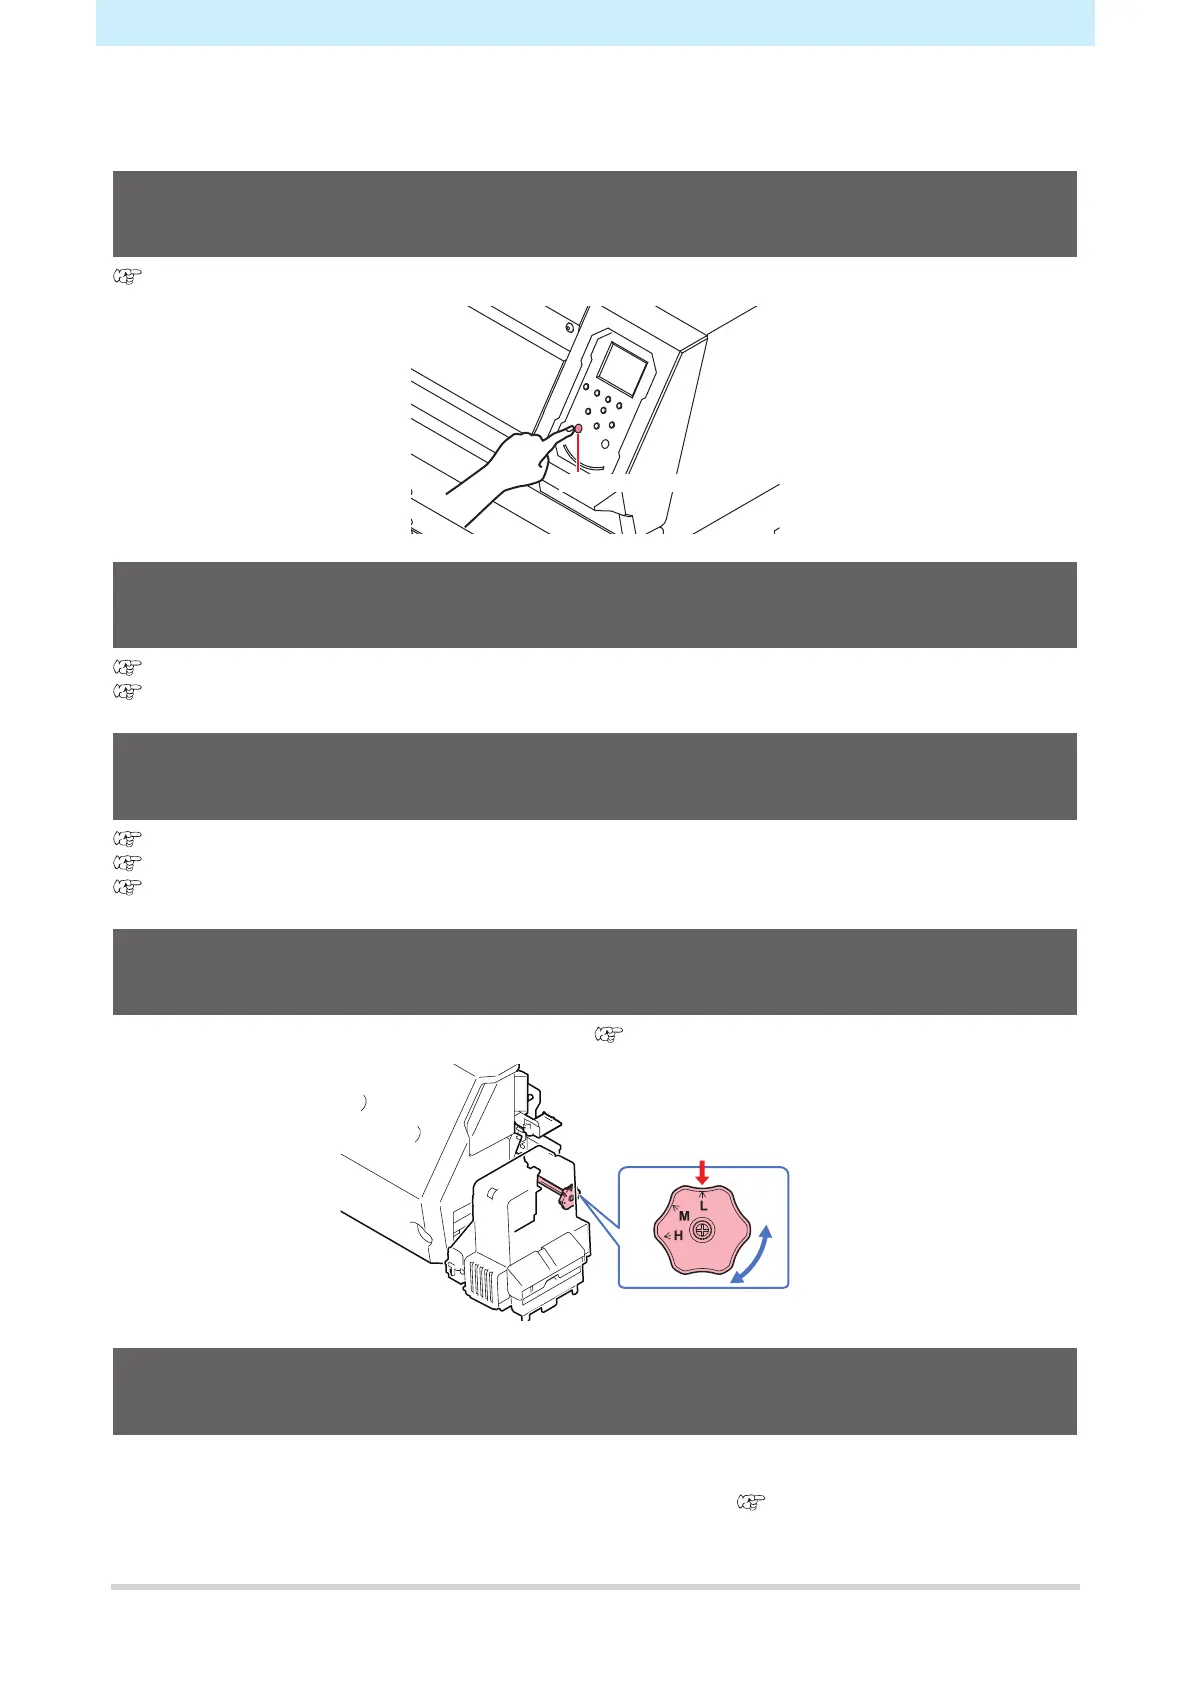
4.
Adjust print head height.
Adjust the height adjustment lever to suit the medium. "Adjusting Print Head Height"(P. 53)
Adjust the head height to this
position.
5.
Adjust the pinch roller positions.
Adjust the pinch roller positions to suit the width of the set media. Adjust the pinch roller positions so that the
pinch rollers are positioned above the grit rollers. The pinch rollers at both ends should be aligned to within
10 cm from the left edges and 2 cm from the right edges of the media. "Adjusting the Pinch Roller
Positions"(P. 54)
 Loading...