Function Checking and Testing 5-3
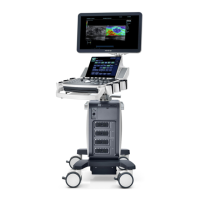
5.3.2.2 Check the LCD
Adjust LCD contrast
Press<Setup> to enter
[System Preset]→[ General],
In “Display” column:
Click color temperature
[Cold/Warm].
Click
[Brightness/Contrast
Load factory].
Display maintenance
Log in as “Service”, click
[Maintenance] in the Preset
menu, then click [Main
Monitor] in [Other] tab to go
for the monitor test.
Press “+”, the brightness increases; and press “-”,
the brightness decreases.
Press “+”, the contrast increases; and press “-”, the
contrast decreases.
The LCD color temperature changes
correspondingly.
Brightness/contrast return to the default setting.
Click each functional button, the LCD responds
correctly, the standard is as follows
1. Light-spot: 0; flash point: 0.
2. The adjoining dark dots are no more than 3 pairs,
and there is no adjoining dark dot in image area.
3. There is no adjoining dark dot of 3 or more than 3.
4. The dark dots are no more than 7 and those in the
image area are no more than 2
5. The distance between bad dots is no less than
5mm.
Note: image area refers to the red rectangle when the
background is black/right.
5.3.2.3 Peripheral Device Checking
Confirm the connection between the
footswitch and ultrasound normal;
check the functions of footswitch
according to the functions listed in Key
Config.
Press the freeze key (the right key), image
is frozen, the freeze menu is displayed;
press the key again, image is unfrozen.
Press the key (middle key), color printing
starts
Press the print key (left key),B/W printing
starts
Video Printer
Check if the video printer and
ultrasound system are correctly
connected. Then check the function of
each key.
Press <Print> key, the printer begins to
work, no image print deficiency or
degradation.
Switch video output port
Press <Print> key, the printer begins to
work, no image print deficiency or
degradation.
Check if the graph/text printer and
ultrasound system are correctly
connected. Then check the function of
each key.
Press <Print> key, the printer begins to print,
no print deficiency or degradation.