9-10 Structure and Assembly/Disassembly
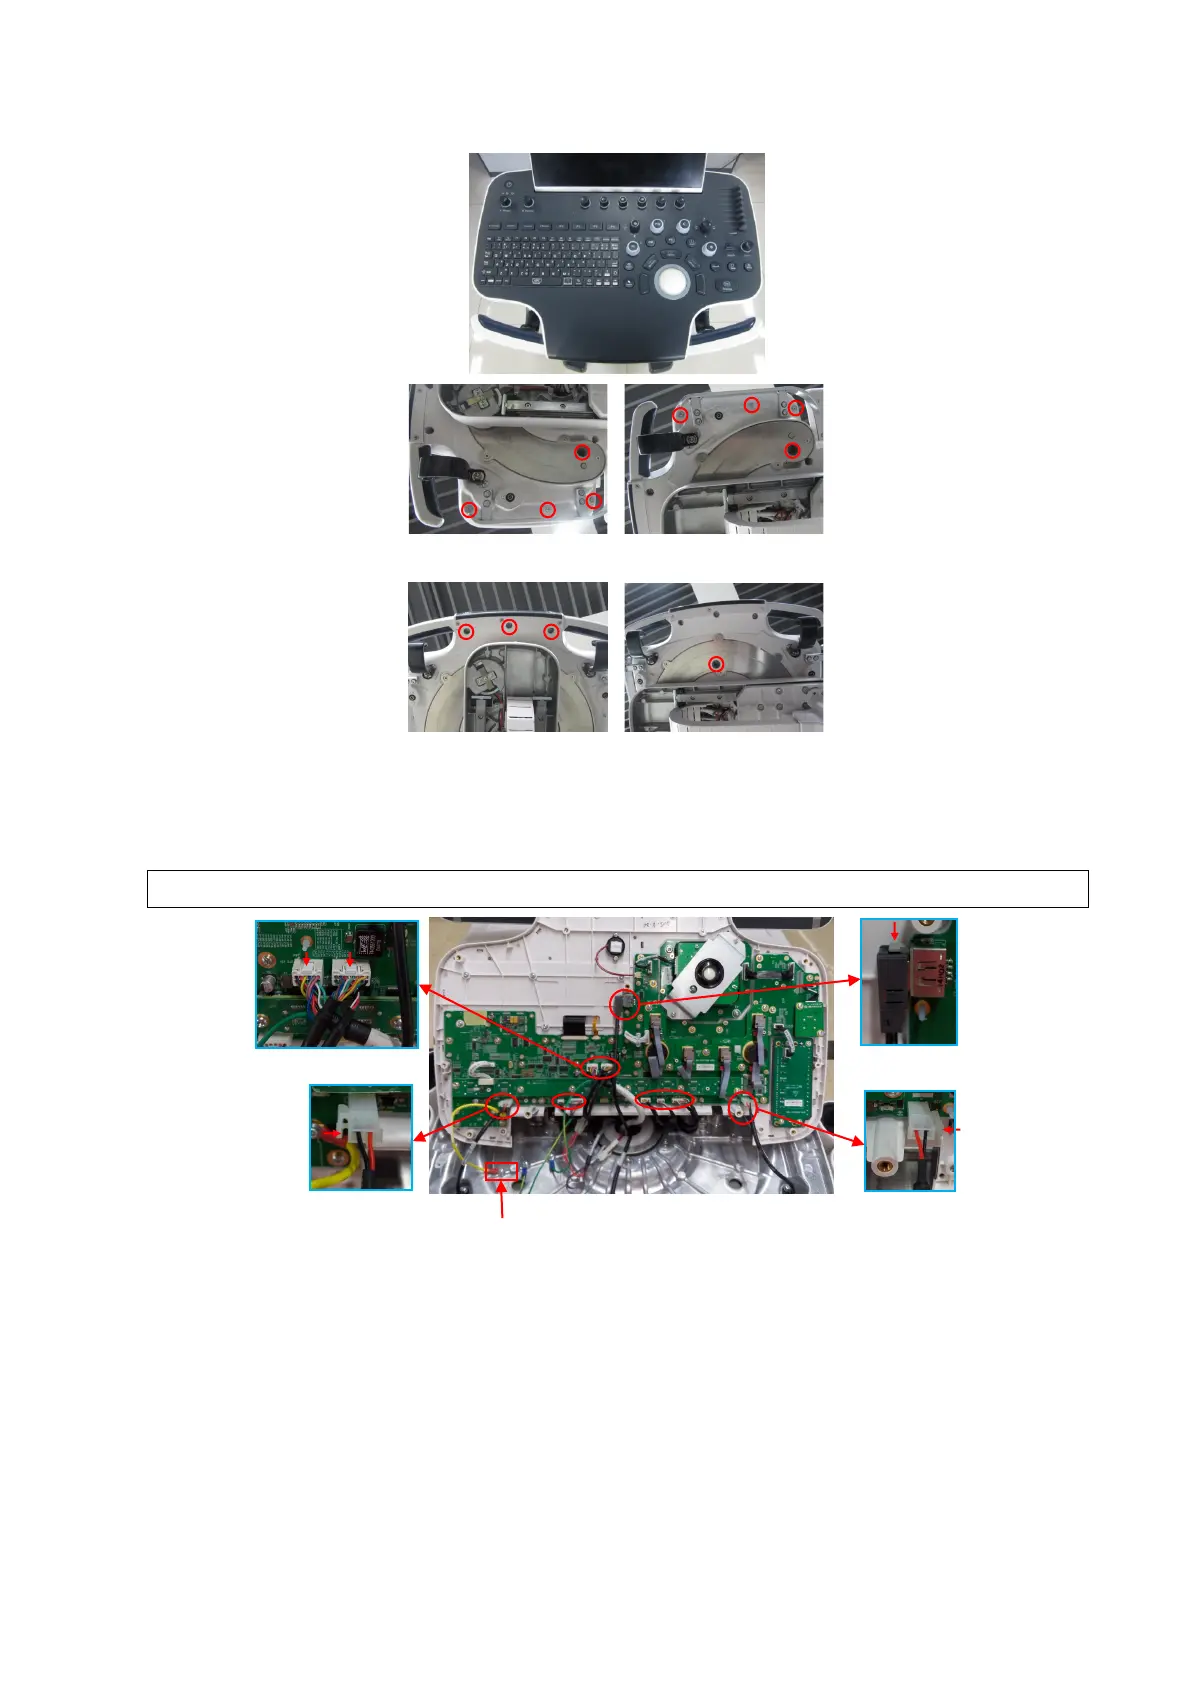
2. Remove the cover of the control panel. Pull 10 plugs out from the PCBA board. Unscrew 1 M3
X 8 cross panhead screw from the grounding wire of the control panel to remove the control
panel assembly.
Press the clip to remove the cables shown in 4 small pictures.
9.3.6.1 Rectangle Caps
Note: it is unnecessary to disassemble the control panel to remove the rectangle caps.
The ultrasound system is equipped with five rectangle caps (iScape, RIMT, TDI, V Flow, S-Planes)
by factory default. It is designed for replacing the rectangle caps by the user.
Insert the paper clip or pen into the slot around the rectangle buttons (P1, P2, P3, iWorks, Fusion,
Elasto, Contrast, Body Mark) to remove them.
M3X8 cross panhead screw
Bottom-left
Bottom
ottom (with the base rotating 90
o
)
 Loading...


