Probes and Biopsy 13-29
If you switched the probe or needle-guided bracket during the biopsy, please verify the guide
line again.
When exiting the Verify menu without saving the setting, system will confirm with you “Data
have changes. Do you want to save the changes?”. Click [Yes] to save the setting and return to
Biopsy menu.
6. Scan to locate the target. Center the target in the electronic guidezone path.
7. Direct the needle into the area of interest for specimen.
8. After extraction of the biopsy sample is completed, gently remove the probe from the body.
NOTE: press <F11 Biopsy> in non-frozen state to exit; press <F11 Biopsy> in frozen state to
hide/show the biopsy.
9. Disassemble the items and properly dispose of these items as required.
Caution
Ensure that all guide parts are seated properly prior to performing a biopsy.
13.2.3 Needle-guided Bracket Inspection and Installation
13.2.3.1 Inspection of the Needle-guided Bracket
Be sure to perform inspections before and after use of the needle-guided bracket. If an abnormality is
found on the needle-guided bracket, immediately stop using it and contact MINDRAY Customer Service
Department or sales representative.
1. Sterilize the needle-guided bracket before and after use.
2. Confirm that the needle-guided bracket is free of damage, deformation, stripping, malfunction,
loose, or missing parts.
3. Confirm that the needle-guided bracket is securely mounted in the correct position.
13.2.3.2 Installing the Needle-guided Bracket
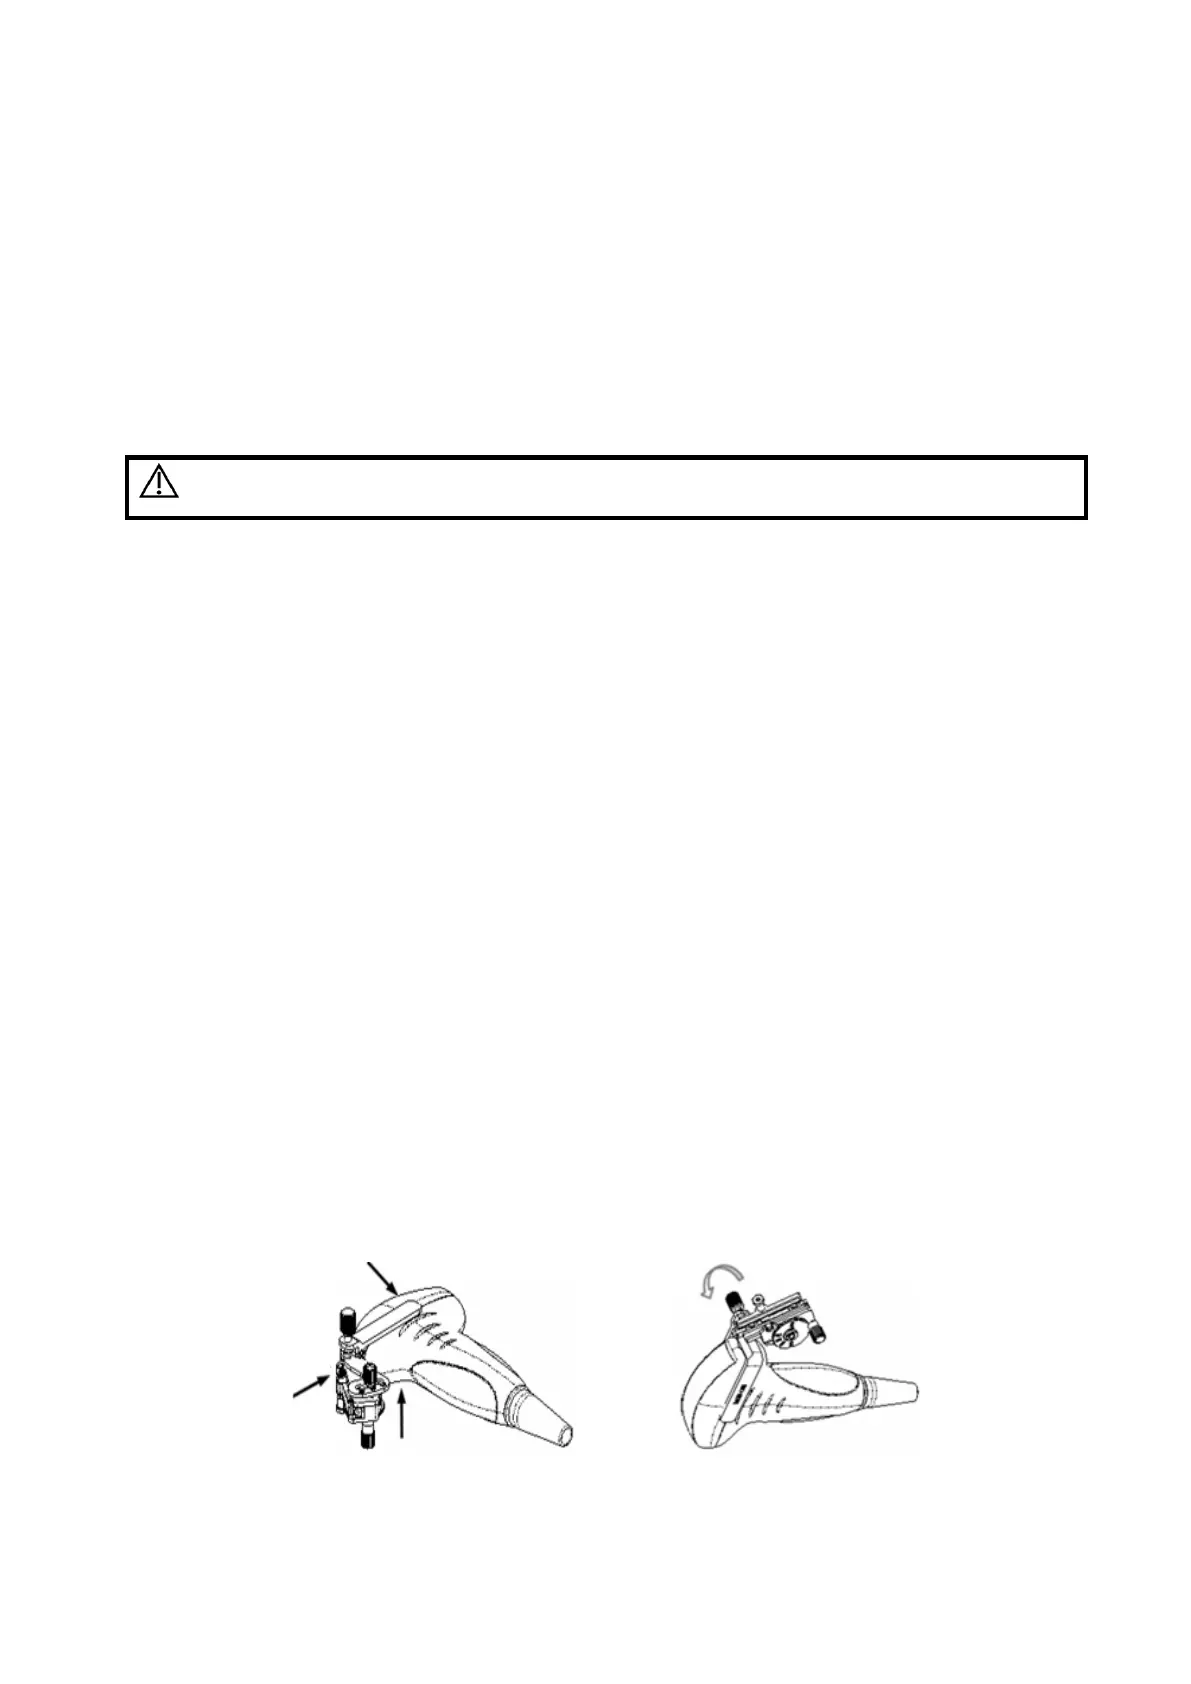
NGB-011
(1) Inosculate the locating groove on the clamp with the two raised edges on the probe head and
align the locating pit of the clamp to the convex point on the probe head.
(2) Tighten the grip knob of the biopsy.
(3) Pull the biopsy guide through the hole and tighten the knob..
NGB-022
(1) Put on the probe sheath.
(2) Hold the transducer by one hand, select the proper needle-guided bracket, and hold it with the
other hand. Match the groove of the bracket with the tab of the transducer. Amount the bracket
onto the transducer.
(3) Screw the pinch nut of the needle-guided bracket to confirm that the needle-guided bracket is
properly installed on the transducer.