Do you have a question about the Mindray Consona N6 and is the answer not in the manual?
Explains the meaning of various safety symbols used in the manual.
Lists essential precautions to ensure patient and operator safety during system use.
Provides information regarding latex content and potential allergic reactions.
Details the intended applications and patient populations for the diagnostic ultrasound system.
Specifies contraindications for the diagnostic ultrasound system's use.
Outlines the system's safety classifications regarding electric shock and water ingress.
Provides technical specifications including power supply, environmental conditions, and dimensions.
Compares different models of the Consona N6 series based on feature availability.
Describes the standard configuration and available options for the ultrasound system.
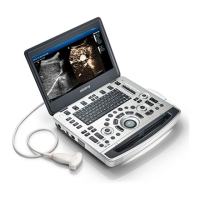
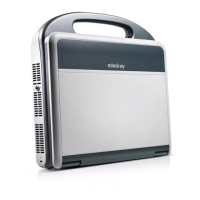
Identifies and illustrates the main physical components of the ultrasound system.
Details the power input and output connections on the system's power supply panel.
Describes the front and back input/output ports for connecting peripherals and data.
Explains the function and layout of the system's control panel keys and knobs.
Details the keyboard layout and the functions of common and special keys.
Provides an overview of the monitor display layout and basic screen operations.
Explains the meaning and placement of warning labels attached to the system.
Lists and defines the various symbols used on the system's interface and labels.
Provides instructions on safely moving and positioning the ultrasound system.
Details the procedures for connecting the system to power and battery operations.
Explains the correct procedures for powering the system on and off, including standby mode.
Describes how to adjust the monitor's position for optimal viewing.
Guides on adjusting monitor brightness and contrast for image quality.
Explains how to adjust the position of the control panel.
Provides safety precautions and procedures for connecting and disconnecting probes.
Details how to connect various peripheral devices like USB devices and printers.
Outlines how to configure system-wide presets for hospital name, language, and date/time.
Covers settings related to hospital name, language, time zone, and system date/time.
Details settings for patient information, exam setup, screen saver, and display options.
Explains how to set default parameters for imaging modes like B, Color, and Doppler.
Guides on setting measurement rulers, follicle methods, and comment configurations.
Details settings for fetal gestational age, growth formulas, and fetal weight display.
Explains how to assign functions to keyboard keys and footswitch.
Covers setting functions for the F keys on the keyboard.
Describes how to configure touch screen gestures for system operations.
Details settings for image output format, range, and resolution.
Explains user account management, privileges, and password policies for system security.
Covers configuration of parameters for barcode readers (1D and 2D).
Details how to set up quick keys for sending images or cine to a workstation.
Guides on assigning available exam modes for different probes.
Explains how to preset general and application-specific measurement packages.
Covers setting up custom comment libraries and groups for exam modes.
Details how to customize protocols and views for automated workflow.
Explains how to create, edit, and manage Stress Echo protocols.
Covers configuration of DICOM and HL7 settings for data transfer and connectivity.
Details network configuration for iStorage, MedSight, Q-Path, and router settings.
Guides on setting up printer and image printing configurations.
Covers system maintenance functions like data export, factory reset, and self-tests.
Explains drive encryption, secure data wipe, and anti-virus software configuration.
Displays system software version and other device information.
Details procedures for entering new patient information and managing existing records.
Guides on inputting new patient details to create a unique information database.
Explains how to access patient data from iStation or external memory devices.
Covers selecting appropriate probes and exam modes for scanning procedures.
Details how to activate or continue a previously performed or paused exam.
Provides procedures for pausing and ending ongoing patient exams.
Introduces the various imaging modes available on the ultrasound system.
Guides on adjusting image parameters via the touch screen interface.
Explains how to save and restore current image settings for quick access.
Describes the basic imaging mode for displaying real-time views of anatomical structures.
Details the procedure for performing B-mode scans and optimizing image quality.
Explains key parameters for B-mode imaging like Gain, Depth, and TGC.
Describes how to use Color Doppler to detect blood flow direction and speed.
Details the procedure for performing Color Doppler scans and optimizing images.
Explains parameters specific to Color Doppler imaging, such as Gain and PRF.
Describes Power Doppler for displaying blood flow intensity.
Details the procedure for performing Power Doppler scans.
Explains parameters specific to Power Doppler imaging.
Describes M Mode for observing tissue motion and cardiac cycles.
Details the procedure for performing M Mode scans.
Explains parameters specific to M Mode imaging.
Describes Color M Mode for observing cardiac motion with flow information.
Introduces Anatomical M Mode for flexible M-line placement.
Explains Pulsed Wave (PW) and Continuous Wave (CW) Doppler modes for velocity measurement.
Describes Tissue Doppler Imaging (TDI) for assessing tissue motion.
Provides an overview of 3D imaging and its advantages over 2D imaging.
Defines key terms used in 3D/4D imaging, such as Volume Data and MPR.
Explains the use of Region of Interest (ROI) and Volume of Interest (VOI) in 3D imaging.
Discusses probe requirements for different 3D imaging modes.
Describes MultiPlanar Rendering (MPR) for viewing 3D image slices.
Explains the Free View function for controlling scanning direction and orientation.
Describes the wire cage feature for visualizing orientation in 3D images.
Provides important notes and precautions before using 3D/4D imaging.
Covers static 3D imaging for single frame acquisition.
Details the steps for performing static 3D imaging.
Explains how to prepare for static 3D image acquisition.
Guides on entering and exiting static 3D image viewing.
Describes Color 3D imaging for visualizing flow information.
Introduces 4D imaging for continuous acquisition of 3D images.
Details the steps for performing 4D imaging.
Explains Smart 3D imaging for automatic reconstruction and display of 3D images.
Introduces iLive for enhanced imaging with light rendering effects.
Details the steps for performing contrast imaging with agents.
Explains the procedure for Left Ventricular Opacification imaging.
Lists and explains parameters relevant to contrast imaging.
Covers quality assurance procedures for contrast imaging using time-intensity analysis.
Details the connection and operation of the ECG module for physiological signal acquisition.
Explains ECG triggering for synchronizing image acquisition with ECG signals.
Guides on reviewing frozen ECG waveforms and linked images.
Describes how to connect and display respiratory waveforms.
Explains Phonocardiography (PCG) sensor connection and operation.
Lists and defines various physio parameters for ECG and PCG.
Details the steps for acquiring Stress Echo loops, including ECG setup.
Explains how to select the best loops for analysis in review and wall motion scoring.
Describes the Review/WMS mode for evaluating cardiac wall motion abnormalities.
Guides on entering the review mode and selecting phases or views for comparison.
Explains how to assign wall motion scores to segments for semi-quantitative evaluation.
Covers saving Stress Echo loops, scores, and related information.
Provides instructions on how to exit the Stress Echo feature.
Details how to perform measurements and generate reports within the Stress Echo function.
Explains how to use dual-split and quad-split display formats for image comparison.
Details various zooming functions like Res Zoom, Pan Zoom, Spot Zoom, and iZoom.
Guides on using the Res Zoom function to magnify scanning images.
Explains how to use the Pan Zoom feature for adjusting magnification and position.
Details the Spot Zoom function for magnifying specific areas of an image.
Describes how to use the iZoom function for full-screen image magnification.
Explains how to freeze and unfreeze scanning images.
Guides on reviewing and editing cine clips of captured images.
Describes how to compare multiple images in review mode.
Details methods for saving live and frozen images or cine files.
Explains how to set the duration for live and retrospective cine capture.
Covers general and application-specific measurements on images.
Explains how to add text, arrow markers, and traces as comments on images.
Details how to set comment cursor, navigate libraries, and adjust comment properties.
Provides procedures for adding text and arrows as comments.
Guides on repositioning existing comments on the image.
Explains how to modify character text and arrow properties of comments.
Details methods for deleting comments, characters, texts, or arrows.
Covers adding and reviewing voice comments for frozen images.
Explains how to add, move, and delete body marks for indicating exam position.
Details sending images and structured reports to DICOM storage servers.
Explains how to send images from various screens to DICOM storage.
Describes using shortcut keys to send images to DICOM storage.
Guides on automatically sending images to storage after an exam concludes.
Covers sending structured reports for various exam types.
Explains how to encapsulate PDF files within DICOM IOD for transmission.
Details how to unload images to DCM format for storage.
Describes sending images to a DICOM print server for printing.
Covers configuring and using the Worklist server for patient data management.
Explains sending exam state information to the configured server.
Details confirming successful image storage on DICOM servers.
Guides on querying and retrieving patient exam records from DICOM servers.
Covers saving and reviewing patient data on external media using DICOMDIR.
Explains how to store and manage image files on the system or external devices.
Lists supported memory media for storing images and data.
Describes system-relevant and PC-compatible image file formats.
Covers settings for user-defined keys, auxiliary output, image size, and cine length.
Details methods for saving single-frame and cineloop images to the system.
Guides on saving images to USB flash drives.
Explains how to export cine files to a USB flash drive.
Describes auxiliary output functions for saving and sending images.
Explains how stored images and cineloops are displayed as thumbnails.
Covers reviewing and analyzing saved patient images.
Details viewing, zooming, and performing post-processing on stored images.
Explains how to send image files to external devices or servers.
Covers importing, exporting, and sending exam reports.
Describes managing patient data including searching, viewing, and exporting.
Explains how to recover deleted patient data, exams, and images from the recycle bin.
Lists available probes and provides general information about them.
Explains the function of each part of a typical ultrasound probe.
Describes how to match probe orientation with the ultrasound image display.
Provides general procedures for operating probes, including disinfection.
Details the procedure and precautions for wearing a probe sheath.
Explains cleaning, disinfection, and sterilization procedures for ultrasound probes.
Provides instructions for cleaning the probe cable and connector.
Lists environmental conditions for probe operation, storage, and transportation.
Provides guidelines for storing and transporting probes to prevent damage.
Covers safety precautions and procedures for biopsy using needle-guided brackets.
Lists available needle-guided brackets and their compatibility with probes.
Details the procedures for installing and removing needle-guided brackets.
Explains how to verify the biopsy guide line for accurate needle placement.
Provides critical safety warnings and steps for starting a biopsy procedure.
Details cleaning and sterilization procedures for needle-guided brackets.
Provides guidelines for storing and transporting needle-guided brackets.
Instructs on the proper disposal of needle-guided brackets.
Explains the Middle Line function for locating lithotripsy focus points.
Guides on starting and saving video recordings using the DVR function.
Describes exporting recorded images from local disk to other locations.
Explains how to replay recorded video and audio.
Details daily maintenance tasks for system upkeep.
Provides instructions for cleaning various parts of the ultrasound system.
Outlines periodic inspections for probes, power cables, and system appearance.
Guides on performing safety checks for peripherals and optional functions.
Emphasizes the importance of regularly backing up the system hard drive.
Describes system function inspections to ensure product quality.
Provides solutions for common system malfunctions and error messages.
Covers operation modes and setup for 1-D barcode readers.
Details the physical setup and connection of the barcode reader.
Explains reader settings, including volume and symbology configurations.
Guides on performing barcode scanning in hand-held mode.
Details the assembly and operation of the Intellistand for hands-free scanning.
Covers setup and overview of 2D barcode readers.
Details installing the interface cable for digital imager readers.
Explains reader settings, including volume and symbology configurations.
Guides on performing barcode scanning with the digital imager reader.
Covers maintenance procedures for the barcode reader, specifically cleaning the exit window.
Lists default parameter settings for LS2208 and DS4608 barcode readers.
Guides on connecting to and using the wireless network manager.
Details how to configure IP settings for network connectivity.
Provides information on setting up EAP network configurations.
Explains how to use iScanHelper for referencing scanning information.
Guides on using iScanHelper for learning and practicing scanning techniques.
Describes the basic screen layout and operations of the iScanHelper software.
Explains how to add and manage demonstration items for playback.
Covers managing demo and custom catalogs for iVision demonstrations.
Details procedures for transferring files between mobile hard disks and the ultrasound system.
Explains how the system plays image files in demonstration mode.
Covers options for repeating demonstrations or exiting the demo mode.
Discusses potential bioeffects associated with diagnostic ultrasound.
Provides a statement on the prudent use of ultrasound instruments.
Explains the ALARA principle for controlling ultrasound energy exposure.
Explains Mechanical Index (MI) and Thermal Index (TI) and their significance.
Guides on adjusting acoustic power and understanding default settings.
Details system controls for managing ultrasound output power.
Provides information on derated ultrasonic output parameters and limits.
Details inspection criteria for the power cord plug and its components.
Covers visual and contextual inspections of the device enclosure and accessories.
Guides on checking the presence and legibility of device labels.
Explains how to test protective earth resistance and its acceptable limits.
Details the procedure for performing an earth leakage test on the device.
Outlines the procedure for testing enclosure leakage current under various conditions.
Explains how to measure patient leakage currents and their limits.
Details the test for mains voltage applied to terminals and current measurements.
Explains how patient auxiliary currents are measured and their limits.
Provides declarations and guidance on electromagnetic emissions compliance.
Details guidance on electromagnetic immunity requirements and compliance levels.
Recommends minimum separation distances for RF equipment to prevent interference.
Details guidance on electromagnetic immunity and compliance levels.
Outlines radio regulatory compliance information, including frequency ranges and power.
Lists vocal commands recognized by the system and their corresponding operations.
Illustrates the physical structure of the ultrasound gel heater.
Provides technical specifications for the ultrasound gel heater, including power.
Details the functions and operational requirements of the ultrasound gel heater.
Guides on the proper installation procedure for the ultrasound gel heater.
Specifies the hardware and software requirements for the ultrasound system.
Lists the off-the-shelf software components used in the ultrasound system.
Details the technical specifications of the system's electronic interfaces.
Outlines the quality of service parameters for data rate and security.
Provides measures and tips for protecting the system and patient data.
Lists indications for use and additional comments for various clinical applications.
| Connectivity | USB, Ethernet, HDMI, VGA |
|---|---|
| Power Supply | 100-240V AC, 50/60 Hz |
| Applications | General Imaging, Cardiology, Vascular |
| Operating Modes | B-Mode, M-Mode, Color Doppler, Power Doppler |
| Operating System | Windows |
| Battery Backup | Yes |


