EasyManuals Logo

Minelab F3Ci Service Manual

Minelab F3Ci
62 pages
To Next Page IconTo Next Page
To Previous Page IconTo Previous Page
Page #20 background imageLoading...
Page #20 background image
F3Ci Service Manual
_______________________________________________________________________________________________________________________
20
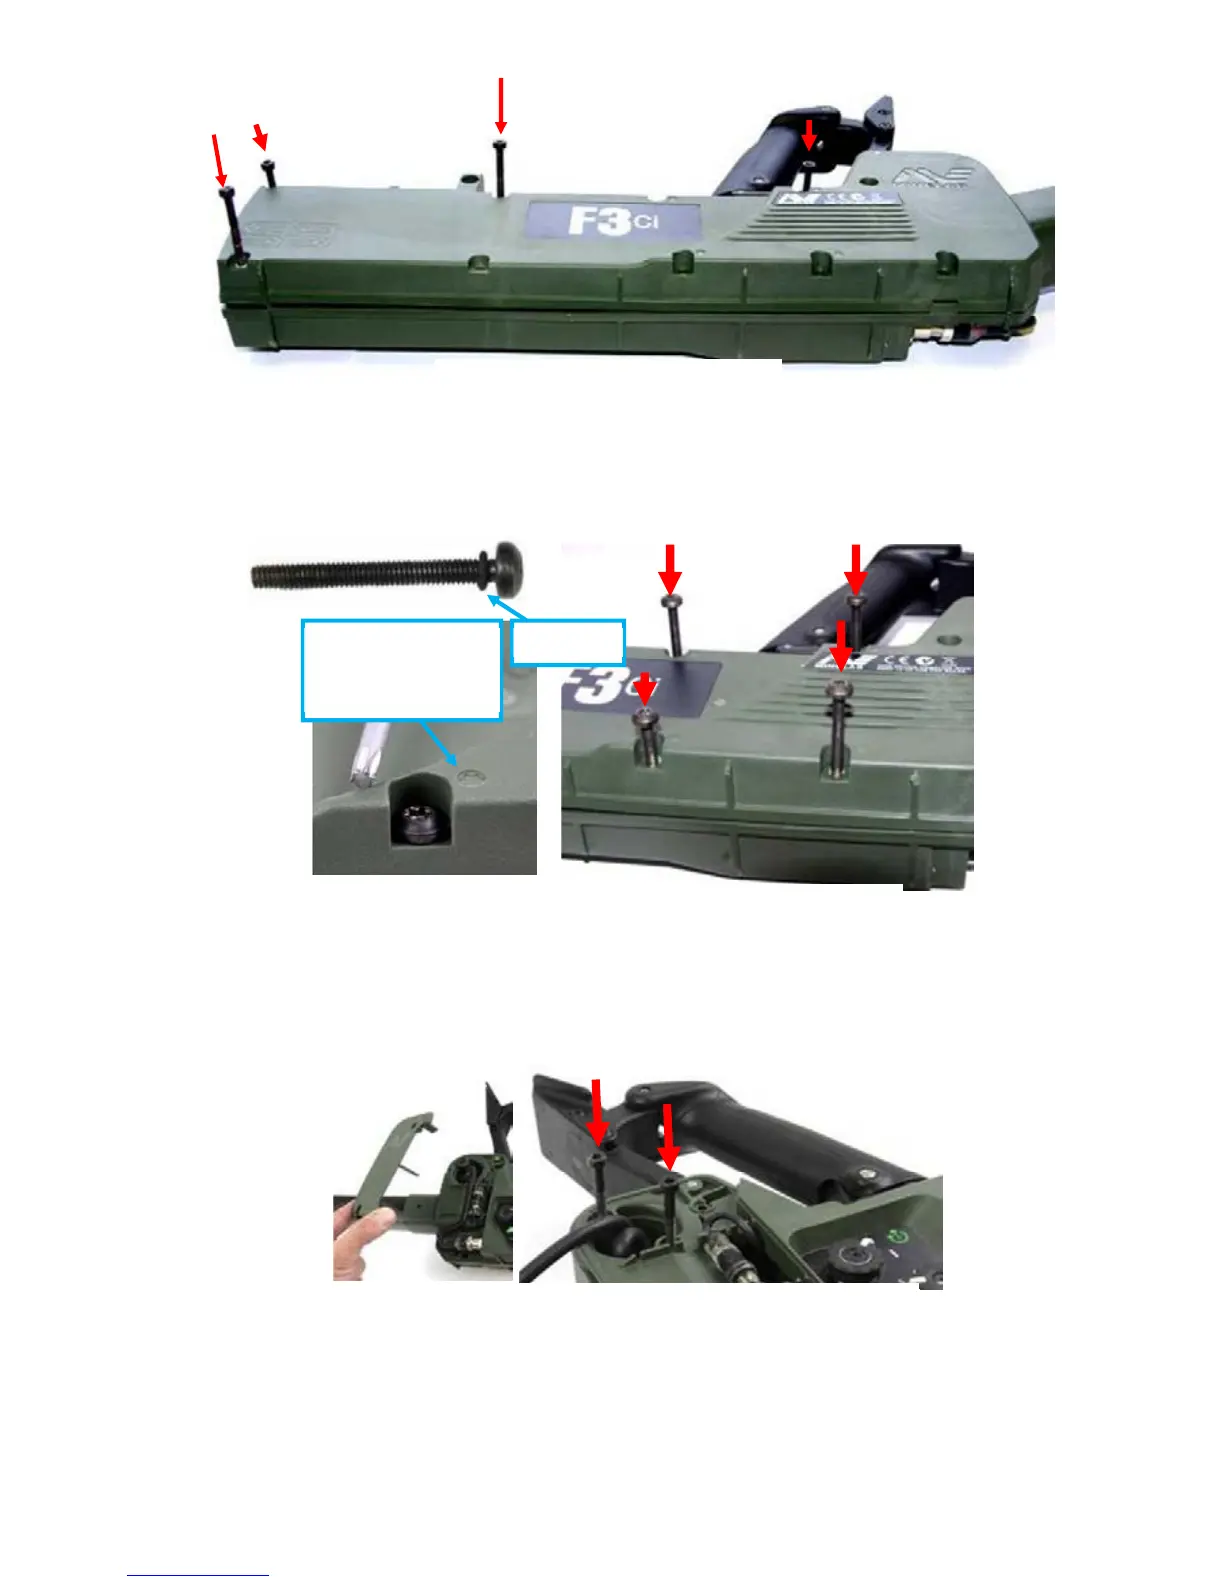
Identify the four Torx screws (star) and check they all have O-rings fitted. Insert the
four Torx screws into the right side of the detector. The Torx screw positions have a
Torx symbol next to their screw holes. Insert the three long screws first.
Check the detector assembly and test all moving parts.
Place the detector on its right side. Remove the hinge cover then insert and tighten
the two screws (35mm) into the shaft hinge.
Figure 24
: Fitting Screws into the Shaft Hinge
Torx Screw symbol
m
arks location of
all Torx Screws
O-ring
Figure 23
: Fitting Torx Sc
rews.
Figure 22: Fitting Four Screws

Other manuals for Minelab F3Ci

Questions and Answers:

Question and Answer IconNeed help?

Do you have a question about the Minelab F3Ci and is the answer not in the manual?

Minelab F3Ci Specifications

General IconGeneral
BrandMinelab
ModelF3Ci
CategoryMetal Detector
LanguageEnglish

Related product manuals