F3Ci Service Manual
_______________________________________________________________________________________________________________________
19
•
Ease the two halves of the detector together. Align the detector body right side with
the locating pins either side of the shaft hinge.
•
Check the latch hinge and spring latch hinge are in place and connected.
•
Once the two sides of the detector are together check the handle, shafts and armrest
slide are correctly fitted. Carefully hold the detector together whilst turning the
detector over onto its right side with the hinge cover facing up.
•
Remove the hinge cover to check the coil cable is not trapped within the shaft hinge.
Refer to figure 20.
•
Check the latch hinge and spring latch hinge are still connected as shown in Figure
18.
•
Refit the hinge cover.
•
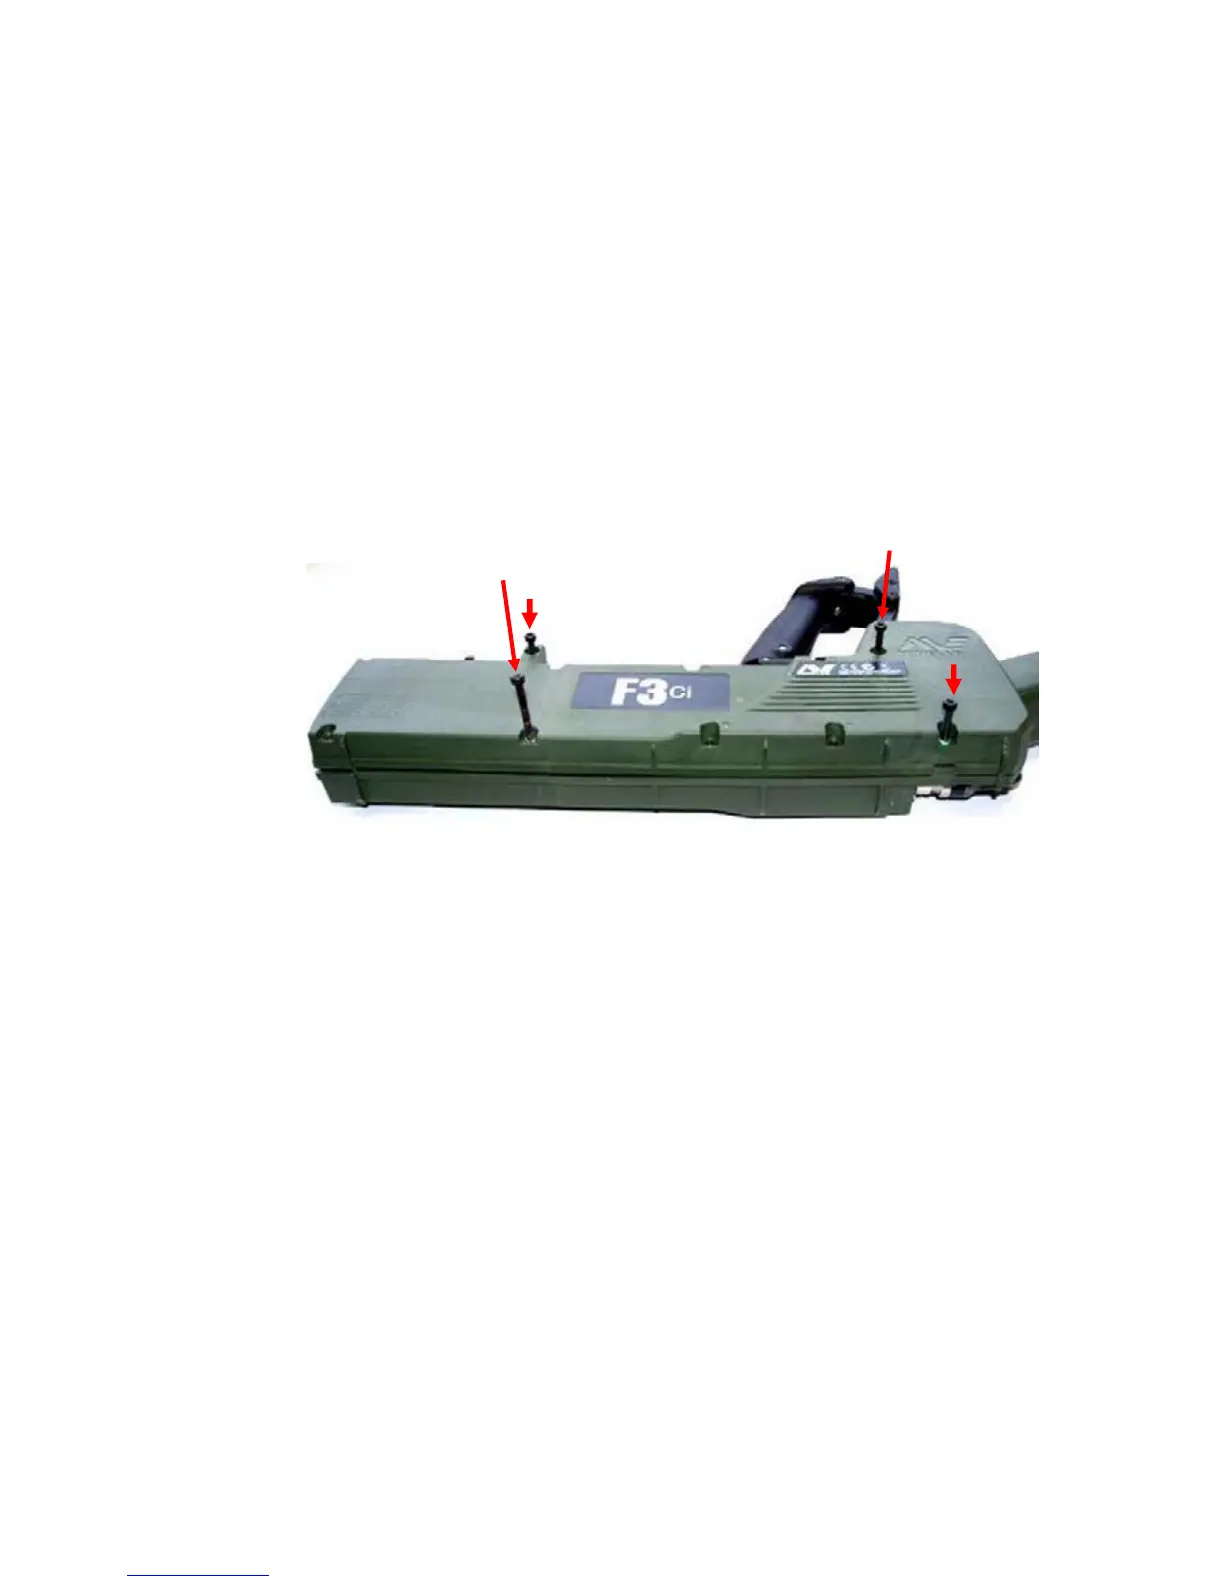
Insert the four screws (two 20mm and two 35mm) as indicated in Figure 21 but do
not fully tighten at this point.
•
With the detector loosely held together check the handle slides up and down
correctly. Check the armrest slide also moves freely along the rod detector slide.
•
Check the battery lid moves in and out and ensure the battery lid is closed.
•
Starting with the two long (35mm) screws fit the four remaining screws into the right
side of the detector as indicated by figure 22.
•
Tighten all eight screws.
Figure 21: Fitting Four Screws
 Loading...