4. Getting started
MiR Precision Docking Operating guide (en) 2019/11 - v.1.2 ©Copyright 2019: Mobile Industrial Robots A/S. 12
The following steps describe how to mount the station correctly.
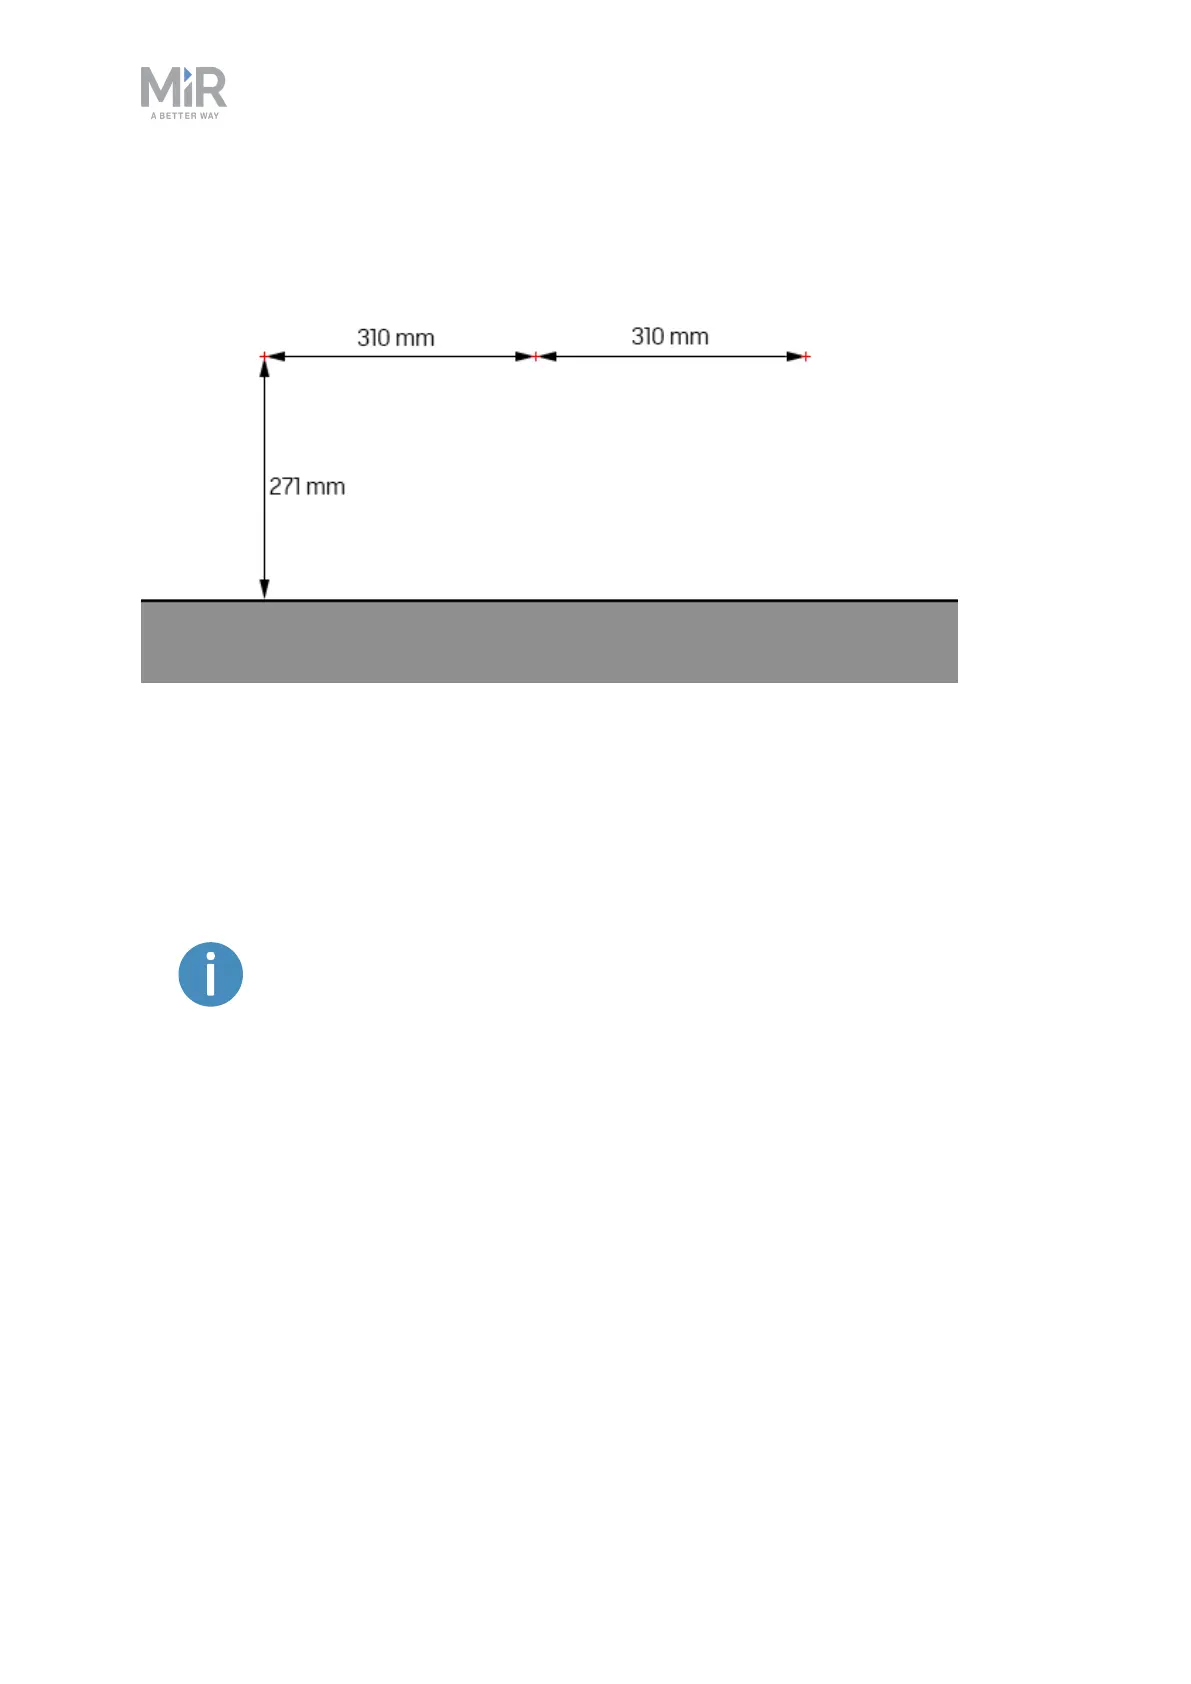
Figure 4.2. The red crosses mark the positions of the three mounting holes. The vertical measurement is from
the floor, and the horizontal measurements are the horizontal distances between the holes.
1. Mark the three points shown in Figure 4.2 on the wall, or other vertical surface, that the
station is to be mounted to.
2. Place the station over the marked points, so they are visible through the mounting holes.
Verify that this is the position where you want the station to be mounted.
It is a good idea to check that the height of the precision pins at this
position aligns with the precision holes of the robot.
3. When satisfied, remove the station and drill three holes to fit the mounting holes.
Consider inserting wall plugs to ensure a secure mounting, in which case the drilled holes
must accommodate the size of the chosen plugs.
4. Place the station back in the desired mounting position, and screw in three bolts through
the mounting holes to fix the station to the wall.