StudPartition,LaminatedPanel,orUnxedRear-entryPipeworkInstallation
For all installations using the Wall Mounting Bracket:
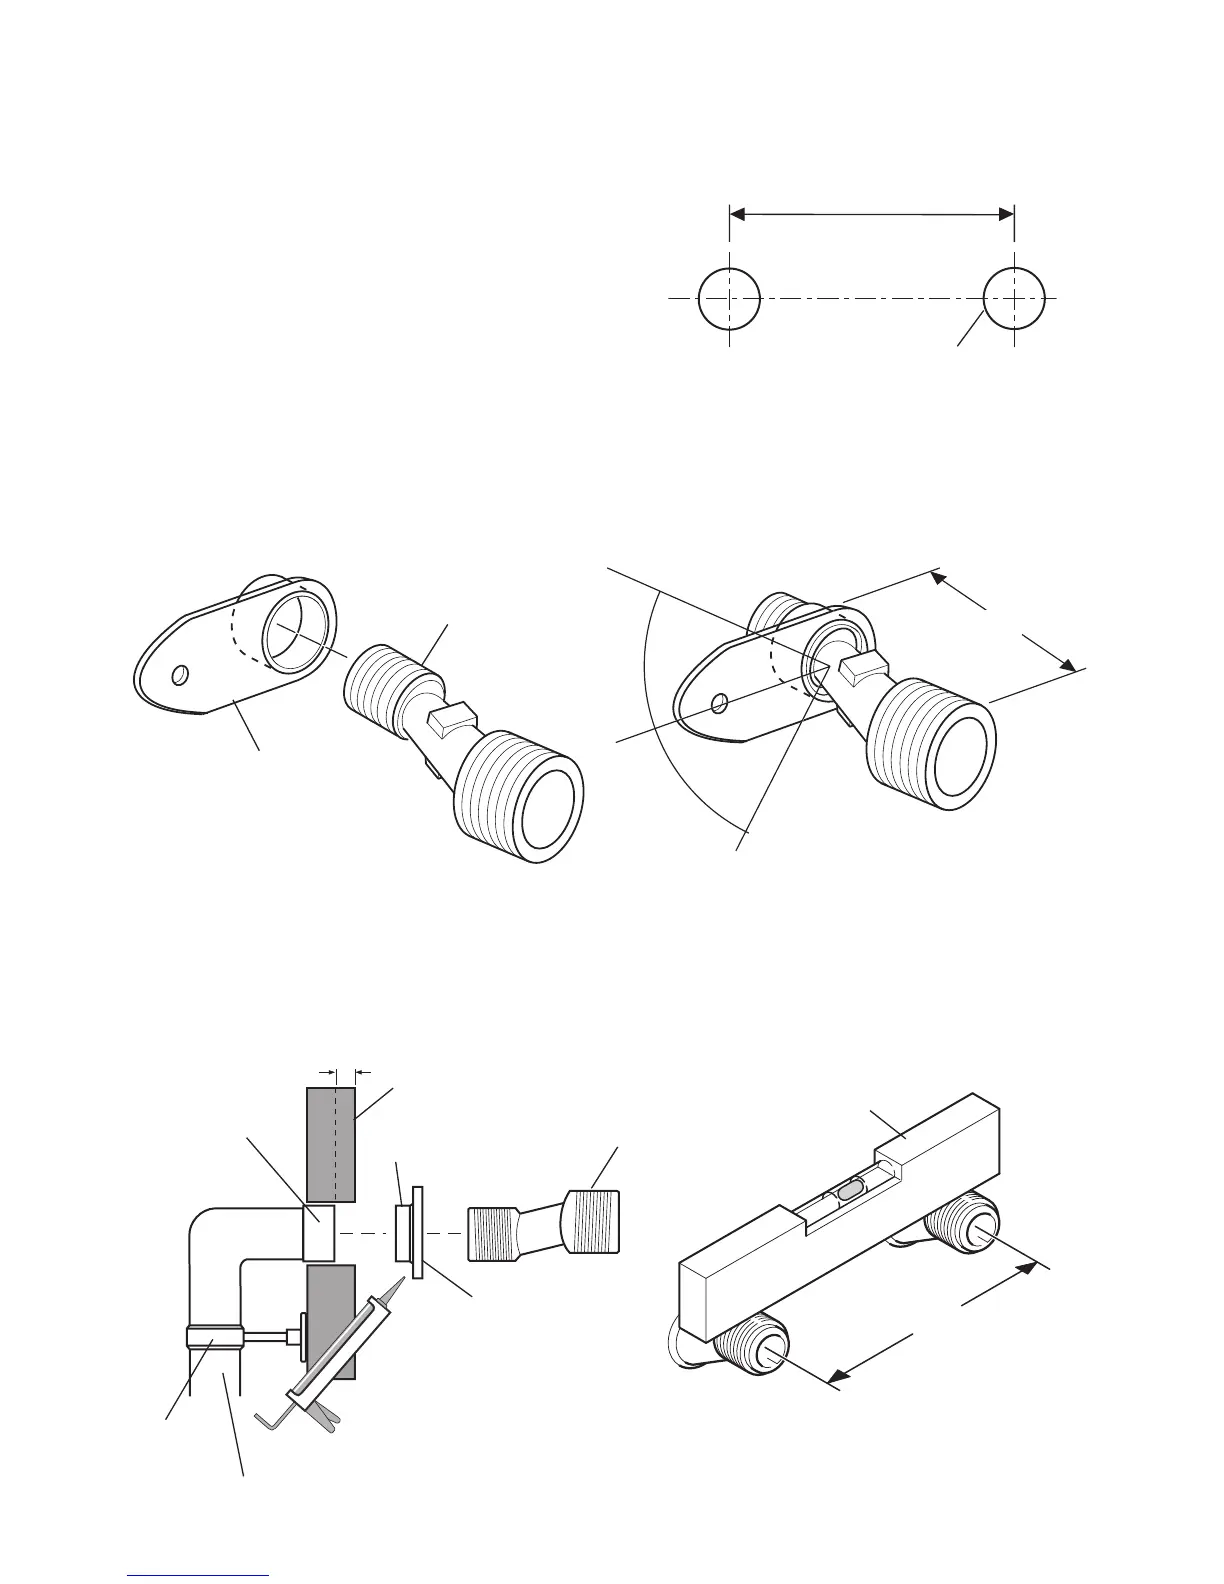
45°
45°
35 - 40 mm
Wall Mounting
Bracket
Offset
Connector
4. The mounting bracket boss should protrude to the rear, facing the wall.
5. Apply suitable thread sealant (not supplied) and attach the offset connectors
to the pipework in the wall.
Note! Connections are: Hot-Left, Cold-Right. This is very important as this
product does not allow for reversed inlets.
Wall Mounting
Bracket
Wall
Offset
Connector
Boss
Spirit Level
150 mm
Apply Silicone
Sealant
3. The mounting bracket must extend in the same direction as the offset of the
offset connector. The angle between the offset connector and the mounting
bracket must be less than 45°, otherwise the mounting bracket will not t under
the concealing plate.
1. Install the pipework, make sure that
it is set at the correct distance apart
(150 ± 24 mm) and solidly xed.
2. Screw the mounting brackets onto
the offset connectors.
The offset connectors must protrude
between 35 and 40 mm from the
nished wall.
150 ± 24 mm
Pipe Centres in Wall
Ø 27 mm
10 mm
Pipework
Support
Bracket
½" BSP Female
Connection
 Loading...