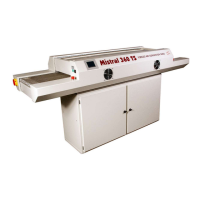
3.4.3 How to make a profile
1. Attach a thermocouple sensor onto the product at the pace of your choice and place it on
the belt.
2. When the component enters the first zone the user should press the “start log” button to
start creating the profile.
Below you will see how screen looks after “start log” is pressed.
3.4.4 Functions in logging state explained.
Logging: This is a representation of the status. There is no further function.
Save: When this button is pressed all collected data is saved on the USB stick and the logging
process is stopped.
When time is finished ( in the example after 210 seconds ) the process will automatically
stops and all collected data is saved onto the USB Memory stick. When no stick is available
the data is destroyed. The data can be printed with the supplied Excel macros. (See “Printing
the profile”)
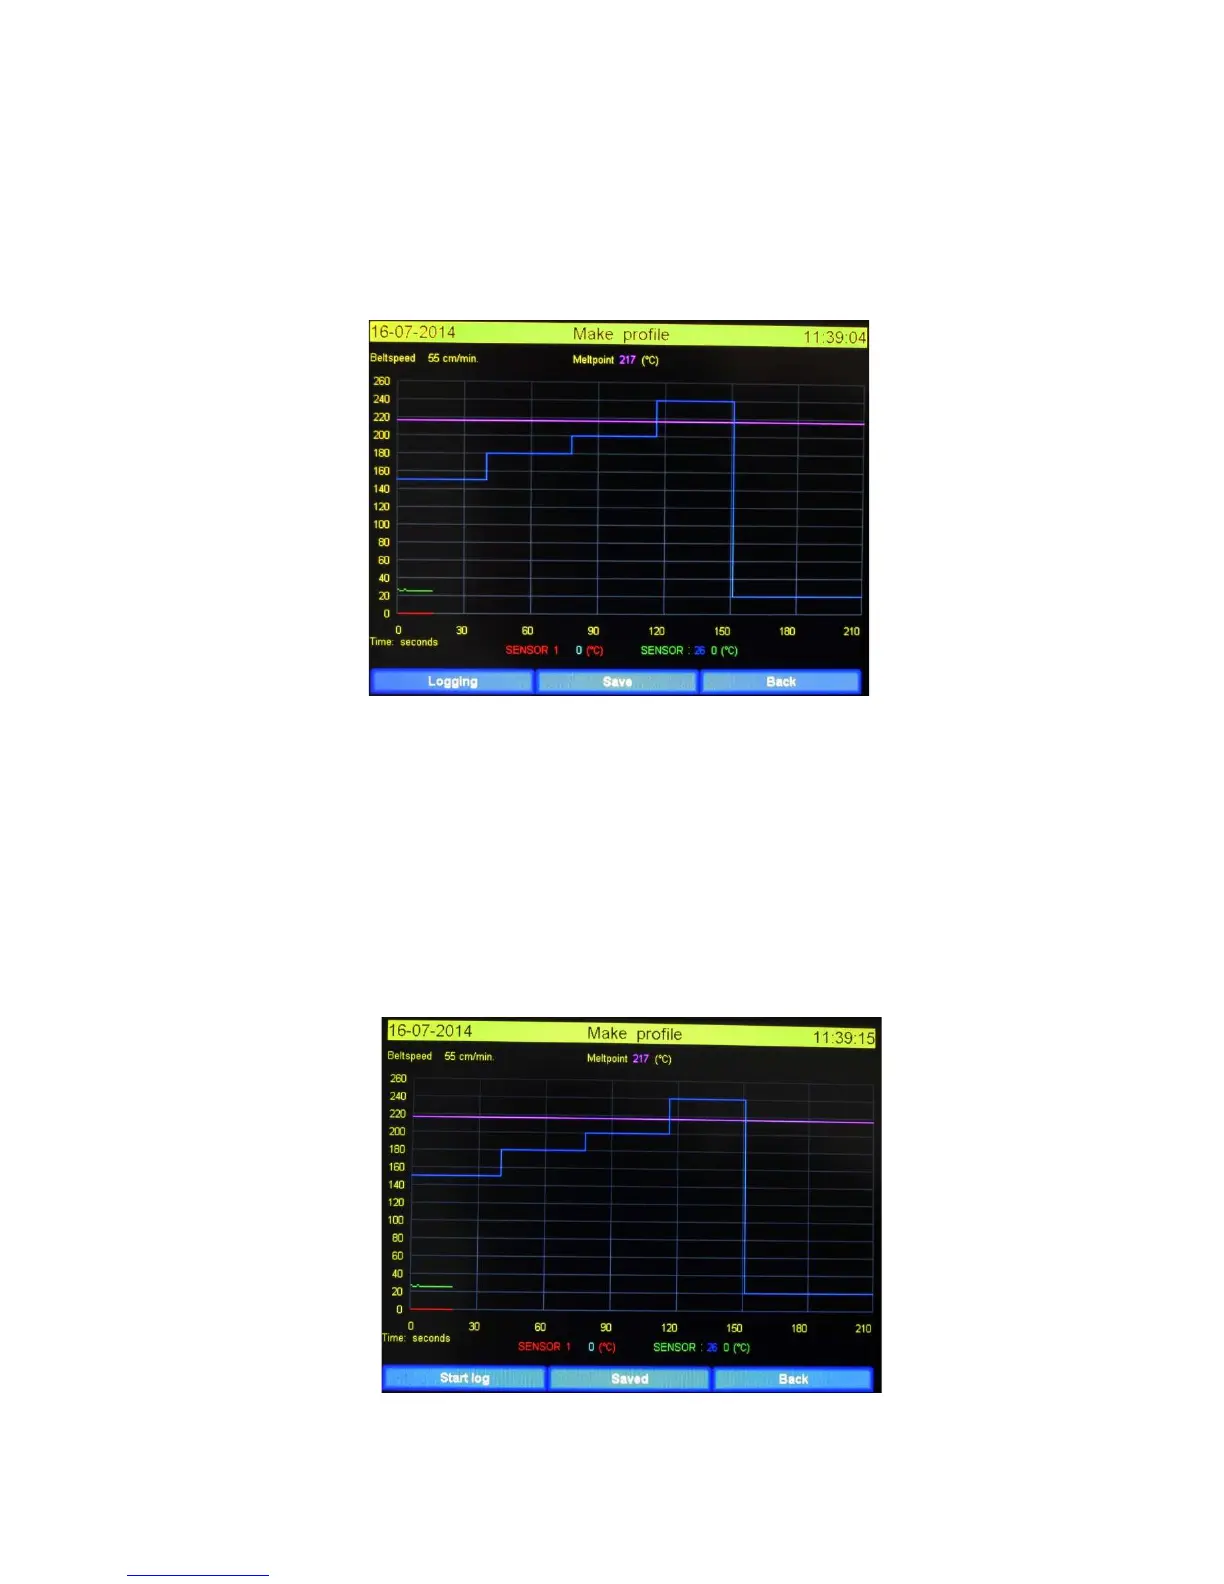
The screen layout after the profile is saved in shown below.
Back: Data is destroyed and the screen will be closed and main screen is coming up.