MICRO 8
Installation and user manual
Page 6 of 24
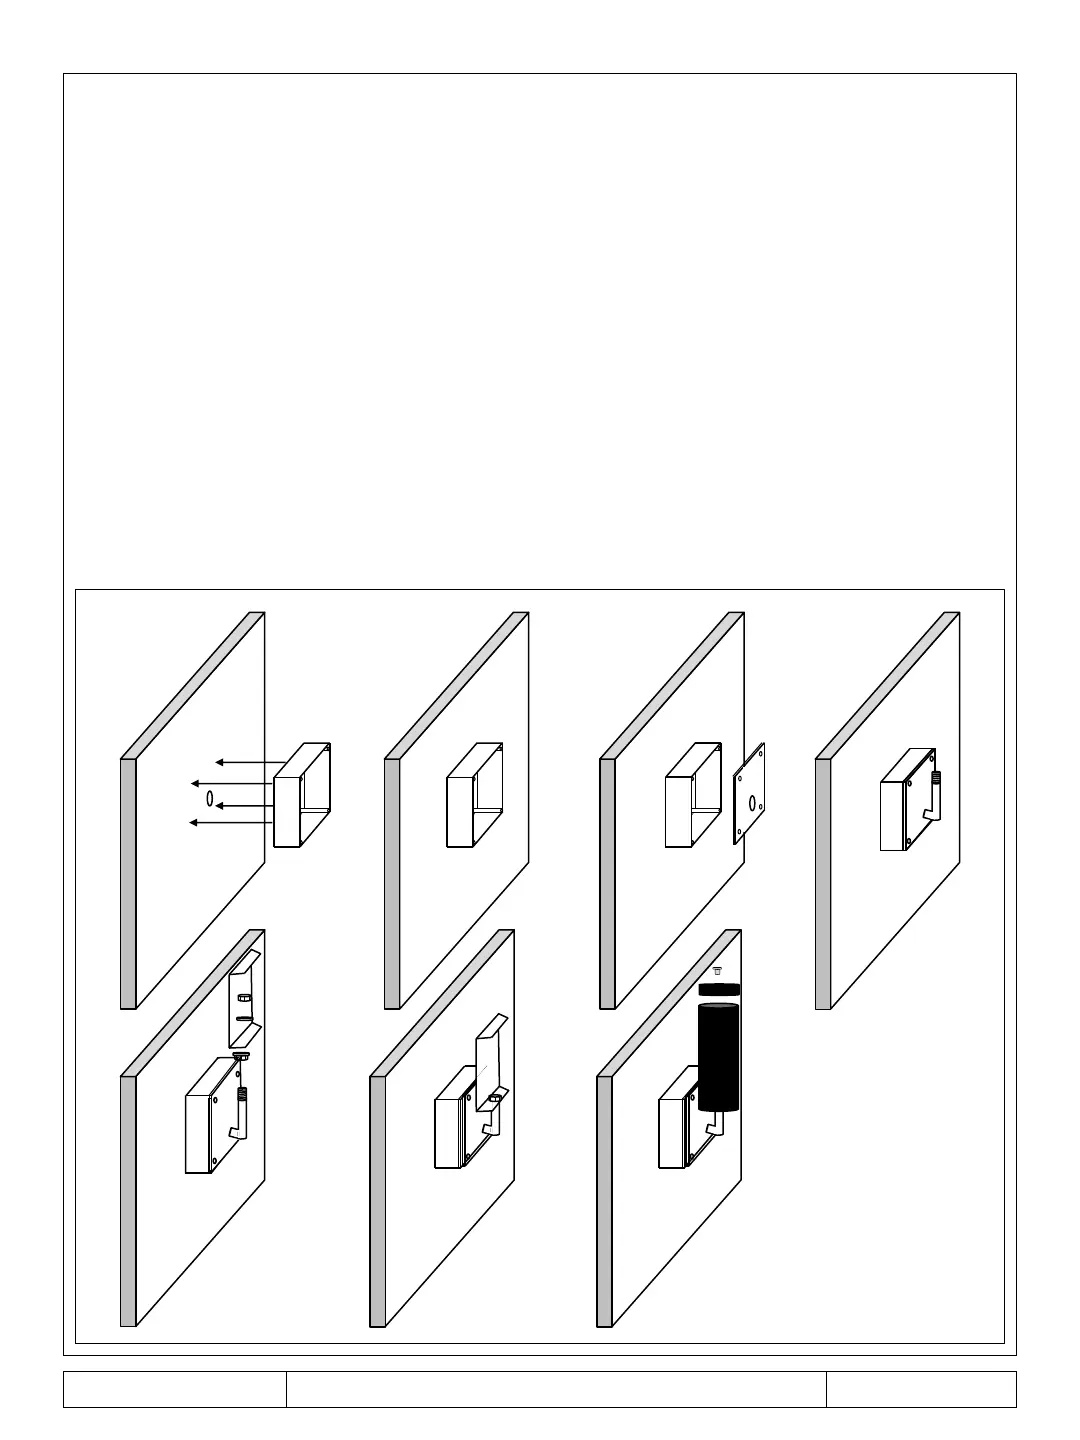
Wall installation with MICRO BOX
Position the base of the MICRO BOX on the wall where you want to install the barrier
(height between 80 and 90 cm from the ground) and make four holes with a 5 mm tip
(figure 1).
Fix the base to the wall using the four screws, plugs and washers supplied (figure 2). If the
supplied cable gland is not used, make a hole in the base of the MICRO BOX verifying that
the hole is in line with that of the wall cable outlet (figure 1). If not, make a hole in one of
the four sides of the base and fix the PG8 (figure 2).
Drill a hole in the center of the MICRO BOX cover using the template provided (figure 3).
Insert the cables into the base and into the MICRO BOX cover, into the main bracket and
close using the four supplied screws (figure 4).
Follow the procedure already indicated in the pole installation from point 3 (see page 5).
Figure 1
Figure 2 Figure 3 Figure 4
Figure 6 Figure 7
Figure 5