PHOTOS/ FIGURES
63
11
DISASSEMBLY PROCEDURE
<Preparation for the repair service>
● Prepare the proper tools.
● Prepare the proper protectors.
● Provide adequate ventilation.
● After stopping the operation of the hydrobox and outdoor unit, turn off all the power-supply breaker.
● Discharge the condenser before the work involving the electric parts.
● Allow parts to cool.
● Do not expose the electric parts to water.
● When replacing or servicing water circuit parts, drain system first.
Check individual illustrations and positions of the parts by referring to the parts catalogue.
Some lead wires and pipes are bundled with Bands. Cut the bands to undo the fastened pipes and lead wires if necessary.
When bundling the lead wires and pipes again, use new commercially available bands.
When removing the parts associated with water pipe work, drain the hydrobox as necessary. (Refer to "Draining the Hydrobox"
on page 21.)
When draining the hydrobox, keep water from splashing on the internal parts (mainly electric parts and insulations).
DISASSEMBLY PROCEDURE
Photo 1-1
Photo 1-2
Photo 2-2 Photo 2-3
Photo 2-1
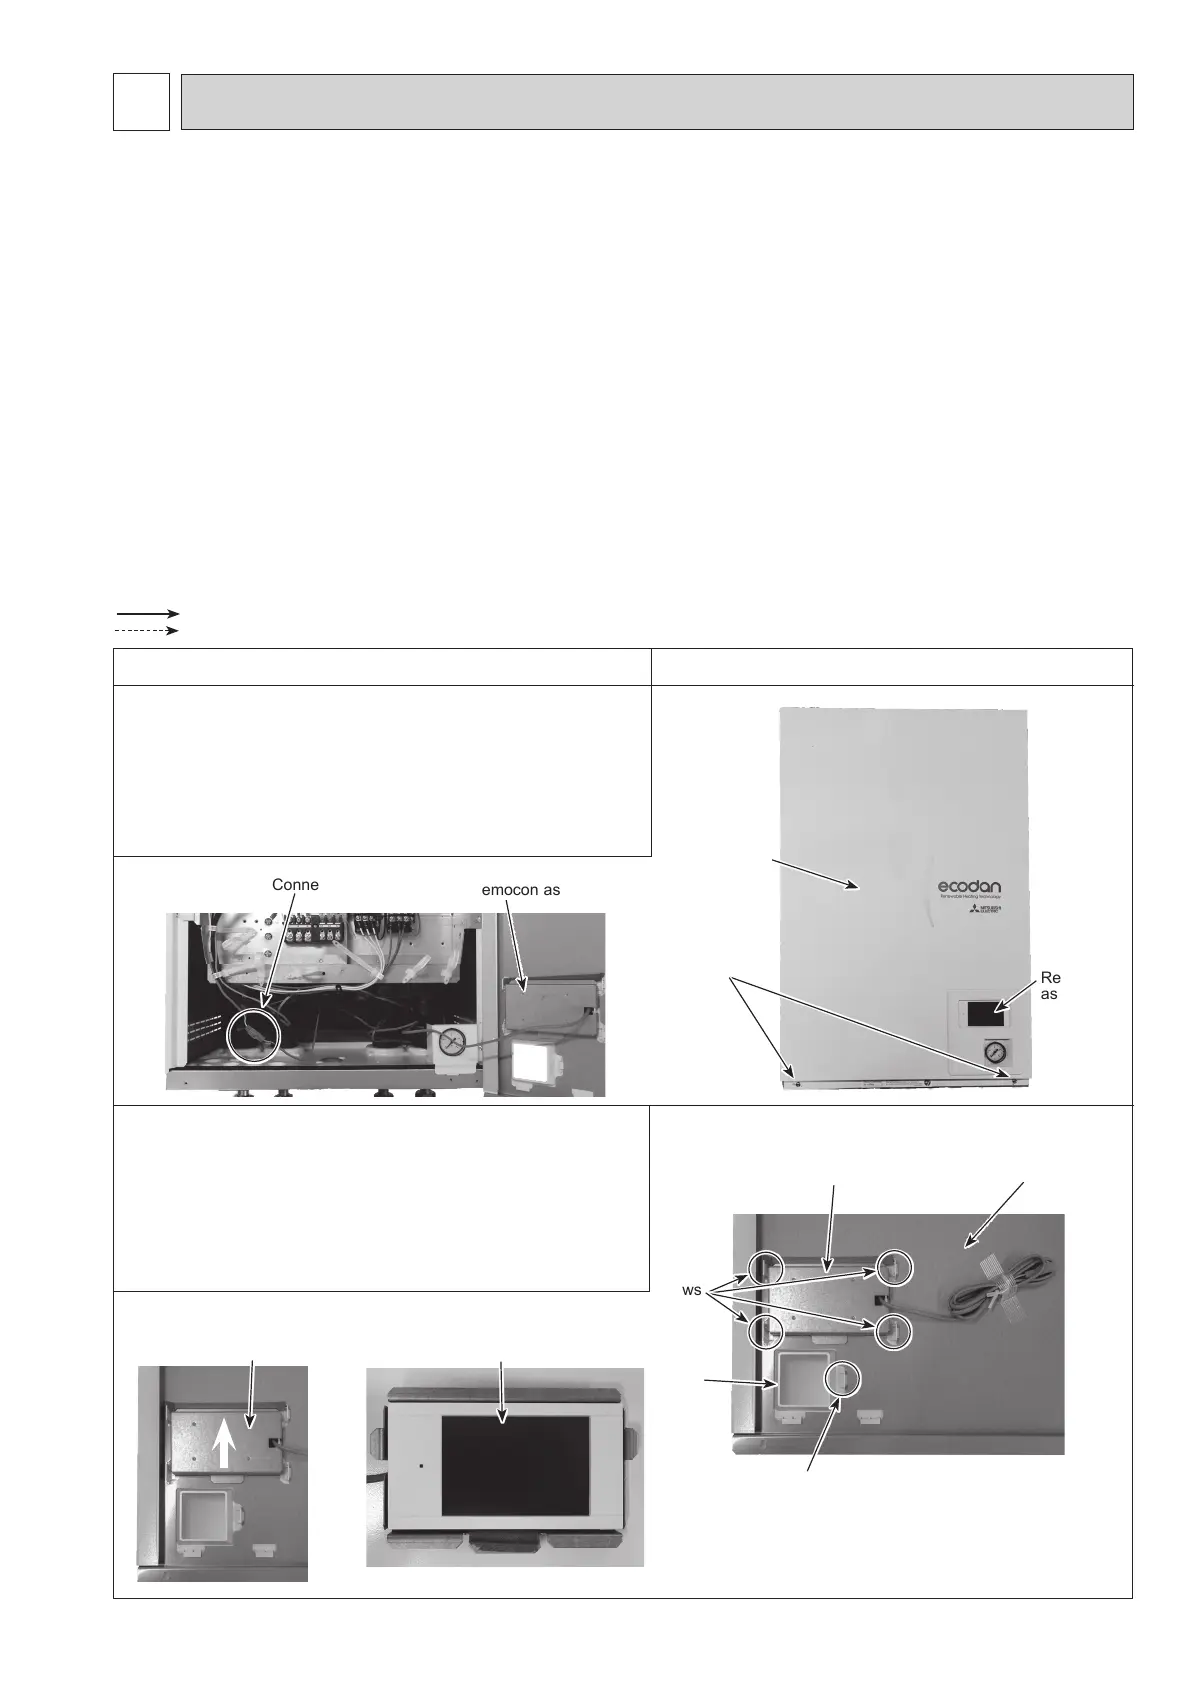
1. How to remove the front panel
(1) Remove the 2 screws at the bottom of the hydrobox.
(Photo 1-1)
(2) Slightly lift and pull out the front panel from the hydrobox.
(Photo 1-1)
(3) Disconnect the relay connector connecting from the
remocon assy. (Photo 1-2)
2. How to remove the remocon assy
(1) Remove the front panel. (Refer to Procedure 1.)
(2) Turn the front panel over and remove the 5 claws at the
remocon holder. (Photo 2-1)
(3) Slide the remocon support upward, then remove it
together with the main remote controller. (Photo 2-2)
(4) Separate the remocon assy from the remocon support.
(Photo 2-3)
Front panel
Remocon
assy
Connector
Front panel
Remocon support
Claws
Screws
Claw
Remocon support
Remocon assy
Remocon assy
: Indicates the visible parts in the photos/gures.
: Indicates the invisible parts in the photos/gures.
Remocon
holder
OCH815A