EasyManua.ls Logo

Mitsubishi Electric MIFH1 User Manual

Mitsubishi Electric MIFH1
12 pages
To Next Page IconTo Next Page
Page #1 background imageLoading...
Page #1 background image
© 2010 Mitsubishi Electric & Electronics USA, Inc.
Suwanee, GA 30024 All Rights Reserved.
The three diamond logo is a registered trademark
of Mitsubishi Electric Corporation
www.mitsubishipro.com
Controller Kit Installation Manual
MIFH1, MRCH1, MCCH1, MOS1
69-2426-01
Installation guide for:
• WirelessReceiverandCable(MIFH1)
• RemoteController(MRCH1)
• PortableCentralController(MCCH1)
• OutdoorAirSensor(MOS1)
DISCONNECT POWER BEFORE BEGINNING INSTALLATION. Can cause
electrical shock or equipment damage.
Must be installed by a trained, experienced technician. Read these
instructionscarefully.Failuretofollowtheseinstructionscandamagetheproductor
cause a hazardous condition.
Installation at a glance
This document covers linking and
installation procedures for the
Mitsubishi Split-Zoning Ductless
and Ducted Systems' RedLINK™
control devices and accessories.
Before you begin, you must attach the cable to the CN105 connector on the indoor unit
control board, then follow the steps in this document.
Remote controllers are linked to specific indoor units. Each indoor unit must have a
dedicated remote controller and wireless receiver.
Wireless receiver
Wireless
outdoor
air sensor
Portable
central
controller
M32309
Remote controller
Question and Answer IconNeed help?

Do you have a question about the Mitsubishi Electric MIFH1 and is the answer not in the manual?

Mitsubishi Electric MIFH1 Specifications

General IconGeneral
ModelMIFH1
ManufacturerMitsubishi Electric
Number of Inputs16
Number of Outputs16
TypePLC
Output TypeTransistor
Programming LanguageStructured Text
Communication InterfaceRS-485, Ethernet
Operating Temperature55°C
Storage Temperature70°C

Summary

Installation Overview

Installation at a glance

Visual guide showing the layout of control devices and accessories for installation.

Wireless Device Installation

Battery Installation Procedures

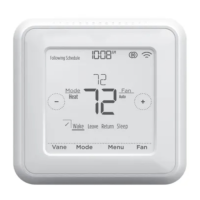
Install batteries for remote controller, portable central controller, and outdoor sensor.

Cable and Receiver Installation

Connect the receiver cable and mount the wireless receiver.

Link Devices to Wireless Network

Wireless Receiver Status Indicators

Explains the status lights (POWER LED, CONNECT LED) on the wireless receiver during setup.

Linking the Remote Controller

Step-by-step guide to link the remote controller to the wireless network and configure zone names.

Link Optional Devices to Network

Linking Portable Central Controller

Procedure to connect the Portable Central Controller to the RedLINK™ network.

Linking Outdoor Air Sensor

Procedure to connect the outdoor air sensor to the RedLINK™ network.

Setup and Configuration

Exiting Wireless Setup Mode

Steps to exit the wireless setup mode on the receiver and confirm connection.

Initiating Installer Setup

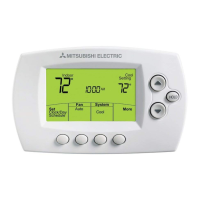
Guide on how to start the installer setup on the remote controller and navigate settings.

Installer Setup Options

Setup Function Details (101-128)

Detailed table of setup functions (101-128) and their configurable settings with factory defaults.

Additional Installer Setup Options

System Configuration Settings

Table detailing setup functions (134-174) related to system configuration, setpoints, and display.

Advanced Installer Setup

Zone Naming and Wireless Setup

Table for configuring zone names and managing wireless system setup and defaults.

Special Functions and System Testing

Understanding Special Functions

Explains special functions like Commercial Override, Optimal Start, Scheduled Off, and Power Off Timer.

Performing Installer System Tests

Guide on how to conduct system tests to verify operation, including wireless test and configuration data checks.

Mounting and Troubleshooting

Mounting Components

Instructions for mounting the remote controller and the outdoor sensor.

RedLINK™ Error Code Reference

Lists common RedLINK™ error codes and their potential causes and solutions.

Replacing System Components

Replacing Controllers and Sensors

Procedures for replacing remote controllers, portable central controllers, and outdoor sensors.

Replacing Wireless Receiver

Steps to replace the wireless receiver and re-link devices.

Removing All Wireless Devices

Instructions on how to disconnect all wireless devices from the system.

Regulatory and Specifications

FCC Compliance and RF Exposure

Information regarding FCC compliance and RF exposure limits for the system components.

System Specifications and Parts

Details on operating temperatures, humidity, physical dimensions, and available replacement parts.
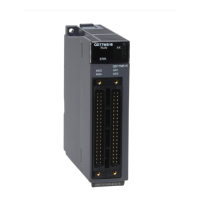
Related product manuals