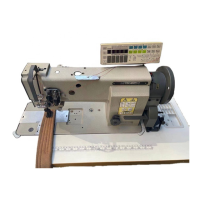
OPERATION
FOR
AUTOMATIC
CORNER
STITCHING
2 Retracing
of
corner stitching
step
Every
one depression of the "SUB" switch causes retracing of one corner stitching step.
When
steps are retra
ced,
be sure
to
check
the
position by LED.
3 Continuous single-needle stitching
(1)
Set
the
"SINGLE
NEEDLE"
switch
@
to
"ON".
(2) To-select the left needle or the right needle, set switch .
•To
stop
the
left
needle, depress switch red LED will flicker.
•To
stop
the
right needle, depress switch green LED will flicker.
(3) Toe down the pedal to start continuous single-needle stitching.
(4)
To
disengage
continuous
single-needle
stitching,
set
the
switch
@
to
"OFF"
and
toe
down
the
pedal.
4
Compensation
stitching
Compensation stitching is made before starting
corner
stitching,
or
when
one
stitch
is
added
in
corner
stitch
ing.
(1) By once depressing
the
compensation stitch
switch,
one
stitch
can
be
added
in
the
forward
direction.
(2) By depressing the compensation stitch switch
while
holding
down
the
touchback
switch,
one
stitch
can
be
added
in
the
backward
direction.
'
stitching
switch
Touchback
switch
5 Example
of
corner stitching patterns
Stitching
pattern
NUMBER
of
corner
stitch
ing
steps
Step
Number of corner single-
needle
stitches
Corner stitching direction
Needle
gauge
1/4"
{6.4
mm)
Stitch
length:
3.2
mm
LEFT
LEFT
LEFT
LEFT
-10-
57®
:TT
(D
Needle
gauge
1/4"
(6.4
mm)
Stitch
length:
3.2
mm
RIGHT
LEFT
LEFT
RIGHT
LEFT

 Loading...