<Notice>
● Do not overtighten the screws.
►The bracket may deform or break.
● When installing the bracket, select an interference-free space.
►Keep the installing area at least 10 cm away from metal or a wall box. If unable to do
so, always place the room wireless remote controllers in locations where the com-
munication test determines that the wireless remote controllers are fully capable of
communication with the wireless receiver.
● Do not install the bracket with screws on the exterior casing of the cylinder unit.
►
The internal parts may be damaged, which could result in breakdown of the indoor unit.
● Do not install the bracket where the receiver could be exposed to moisture or
leaked water from piping connections above.
► The wireless receiver subjected to moisture or leaked water could cause electric
shock, fire, or its breakdown.
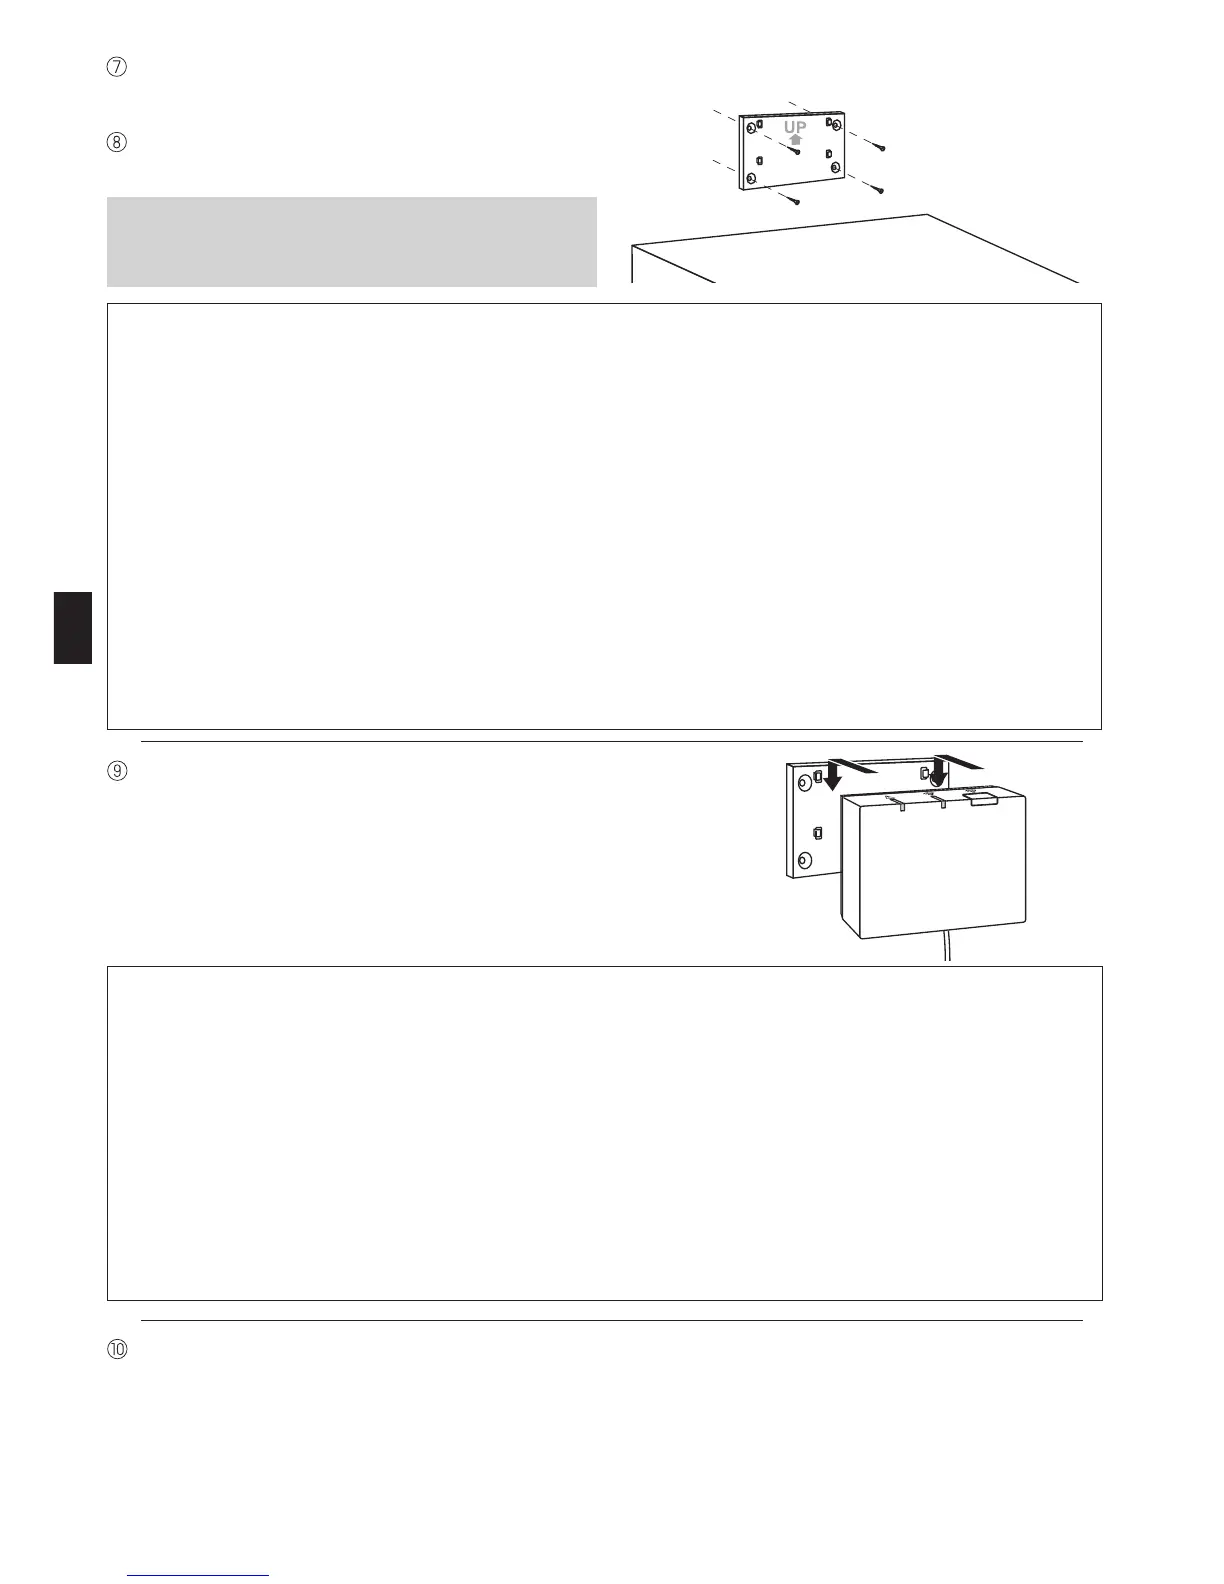
7
Check the maximum reach of the cable and
install the bracket on the wall with screws.
Place the control and electrical box back in the original position and reinstall the 3 screws.
Place the wireless receiver on the fixed bracket.
Hook the holes on the back of the wireless re-
ceiver onto the projections on the bracket, and
fix the wireless receiver in place.
<Notice>
● Do not place the wireless receiver inside the cylinder unit.
►Both the wireless receiver and its wire may break due to heat inside the indoor unit.
● Do not let the wireless receiver stand on top of the cylinder unit. Always x the
wireless receiver onto the bracket.
►Wireless communication performance may be affected.
● Do not pull the cable excessively.
►Breakdown, ignition, or fire may result.
● Do not have the wireless receiver suspended.
►Breakdown, ignition, or fire may result.
Fix the front panel with screws.
Do not excessively pull the cable when
checking the maximum reach.
 Loading...