3
No. 99MAK004B
■ Example of conventions use
Indicates an operating
procedure to be performed
or its outline.
15
No. 99MAK004B
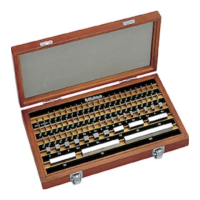
2 How to Use Gauge Blocks
4 Wring the 30 mm Gauge Block and other Gauge Blocks together in order of thickness.
Tips
When wringing a thin Gauge Block, check the state of the measurement surface of
the thin Gauge Block by placing on the optical at.
For details about wringing, see
"2.2 Wringing" (page 16).
5 Perform thermal stabilization.
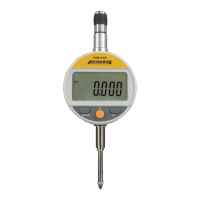
6 Use as a reference gage.
Example of comparative
measurement
Example of zero-setting for a
measuring tool
37.785
37.793
Workpiece
Reference gage (wrung Gauge Blocks)
Measuring tool
Wrung Gauge Blocks
■ Disassembly
1 Disengaging the wringing
1 Rotate the wrung Gauge Blocks until they form
a cross shape.
2 Slide the Gauge Blocks to detach them.
2 Wipe any dirt o the Gauge Blocks.
Tips
For details about cleaning, see " Cleaning" (page 19).
13
No. 99MAK004B
2 How to Use Gauge Blocks
2 Gently place the optical at on the measurement surface
of the Gauge Block.
IMPORTANT
Place the optical at on the measurement surface of
the Gauge Block so that the arrow printed on the side
of the optical at points downward.
3 Lightly slide the optical at.
» If interference fringes appear: Proceed to step 4.
» If interference fringes do not appear: Burrs exist; proceed to step
2
.
Tips
Interference fringes may not appear if the surfaces were not wiped suciently or
if paper bers are present on the surface. In this case, wipe the surfaces again,
and then repeat from step 2.
4 Lightly hold down the optical at.
» If interference fringes do not appear: No burrs exist;
proceed to step
3
.
» If interference fringes partially appear: Burrs exist;
proceed to step
2
.
Tips
If interference fringes partially appear, slide the optical at slightly. If the inter-
ference fringes move with the optical at, it means that there are burrs on the
optical at, and not on the Gauge Block. Use a new optical at.
Indicates supplementary
information.
Indicates the action resulted
from some operation(s).
Indicates specic work
procedures.
Indicates the referential
location.
 Loading...