3.1.5
USING THE SKEW FUNCTION
,
.
To skew the current coordinate system, refer to Figure
3-2
and perform the
following steps:
1.
Press the [SKEW] key. The Skew Indicator will illuminate and
P03
will
appear on the Sub-Display, indicating that three points need to, be measured.
2.
Move the crosshairs to target on P,,, then press either the [MANUAL IN] key
or the footswitch.
P02
will appear on the Sub-Display, indicating that there
are two points remaining to be measured.
3.
Move the crosshairs to target on P,,, then press either the [MANUAL IN] key
or the footswitch. The new direction of the X-axis is now set. will
appear on the Sub-Display, indicating that there is one point remaining to be
measured.
4.
Move the crosshairs to target on
P,,,
then press either the [MANUAL IN] key
or the footswitch. This sets the new origin.
POO
will appear on the Sub-
Display, indicating that there are no points remaining to be measured.
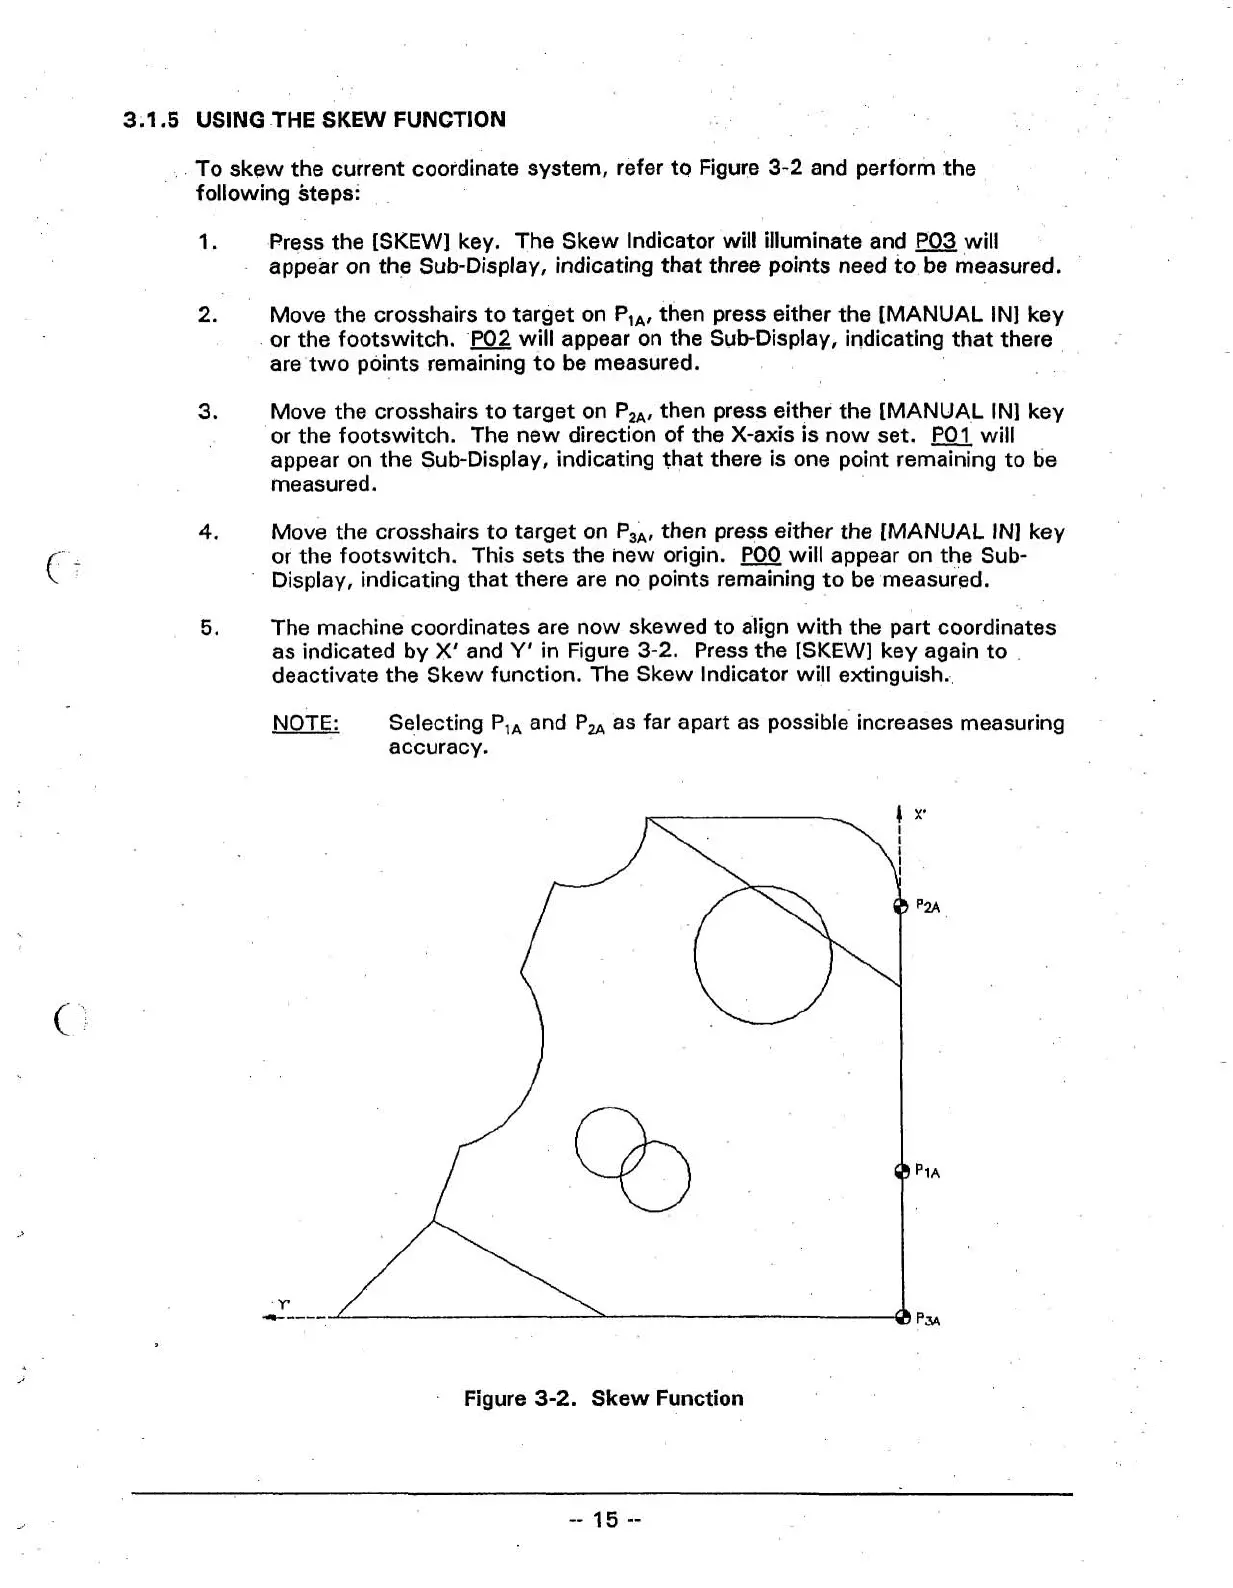
5.
The machine coordinates are now skewed to align with the part coordinates
as indicated by
X'
and
Y'
in
Figure
3-2.
Press the
[SKEW]
key again to
deactivate the Skew function. The Skew Indicator will extinguish.,
NOTE:
Selecting P,, and P, as far apart as possible' increases measuring
accuracy.
Figure
3-2.
Skew Function