12
CHAIN 1/2” X 1/8”
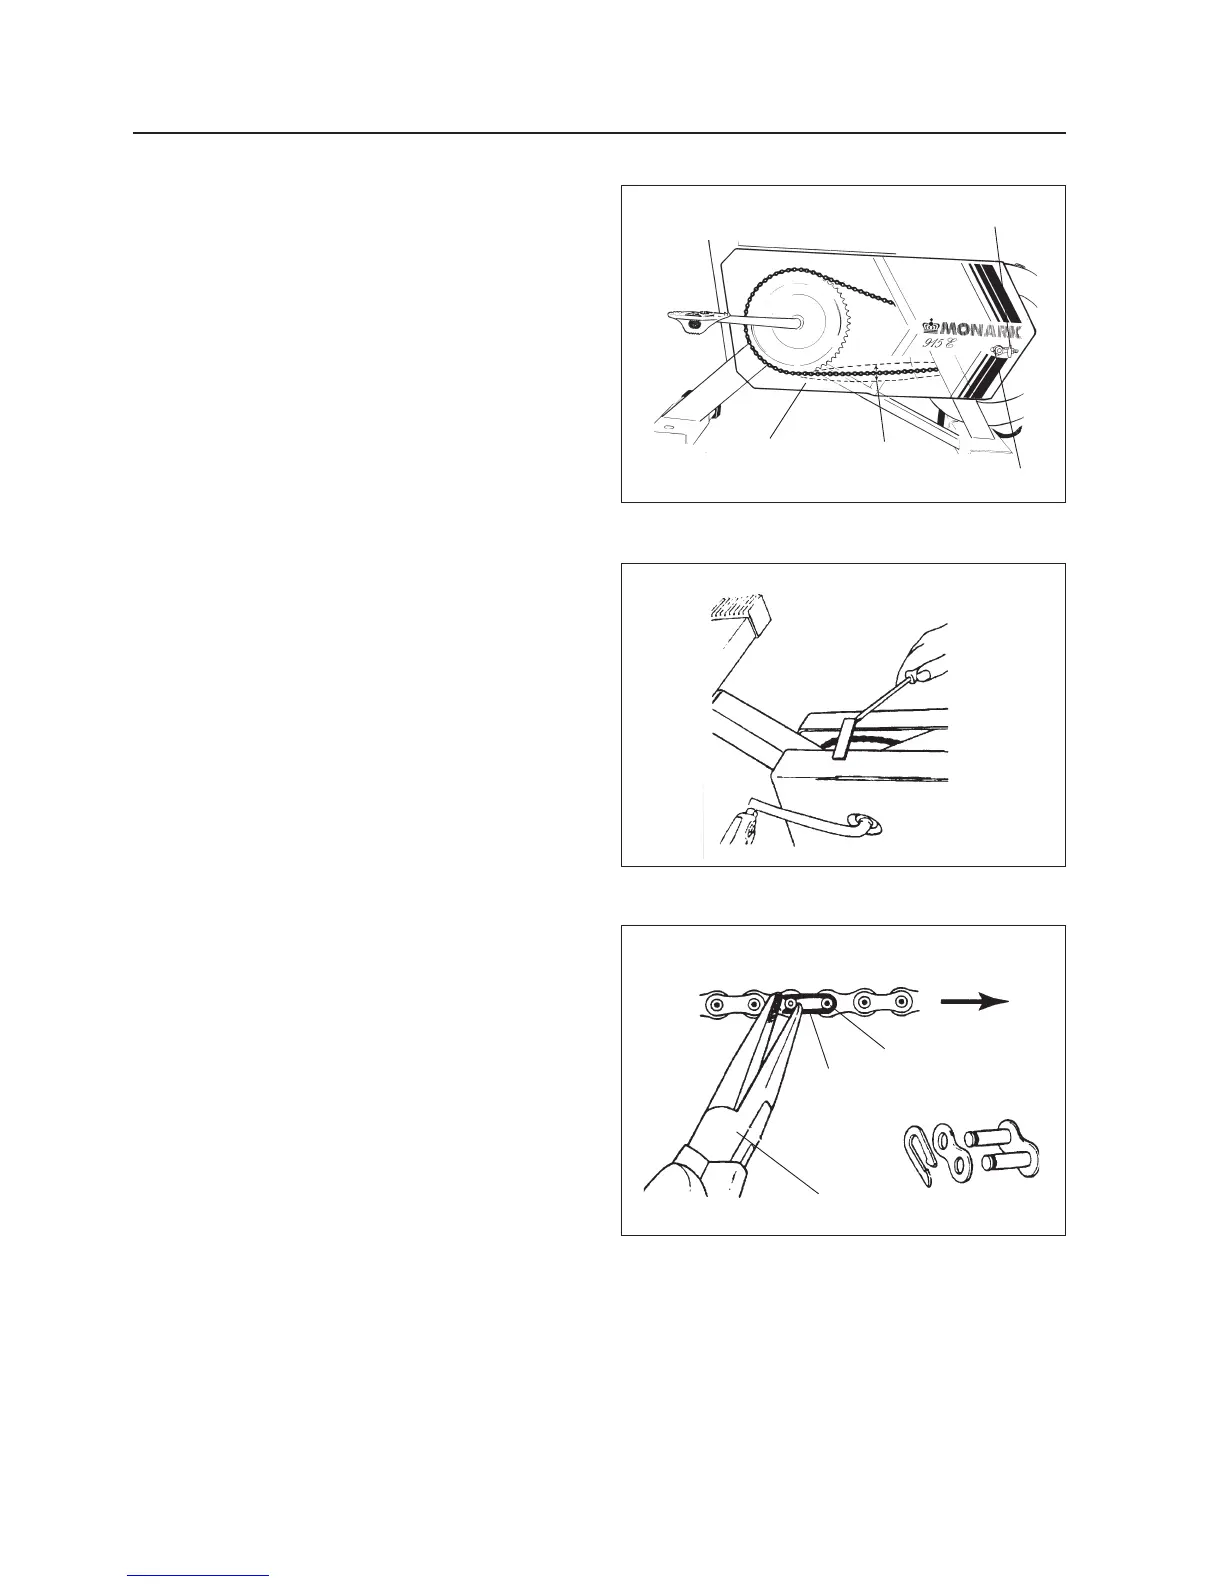
Fig 16
Fig 15
Fig 17
Check the lubrication and tension of the chain at re-
gular intervals.
In the middle of its free length the chain should have a
minimum of 10 mm of play. See fig 15. When the play
in the chain is about 25 mm (1 inch) the chain should
be tightened.
To change the tension of the chain the lower cover
bracket should be loosened by means of a screwdriver.
See fig 16. Remove the screw of the right and left co-
ver. Move the covers backwards, in order to remove
them. Loosen the axle nuts. The hub and axle are then
moved forward or backwards by loosening or tight-
ening the nuts of the chain tensioners. Then tighten
the nuts on the hub axle again. See fig 15.
Please note! The spring of the chain lock should be assem-
bled with the closed end in the movement direction of the
chain. Use a pair of tongs for dismantling and assembling
the spring. See fig 17.
When the chain has become so long that it can no
longer be tightened with the chain tensioners it is worn
out and should be replaced with a new one.
Please note! The wheel must be straightened parallel to
the center line of the frame. Otherwise the chain will get
caught on the tops of the sprocket and cause noise.
Axle nut
Chain tensioner
Chain play
Cover
Movement direction of chain
Closed end
Chain lock
Lock spring
Pair of tongs