Installation Instructions
ISTEP 51 LEVEL REFRIGERATOR
All models have 4-point leveling. The thmt is
supported by leveling legs, the rear is supported by
a_!justable wheels. Both are accessible fl'om the fl'ont
of the refligerator.
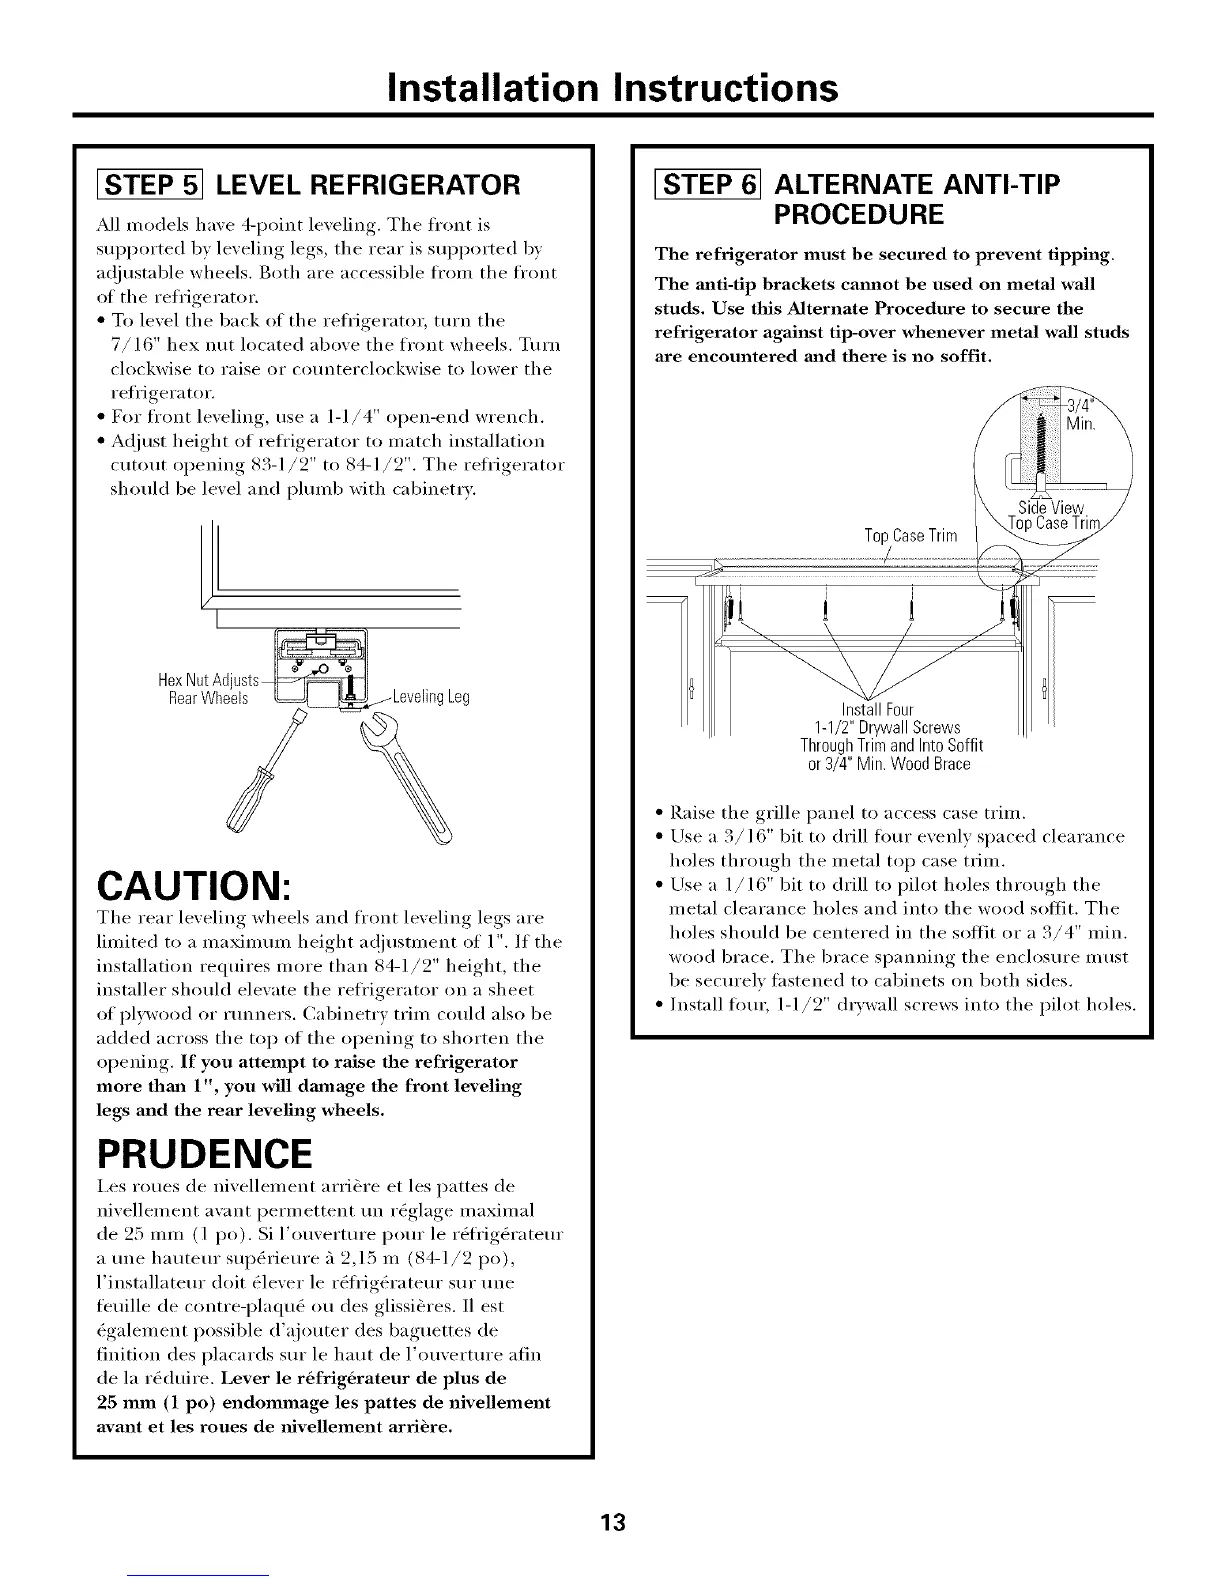
• To level the back of the refligerator, turn the
7/16" hex nut located above the fl'ont wheels. Turn
clockwise to raise or com_terclockwise to lower the
refl'igerator.
• For fl'ont leveling, use a ]-1/4" open-end wrench.
• A(!just height of refl'igerator to match installation
cutout opening 83-1/2" to 84-1/2". The refligerator
should be level and phunb with cabinetry.
/[
I
Hex NutAdjusts_]
RearWhei__eg
CAUTION:
The rear leveling wheels and fl'ont leveling legs are
limited to a maximum height ac!justment of 1". If the
installation requires more than 84-1/2" height, the
installer should elew_te the refl'igerator on a sheet
of pl}_vood or rtmners. Cabinetry trim could also be
added across the top of the opening to shorten the
opening. If you attempt to raise the refrigerator
more thm_ 1", you will dmnage the front leveling
legs and the rear leveling wheels.
PRUDENCE
I.es roues de nivellement artiste et les pattes de
nivellement avant permettent un r_glage maximal
de 25 mm (l po). Si l'ouverture pore" le r_fi'ig_ratem"
a tree hauteur sup_rieure _'l 2,15 m (84-1/2 po),
l'installatem" doit _lever le r_li'ig_ratem" sur une
feuille de contre-plaqu6 ou des glissi&res, ll est
_galement possible d'ajouter des baguettes de
finition des placards sur le haut de l'ouverture afin
de la r_duire. Lever le r&frig&rateur de plus de
25 Inln (1 po) endommage les pattes de nivellement
avant et les roues de _fivellement arri&re.
ISTEP 61 ALTERNATE ANTI-TIP
PROCEDURE
The refrigerator must be secured to prevent tipping.
The mlti-tip brackets cmmot be used on metal wall
studs. Use this Alternate Procedure to secure the
refrigerator against tip-over whenever metal wall studs
are encountered mad there is no soffit.
SideView
TopCaseTrim
i i =
! ! !
InstallFour
1-1/2"DrywallScrews
ThroughTrimand IntoSoffit
or3/4" Min.WoodBrace
• Raise the grille panel to access case trim.
• Use a 3/16" bit to drill tour evenly spaced clearance
holes through the metal top case trim.
• Use a 1/16" bit to drill to pilot holes through the
metal clearance holes and into the wood sottit, The
holes should be centered in the sottit or a 3/4" rain.
wood brace. The brace spanning the enclosm'e must
be secm'elv tastened to cabinets on both sides.
• Install flmr, 1-1/2" drywall screws into the pilot holes.
13