3
CONTROLS
1
2
3
4
5
6
7
8
9
10
11
12
13
14
15
16
18
17
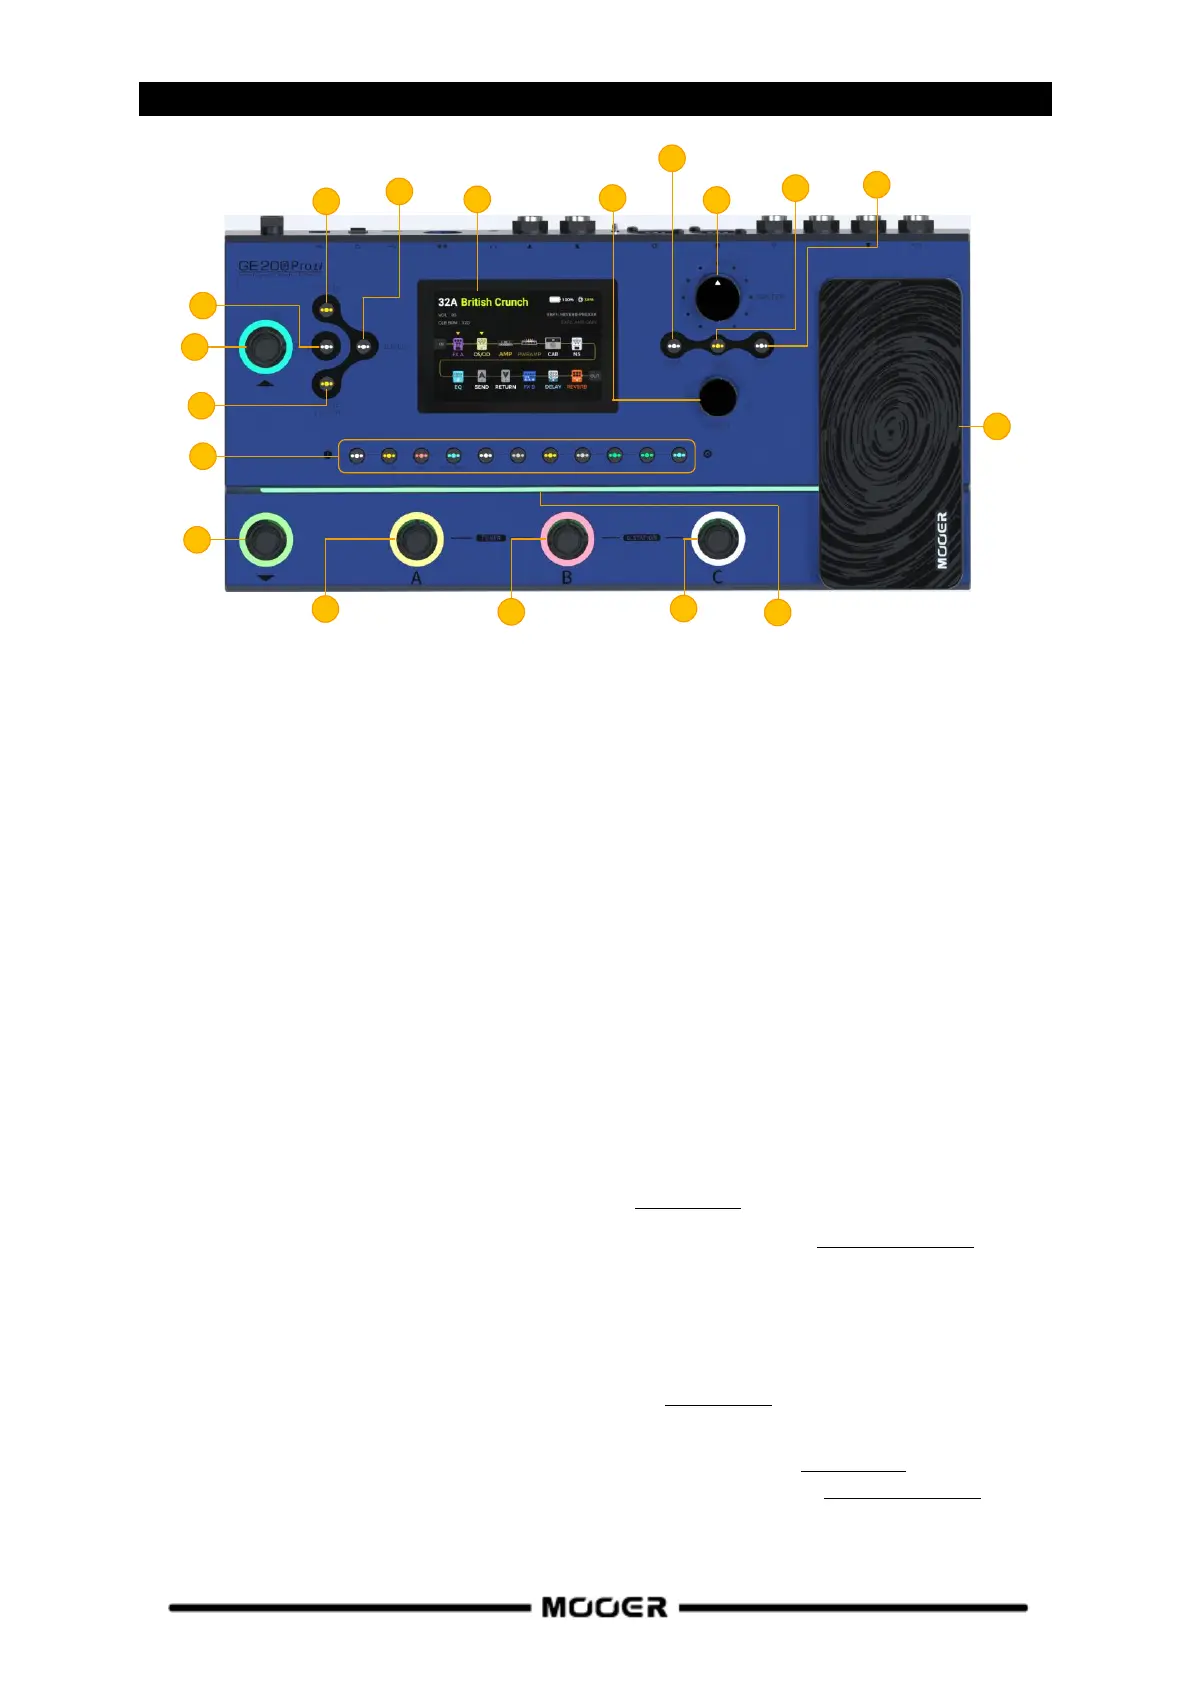
1. 3.5 inch color LCD screen: Status and information about presets and operating modes.
2. Master knob: Rotate to adjust the total output volume.
3. Select knob: Use to select presets, move modules or edit parameters.
Rotate the knob to select items on the screen (highlighted).
Press the knob to confirm the selection.
Rotate the knob to change values.
Press the knob to confirm the changes and return to selection mode.
4. Home button: Press to return to the main user interface or to switch between Preset View and
Effect Chain View.
5. Save button: Press to save your settings in a Preset.
6. EXP button: Press to open the menu for expression pedal settings.
If this button is lit, the on-board EXP1 pedal works as an expression pedal to control module
parameters. If it is not lit, the EXP1 pedal can work as a volume pedal, if so configured in the EXP
menu.
7. SYSTEM button: Press to open the SYSTEM settings menu.
8. GLB-EQ button: Press to open the menu for the global equalizer settings.
9. CTRL button: Press to activate the CTRL Mode (see CTRL MODE).
10. GROOVE STATION button: Press to open the Groove Station Mode (see GROOVE STATION).
11. Effect module LED buttons: The buttons correspond to the effect modules used in the effect
chain. Press a button to open the parameter editing screen for the corresponding module. Press
again to activate / deactivate the module.
12. Bank ▲footswitch: Press to scroll up between preset banks.
This switch is also used for exiting the CTRL mode (see CTRL MODE).
13. Bank ▼footswitch: Press to scroll down between preset banks.
This switch can also be assigned a control function in CTRL mode (see CTRL MODE).
- in Groove Station mode: Looper REC / PLAY / DUB / UNDO / REDO (see GROOVE STATION).
14. Footswitch A:
- in Preset mode: switches to Preset A in the selected bank
 Loading...