English
Moog | Installation instructions series G400
09/2008
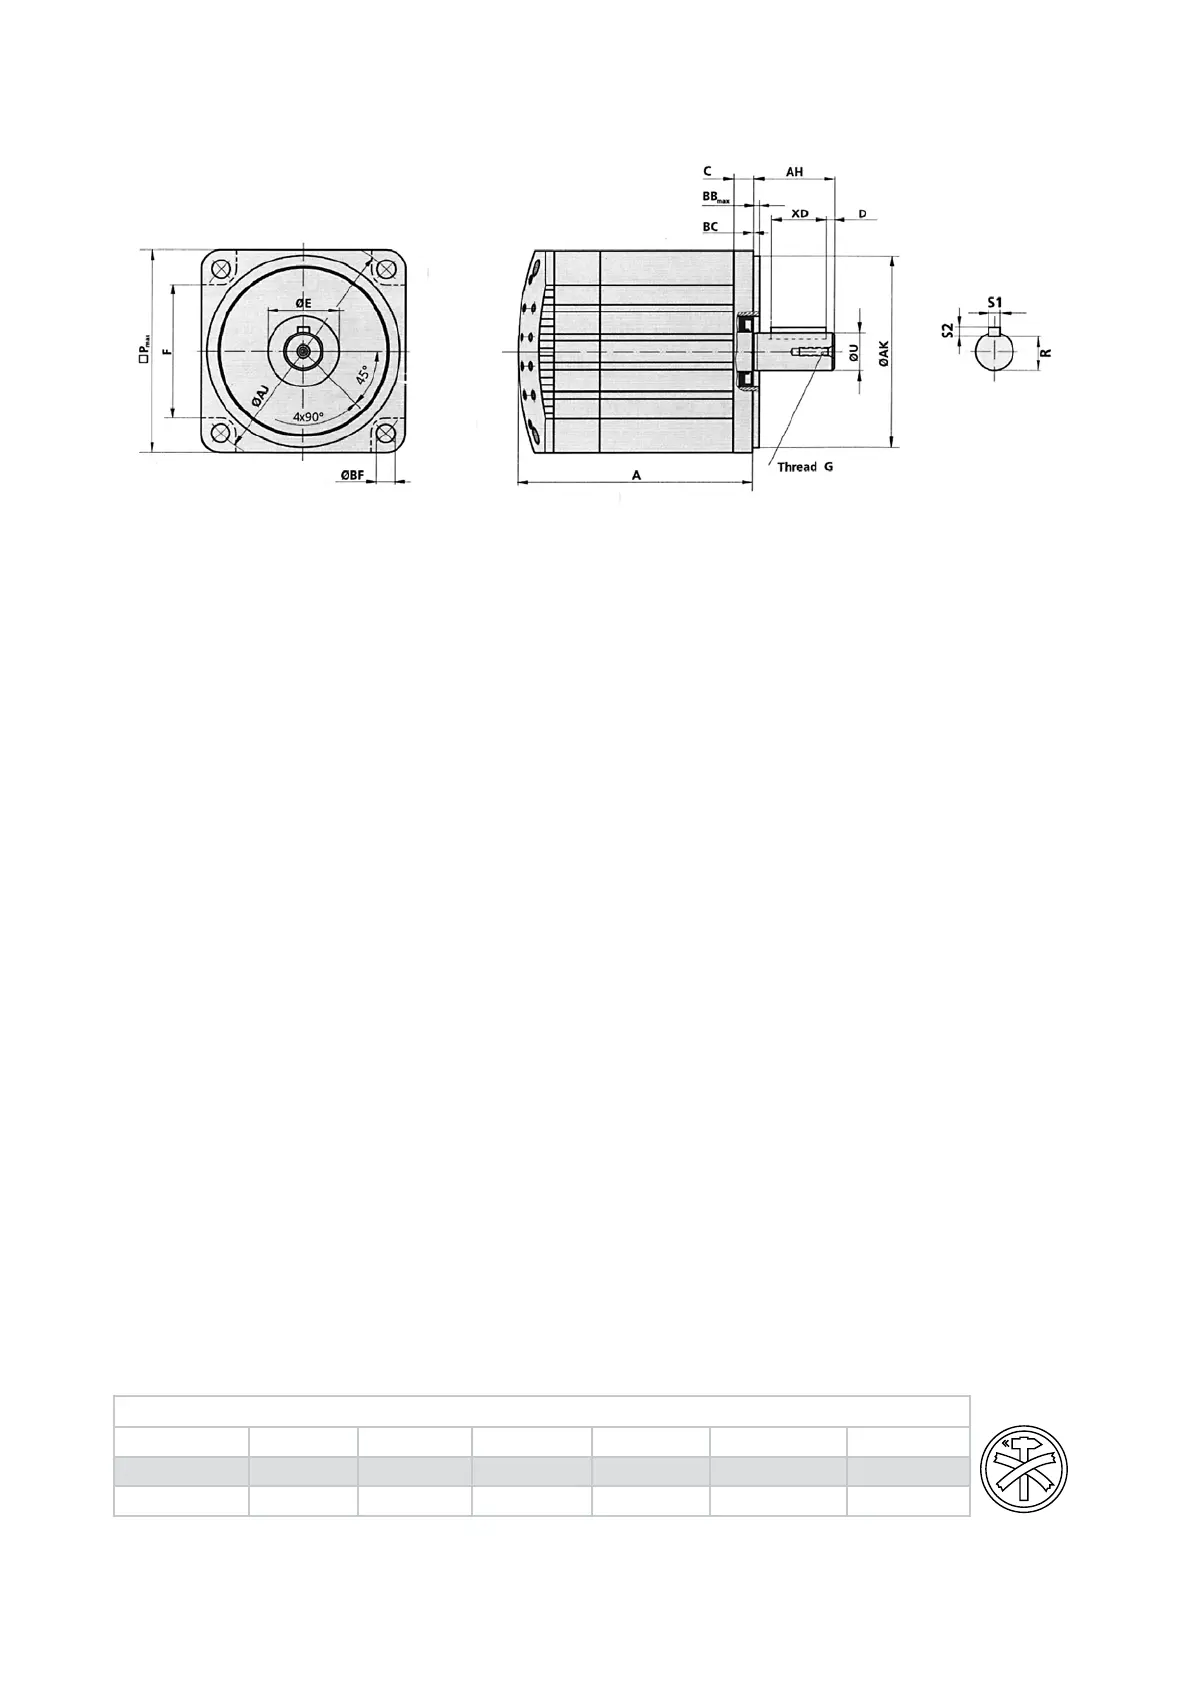
Mounting
MOOG recommends the use of Hex head screws accor-
ding to DIN 912 8.8 (see column H in the table on page 2).
The mounting of MOOG motors, especially size 1, 2 and
3 motors, can be eased considerably by the use of a ball
ended, hex key. With these motor sizes, the length of the
screws used for mounting must not exceed 40 mm.
MOOG motors generate heat during normal operation.
Therefore a good heat sink and sufcient ventilation
should be provided when mounting the motor, i.e. the mo-
tor must be tted to a sufciently large metal machine
part. The motors should be protected against contact
with the hot surfaces if necessary.
The motor shaft should be degreased carefully before
mounting a coupling. When using a degreaser (grease
dissolving substance) prevent it from owing into the
bearing as this will destroy the lifetime lubrication. A
clamp coupling or a shrink connection is recommended to
provide a reliable torque transmission.
Caution: The motor can be damaged during mounting by
excessive axial or radial forces applied to the shaft.
The resulting damage to the bearings can reduce the
motor’s life. Excessive axial force on the rotor shaft can
impair the functionality of an optional brake. This leads
either to reduced braking force or brake failure. There-
fore excessive pressure and shocks on the front end of
the shaft and the back housing must be avoided under all
circumstances. The impulse of any hammer blow always
exceeds the maximum permissible axial and radial forces.
Electric interfaces
For connection of series G400 MOOG motors, it is best
to use the mating connectors and cable characteristics
indicated in the tables on pages 12 and 13. When using
non MOOG components, the cable specications must be
fullled in every way.
Danger: A rotating motor can generate dangerously high
voltages. Always make sure that there are no exposed
cables.
The pin layouts of the connectors are shown in the follow-
ing tables. Connection and disconnection of the motors
must be made with the controller switched off. Simply
disabling the controller is not sufcient. During installa-
tion, special attention should be paid to the diameter of
the protective earth (PE) conductor, which must be sized
according to legal safety rules.
Caution: Small wire diameters lead to an unacceptable
heating in the cable. This results in power loss to the mo-
tor, especially when the cables are long.
We recommend shielding of power and signal cables. The
shielding should be connected to earth at both ends.
What to do if repairs are required
If a repair of a MOOG motor should prove necessary, all
parts such as gears, toothed wheels, pinions etc. not t-
ted by MOOG, should be removed because MOOG cannot
guarantee correct disassembly. Grease and dirt on the
front ange should also be removed. Moog would appre-
ciate a detailed failure or breakdown report attached to
the delivery paperwork. ”For repair” should be clearly
stated on the delivery note.
3
Maximum permissible axial and radial loads for MOOG motors during installation
Type G-1 G-2 G-3 G-4 G-5 G-6
Axial load*
75N 150N 150N 300N 400N 500N
Radial load*
300N 500N 500N 1000N 1600N 2000N
*: During installation. Less load is allowed when the motor is rotating, s. catalogue.
 Loading...