10
Rev. 1.0
11/28/2017
STF-D/IP Hardware Manual
400-820-9661
Option 1: Connect a Drive to Your Local Area Network
If you have a spare port on a switch or router and if you are able to set your drive to an IP address
that is compatible with your network, and not used by anything else, this is a simple way to get
connected. This technique also allows you to connect multiple drives to your PC. If you are on a
corporate network, please check with your system a
dministrator before connecting anything new
to the network. He or she should be able assign you a suitable address and help you get going.
If you are not sure which addresses are already used on your network, you can
find out using
“
Angry IP scanner
”
, which can be downloaded free from http://www.angryip.org/w/Download.
But be careful: an address might appear to be unused because a computer or other
device is
currently turned of
f. And many networks use dynamic addressing where a DHCP server assigns
addresses
“
on demand
”
. The address you choose for your drive might get assigned to
something else by the DHCP server at another time.
Once you
’
ve chosen an appropriate IP address for your drive, set the rotary switch according the
address table above. If none of the default addresses are acceptable
for your network, you can
enter a new table of IP
addresses using Configurator. If your network uses addresses starting with
192.168.0, the most common subnet, you will want to choose an address from switch settings 4
through E. Another common subnet is 192.168.1. If your network uses addresses in this range, the
compatible default selections are 1, 2 and 3.
If your PC address is not in one of the a
bove private subnets, you will have to change your subnet
mask to 255.255.0.0 in order to talk to your drive.
To change your subnet mask:
1. On Windows XP, right click on
“
My Network Places
”
and select properties. On Windows 7,
click Computer.
Scroll down the left pane until you see
“
Network
”
. Right click and select properties. Select
“
Change adapter settings
”
2. You should see an icon for your network interface card (NIC). Right click and select properties.
3.
Scroll down until you see
“
Internet Properties (TCP/IP)
”
. Select this item and click the
Properties button. On Windows 7 and Vista, look for
“
(TCP/IPv4)
”
4. If the option
“
Obtain an IP address automatically
”
is selected, your PC is getting an IP
address and a subnet mask from the DHCP server. Please cancel this dialog and proceed to
the next section of this manual:
“
Using DHCP
”
.
5.
If the option
“
Use the following IP address
”
is selected, life is good. Change the subnet
mask to
“
255.255.0.0
”
and click OK.
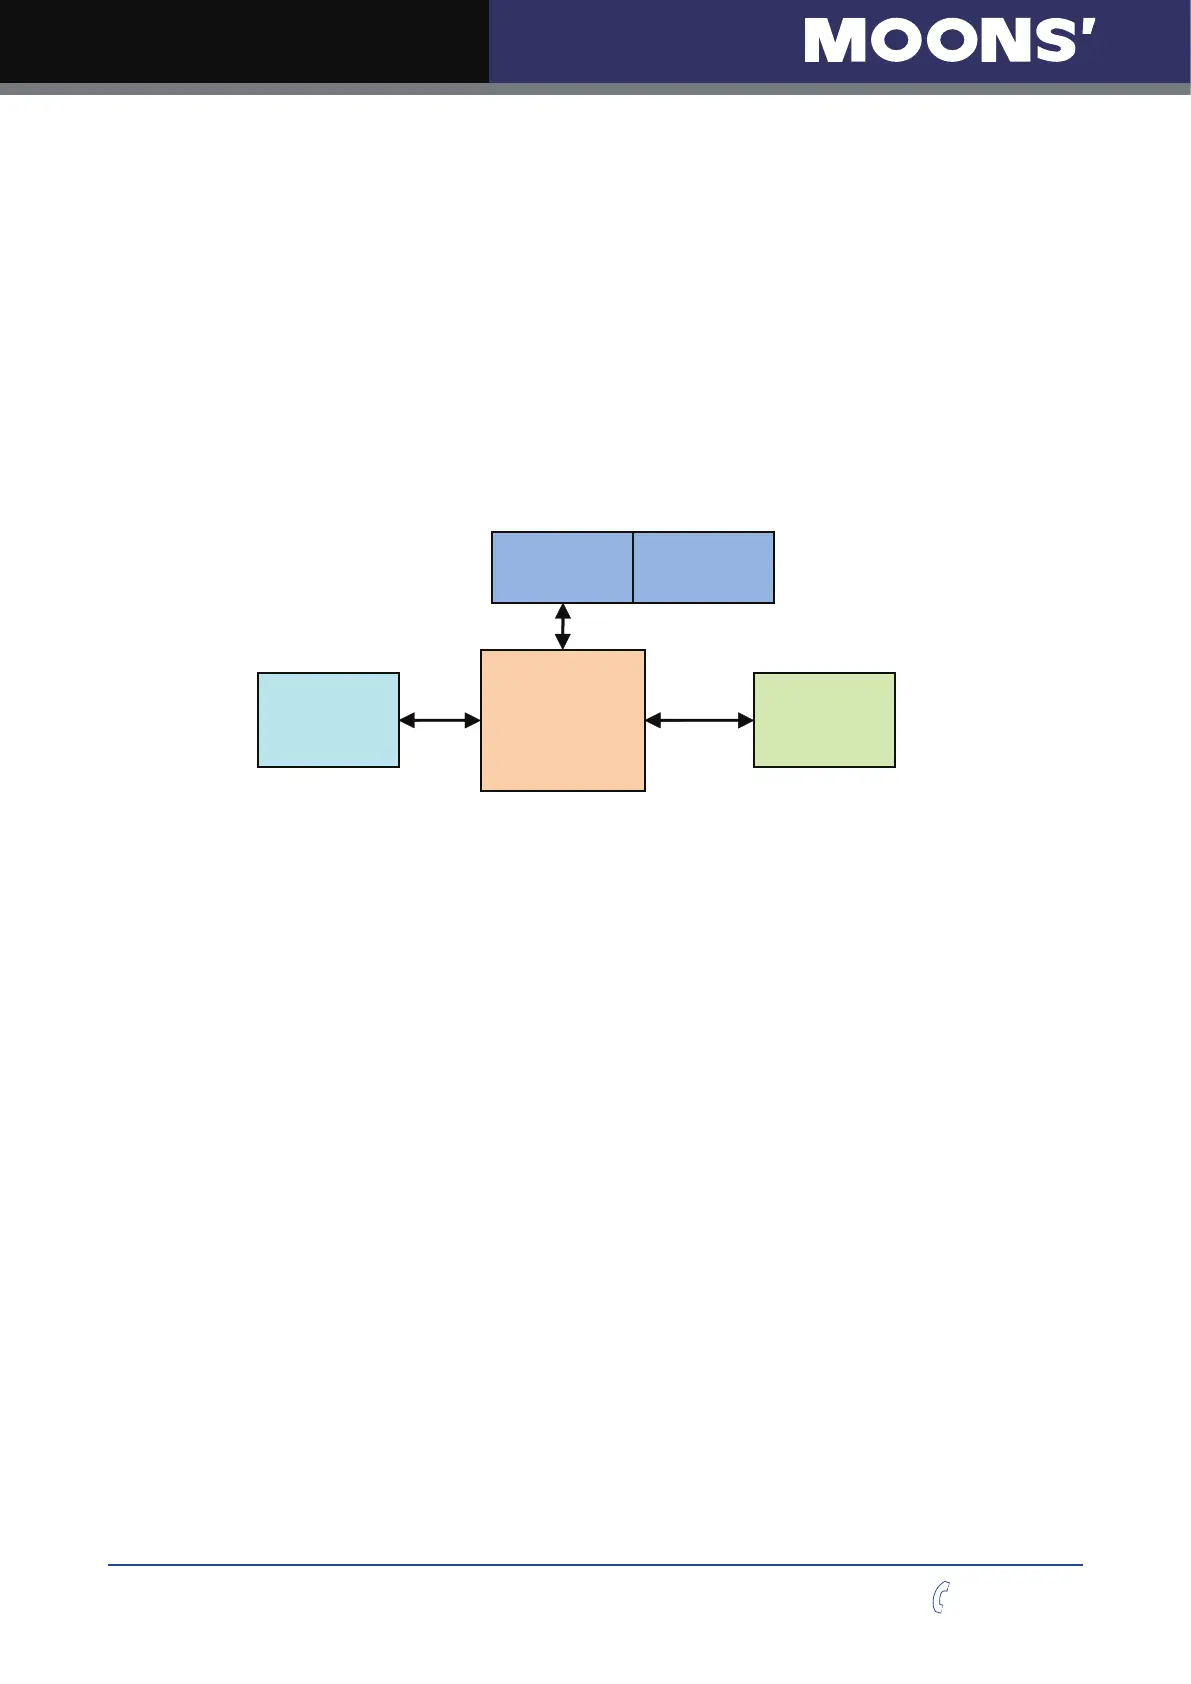
PC NIC
SWITCH
or
RETUOR
LAN DRIVE