EasyManuals Logo

MrCool Universal Series Service Manual

MrCool Universal Series
74 pages
To Next Page IconTo Next Page
To Previous Page IconTo Previous Page
Page #65 background imageLoading...
Page #65 background image
mrcool.com 64
64
MAINTENANCE
4
Assembly & Disassembly of Supply Blower Motor
Note: Ensure the unit is o and the power supply is cut o before removing the motor.
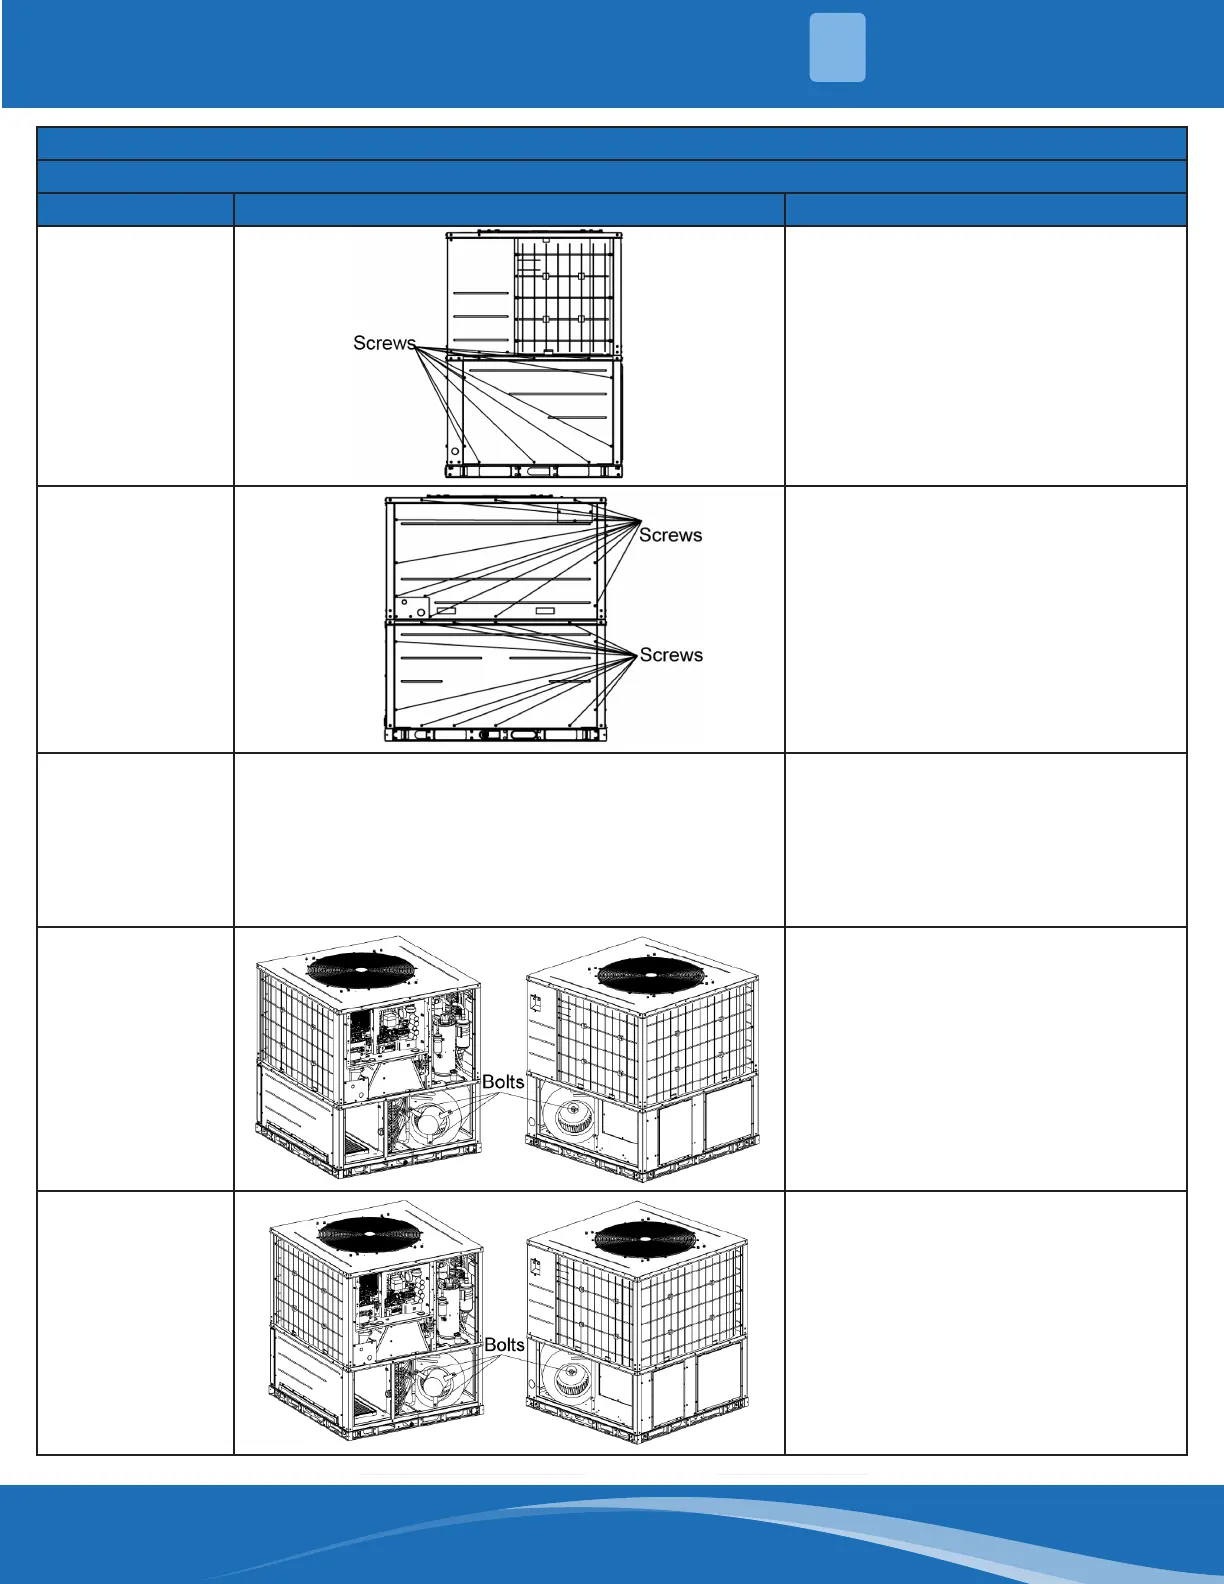
Step Illustration Handling Instruction
1. Remove the
side plate
Remove the screws attaching the
side plate (indicated by arrows) to
remove it.
2. Remove the
front plate.
Remove the screws attaching the
cover plate (indicated by arrows)
to remove it.
3. Disconnect all
connection lines.
Disconnect all connection lines
between motor and elements in
electrical box.
Note: Refer to the schematic
diagram on the electrical box for
disconnection of connection lines of
supply blower motor.
4. Remove the
motor.
Remove the nuts (indicated by
arrows) to loosen the connection
between the motor and bracket.
5. Re-Install the
motor.
Re-assemble the repaired or replaced
motor. Installation direction is the
same as that of disassembly. Then,
screw down the holding bolts with a
wrench.

Other manuals for MrCool Universal Series

Questions and Answers:

Question and Answer IconNeed help?

Do you have a question about the MrCool Universal Series and is the answer not in the manual?

MrCool Universal Series Specifications

General IconGeneral
TypeInverter
BrandMrCool
SeriesUniversal Series
RefrigerantR410A
Phase1
Heating CapacityVaries by model
Cooling CapacityVaries by model
CompatibilityUniversal
HSPF Rating10
Voltage208/230V
Operating Temperature (Cooling)Varies by model
Operating Temperature (Heating)Varies by model
Indoor Noise Level (dB)Varies by model
Outdoor Noise Level (dB)Varies by model
Indoor Unit Dimensions (H x W x D)Varies by model
Outdoor Unit Dimensions (H x W x D)Varies by model
Indoor Unit WeightVaries by model
Warranty5 years

Related product manuals