EasyManuals Logo

MrCool Universal Series Service Manual

MrCool Universal Series
74 pages
To Next Page IconTo Next Page
To Previous Page IconTo Previous Page
Page #66 background imageLoading...
Page #66 background image
mrcool.com65
MAINTENANCE
4
Assembly & Disassembly of Supply Blower Motor
Note: Ensure the unit is o and the power supply is cut o before removing the motor.
Step Illustration Handling Instruction
6. Re-connect the
power cord.
Reconnect the power cord
according to the wiring diagram on
the electrical box.
Note: After connection, arrange
leading wires and rex them with
bundles at original locations. No cable
should touch the pipe or moving parts,
such as the fan. Close the cover plate
of the electrical box hermetically.
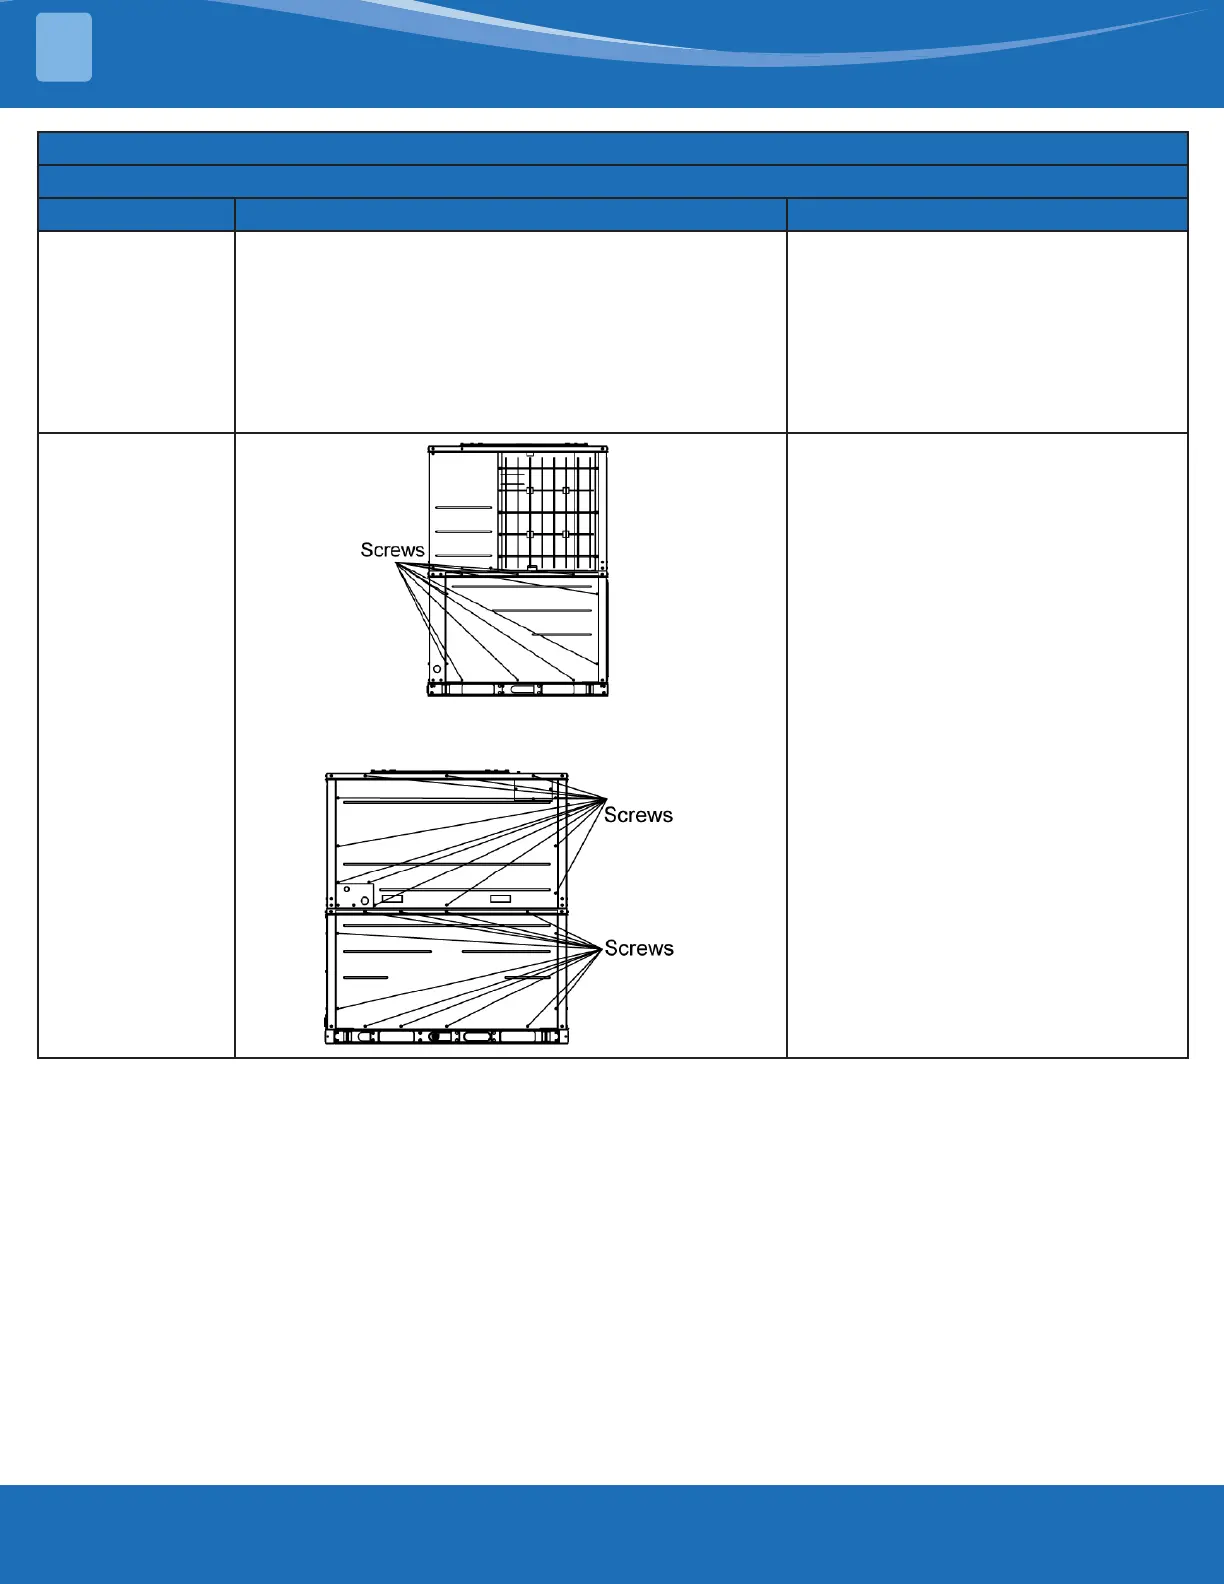
7. Reinstall the
side and front
plates.
Put pulleys onto shaft, then the
taper sleeve. Then, cover the
pulleys onto the taper sleeve.
Screw down the 2 bolts clockwise.
Note: The sleeve has taper, so the
pulleys must be installed rst. Ensure
the coplanarity of the pulleys and
adjust the tightness level of the belt.
Note: Above diagrams may be dierent from actual model.

Other manuals for MrCool Universal Series

Questions and Answers:

Question and Answer IconNeed help?

Do you have a question about the MrCool Universal Series and is the answer not in the manual?

MrCool Universal Series Specifications

General IconGeneral
TypeInverter
BrandMrCool
SeriesUniversal Series
RefrigerantR410A
Phase1
Heating CapacityVaries by model
Cooling CapacityVaries by model
CompatibilityUniversal
HSPF Rating10
Voltage208/230V
Operating Temperature (Cooling)Varies by model
Operating Temperature (Heating)Varies by model
Indoor Noise Level (dB)Varies by model
Outdoor Noise Level (dB)Varies by model
Indoor Unit Dimensions (H x W x D)Varies by model
Outdoor Unit Dimensions (H x W x D)Varies by model
Indoor Unit WeightVaries by model
Warranty5 years

Related product manuals