Setting Parameters
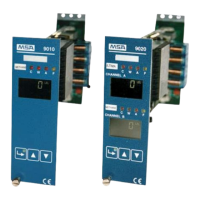
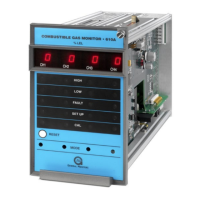
Control Unit Models 9010 LCD and 9020 LCD
23
GB
6 Setting Parameters
As a rule, the Control Units are delivered already configured and calibrated by MSA based on the
specifications provided by the customer.
The CALIBRATION DATA SHEET, in which the main configuration data are recorded, accompa-
nies the Instruction Manual delivered with the Control Unit.
Modifications can be made via the various steps in each of the Access Codes recorded below.
To identify the various steps contained in each Access Code, consult the INDEX in Section 6.
6.1 Use of the buttons for access to the codes
Access to the Access Codes 1, 3, 5, 123 and 223 is accomplished by holding down the
ENTER button with the board energised for approximately 3 seconds until the green LED incor-
porated in the button itself flashes.
For all of the other Codes, for the purpose of ensuring greater protection against unwanted ac-
cess, the button needs to already be pressed before the Control Unit is turned on or via
Access Code 123 if the Control Unit is already turned on.
Mod. 9010 - Example for use of the buttons for access to the Access Codes
The Control Unit automatically returns step by step to regular operation if the buttons are
not pushed within two minutes. [TIME-OUT function]
The TIME-OUT function may possibly be disabled [see item Section 6.3]
Access Code 1 Calibration operations
Access Code 2 Settings for particular operating conditions
Access Code 3 Simulation and functionality operations
Access Code 4 Configuration operations
Access Code 7 Setting the address of the peripherals
Access Code 52 Initialisation operations
Access Code 53 Default settings
Access Code 123 Acceptance of the following Access Codes protected without
de-energisation: 2, 4, 7, 52, 53
Access Code 223 Operations for the setting, the use and the modification of the password
a. Hold down the ENTER button until the incorporated green LED flashes.
b. Next, press the UP button one or more times until the desired number related to the
Access Code is selected.
c. Confirm the selection by pressing the ENTER only once.
d. P1 appears.
e. Press the ENTER only once if you want to enter into the P1 step or press the UP button one
or more times until the desired step is selected.
f. Press the ENTER button only once to confirm the selection.
g. Press the UP or DOWN buttons to modify the indication in the display if necessary.
h. Once the modification has occurred, confirm the new indication by pressing the
ENTER button only once.
i. In order to exit any Access Code, press the ENTER button two times in a row within
two seconds. Depending on the position within an Access Code, it may be necessary to re-
peat the manoeuvre another two or three times.