8
FIRST USE AND SETUP PREPARATION
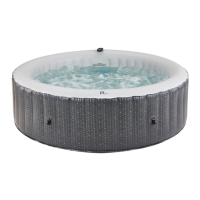
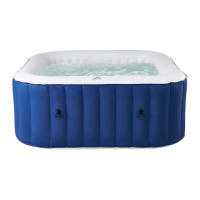
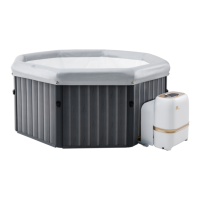
The spa can be installed indoors or outdoors in around 15 minutes by 2 persons. For household use only.
The spa must be set up on a flat, smooth, and supporting surface that can bear the maximum load of the filled spa with the
listed maximum number of occupants. Check with a qualified contractor or structural engineer to verify the requirement.
Make sure that the area is free of sharp objects under or around the spa. The uneven or unsound surface can damage the
spa and void your warranty. Level the surface before filling the spa with water.
Provide an adequate drainage system around the spa to deal with overflow water and splashes.
Provide convenient, local water use regulations for refill methods and adjust parameters as required by the water treatment
department. Make sure there is enough space around the spa to allow full use of the equipment for maintenance and/or
service.
Consider locating the spa with as little noise disturbance as possible.
●
●
●
●
●
●
●
●
●
●
Site preparation and requirements
Humidity is a natural side effect of indoor spa installation. The room must be properly ventilated to allow moisture to escape.
Install a ventilating system to prevent excess condensation and moisture in the room.
Ensure that the spa can be removed from the building without destroying any part of the built structure.
Consider any local regulations on these topics.
Consider not installing the spa on carpet or other floor materials that promote or harbor moisture and bacteria, or that could
be affected by water treatment chemicals used in the spa.
●
●
●
●
Additional requirements for indoor installation
Do not place the hot tub on grass or dirt as this will increase the amount of debris entering the hot tub and can damage the
floor. To ensure a longer life, do not expose the hot tub to direct sunlight.
Do not install or use the spa outdoors at a temperature lower than 39°F (4°C).
Do not use the spa when the water inside the circulation system, pump, or pipework is frozen. Put a heat preservation mat
between the base of the spa and the ground to prevent heat loss from the bottom of the spa and to provide better heat
retention.
Consider local environmental conditions, such as groundwater and the risk of frost.
Additional requirements for outdoor installation
NOTE: Move the entire package to the selected site. Do not drag the spa tub across the ground as this can cause damage and
leakage. Open the carton carefully as this can be used to store the spa over long periods or when not in use.
1. Plug the machine into the mains.
2. The GFCI plug might automatically reseted. If the RESET indicator is not red, press the RESET button.
3. Press the TEST button on the GFCI. The GFCI indicator should shut off. If the GFCI indicator does not turn off, the GFCI is
faulty. Do not use the spa. Contact a qualified electrician to correct the fault.
4. Press the RESET button on the GFCI again. The indicator should turn red. If yes, the spa is ready for use.
GFCI Testing
Risk of electric shock: This product is provided with a GFCI located at the end of the power cord. The GFCI must be tested
before each use. Do not use the spa if the GFCI does not function properly.
Disconnect the power cord until the fault has been identified and corrected. Contact a licensed electrician to correct the fault.
There are no serviceable parts inside the GFCI. Opening the GFCI will void the warranty.
Spa Control Unit Connected External Equipotential Bonding Conductors
A qualified electrician should wire the spa control unit to the household equipotential terminal using a minimum 1.5mm² solid
copper conductor
! WARNING
3.
TEST
RESET
TEST
2.
RESET
RESET
TEST
4.
Indicator area
RESET
TEST
1.
Do not use
faulty sockets
or plug
boards.