STARTER AND CHARGING SYSTEMS
45
NOTE: The rolled end of the pawl fits in the
recess in the starter pulley. The hooked end
engages the starter cup. The roll faces inward
and the hook faces outward.
NOTE: The extrusions on the pressure plate
should fall inside of the pawls as the starter is
assembled.
NOTE: Drag on the pressure plate, from the fric-
tion between the compression spring and the
head of the shoulder screw causes these extru
-
sions to force the pawls outward, engaging the
starter cup.
9. Apply a small amount of thread locking com-
pound such as Loctite 242 (blue) to the threads
of the shoulder screw, and install the screw.
Tighten it to a torque of 71 - 89 in-lb. (8 - 10 Nm).
10. Install the starter rope by following the steps
described in the previous section of this chapter.
11. Install the starter and tighten the starter nuts to a
torque of 53 - 71 in-lbs (6-8 Nm).
Electric starter
The electric starter is only available on the snow
engine. It is powered by an extension cord that is
plugged into household 120 volt AC current. The
starter and switch assembly are one piece and are not
serviceable.
To replace the starter assembly:
1. Disconnect the extension cord.
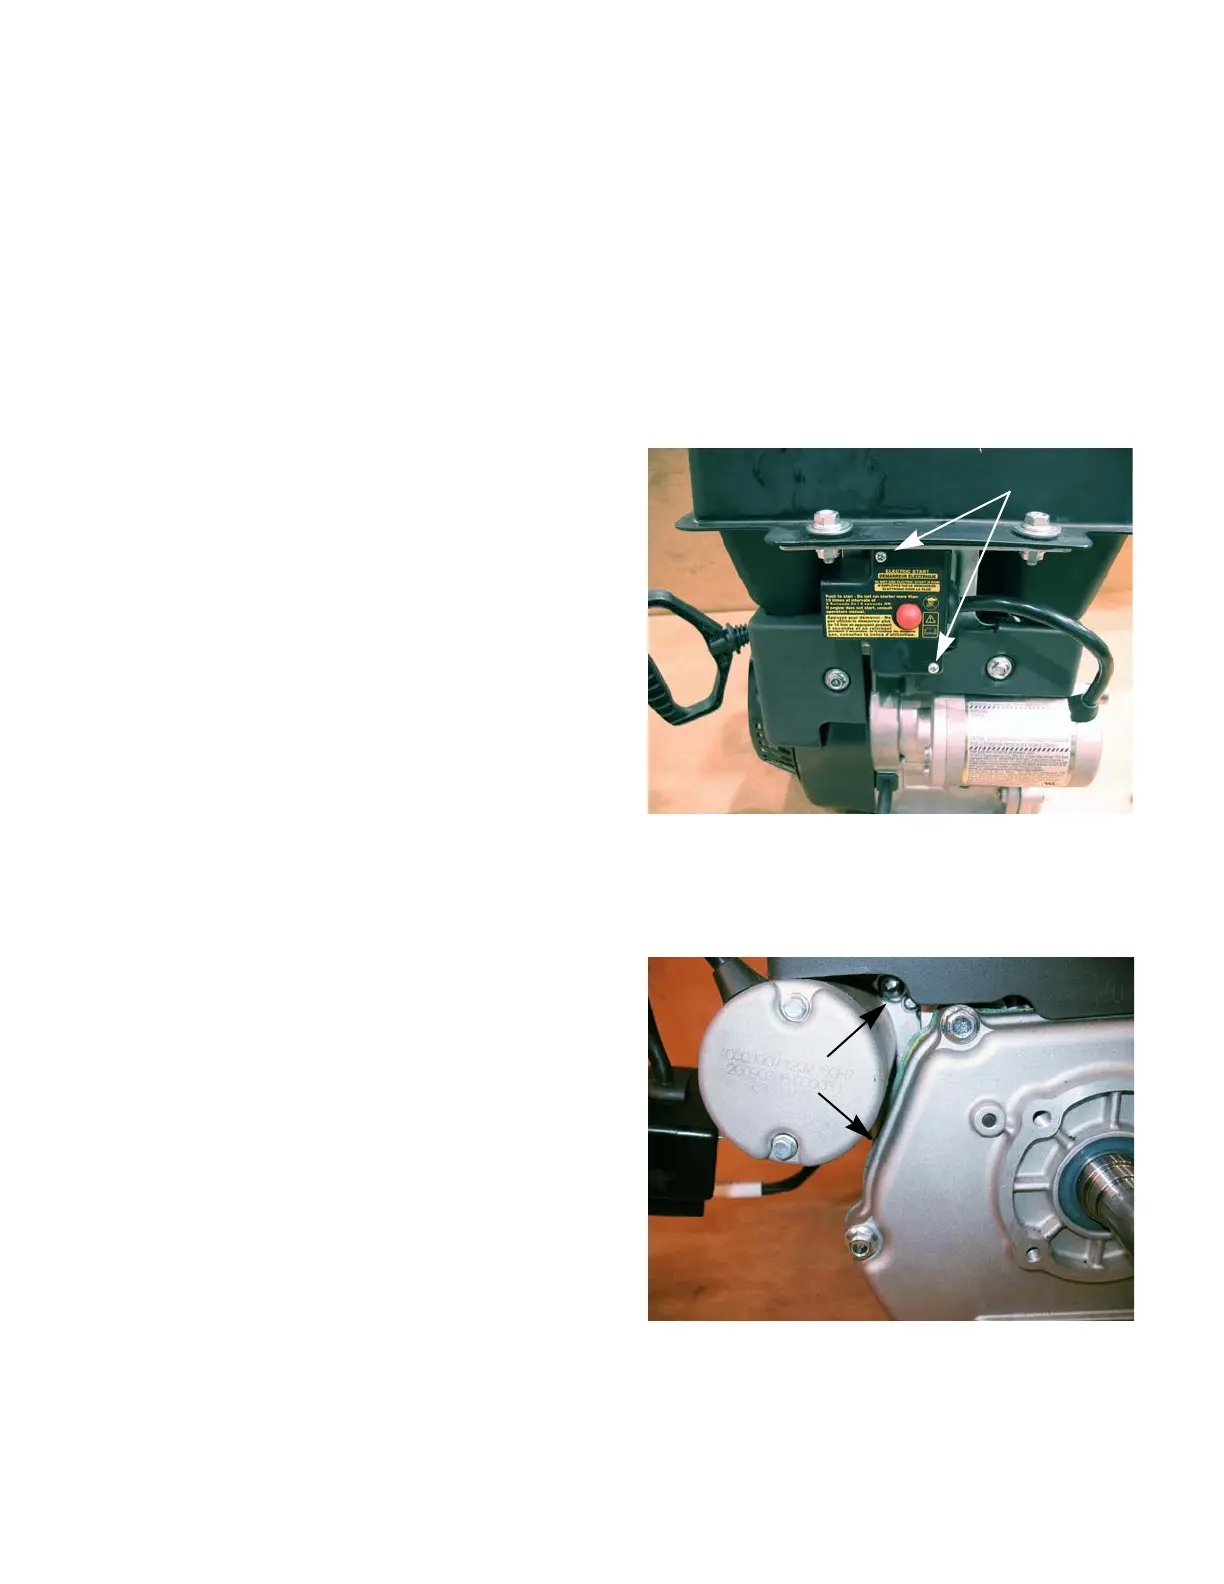
2. Remove the two screws that secures the switch
box to the engine.
See Figure 6.11.
3. Remove the starter by removing the two screws
that hold it to the engine block using a 10mm
socket and a long extension.
See Figure 6.12.
Figure 6.11
Remove these screws
Figure 6.12
Remove these
screws
 Loading...