33
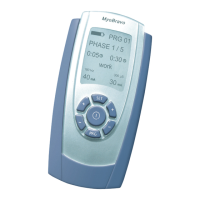
Display and Operating Elements
„ON/OFF”: By pressing the button once, the device will either be switched on or off.
„+/- buttons“: This button adjusts the intensity for the channels A and B. The device also has
two independently controllable output channels A and B. When pressing the respective arrow
buttons the intensity will either be increased or decreased in steps of 1 mA. 60 seconds after the
last intensity regulation, a further increase may not be carried out due to an electronic barrier.
Pressing the „+” button three times, will release the lock and the intensity can be increased
again. A reduction of the intensity is possible at any time.
Whilst conguring the programs 13 – 15 one switches between the programmable parameters
by pressing the left „+/-” button (channel A), and through pressing the right „+/-” button (chan-
nel B) the desired value/data for respective parameter can be set. In this way, the application
time, the stimulation, the pause, rising pulse and falling pulse, as well as synchronous or asyn-
chronous stimulation can be selected.
„PRG”: With this button the preset programs 01–12 or the three free programmable programs
13–15 can be selected for individual use.
Pressing the PRG-button once at any time during a running program will reduce the mA on both
channels to zero and pause the clock display with the actual treatment time. The clock continues
to show the time of further treatment but it is frozen with the “:” symbol no longer ashing.
In addition, this button stores the current adjustment in the programming mode and ends it.
Then the device returns to the home screen of the selected program.
„SET”: With the SET-button you can select the different program phases. With each press of
this button, the phase in progress is terminated and the next program phase is started. This
applies to either the running of the programs 01-12 and also to the programming and the
sequence of programs 13–15. Programs with one single phase will be nished by pressing the
SET-button.
If you keep the SET-button pressed for 5 seconds whilst being in programs 13–15, the symbol
of the clock is ashing and you will be able to start programming of your individual settings.
Pressing SET once again for 10 seconds allows to setup the RTC.
Holding the „SET” button for 5 seconds while the statistics are displayed, will display „dEL”.
Holding „SET” a second time for 5 seconds will delete the statistics, set all custom programs to
default values and show the RTC setup screen.