33
Axles Cont.
The following images show an XL with: optional Grease Zerk Relocation Convenience Kit and optional Wheel
Extensions. It is fully assembled in all images.
1. See Removal under Chains to remove the respected chain(s).
2. See Raising the Mudd-Ox under Jack Points to raise the vehicle using the wooden block method.
3. See Wheel Removal under Tires/Wheels to remove the wheel and wheel extension if installed.
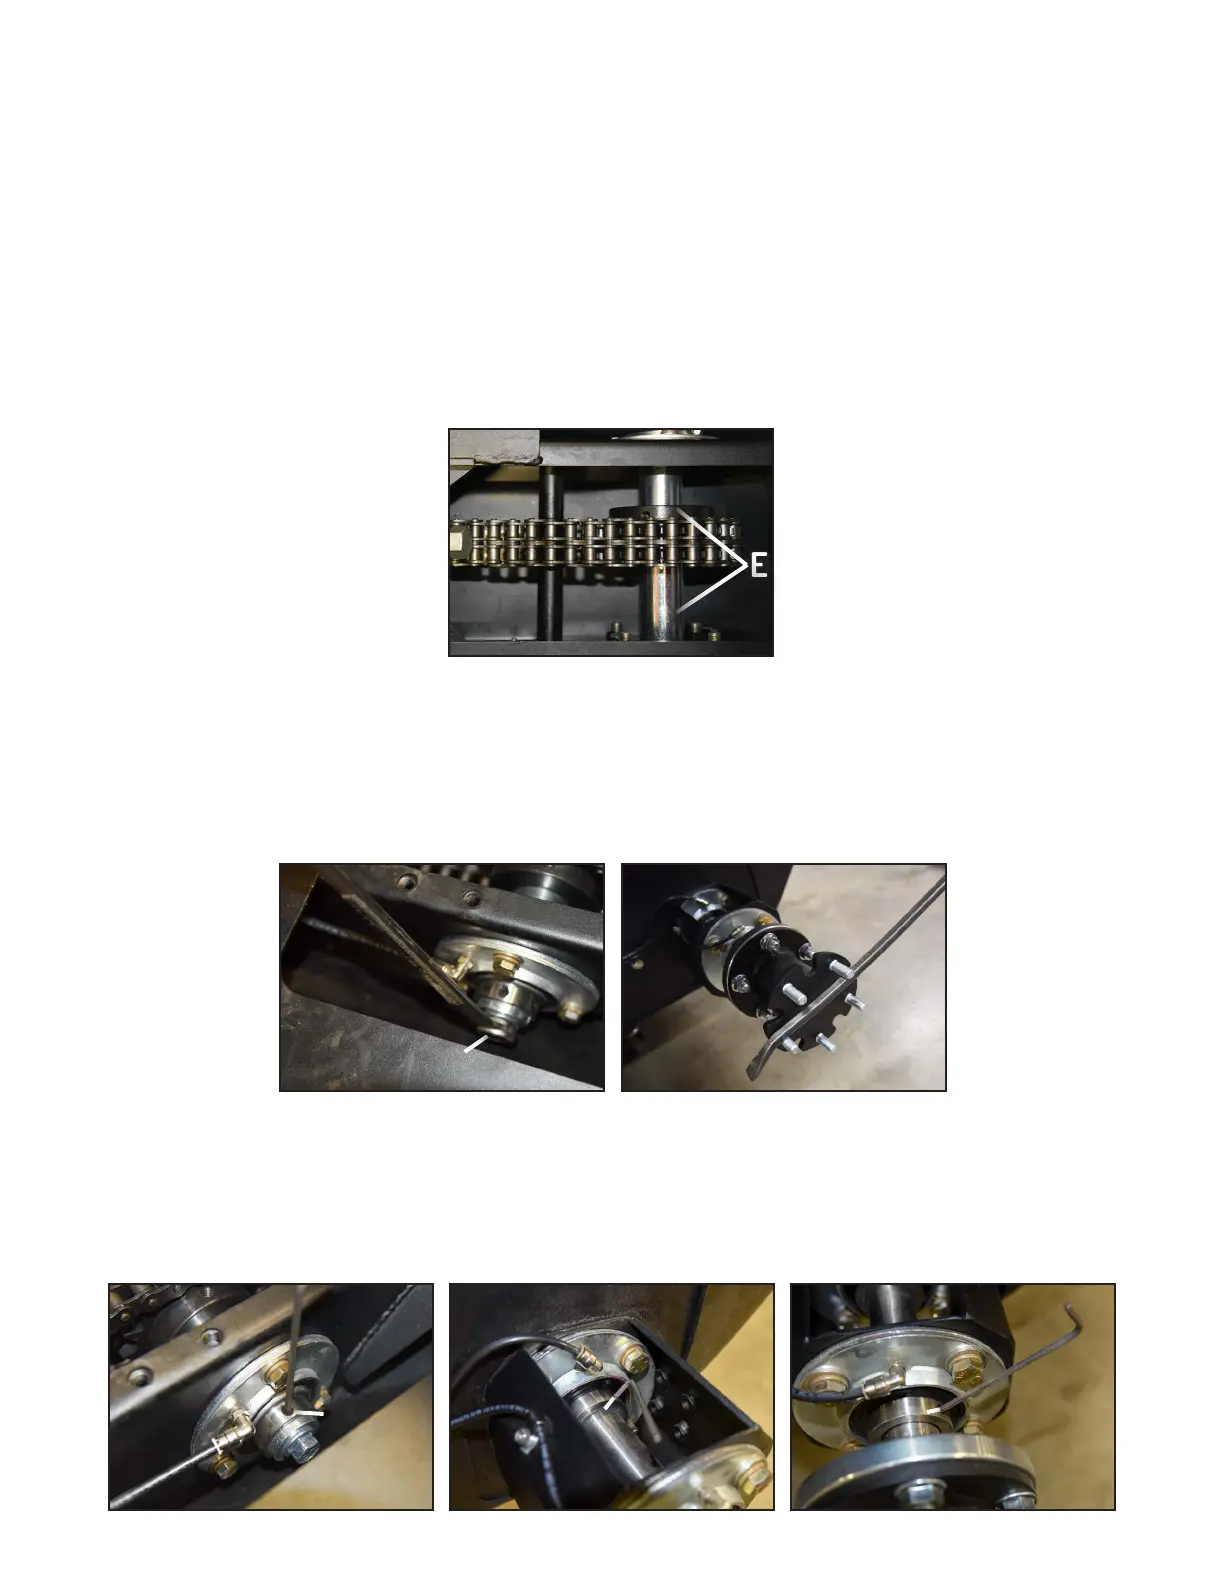
4. Each axle on the Mudd-Ox has spacers that keep the sprockets aligned (E in Figure-3). There may also be small
shims alongside the spacers. Spacer lengths and shims vary throughout the vehicle. It’s best to document this
setup for reference during reinstallation. Recommended options are: labeling each one, measuring and writing
down, or even taking detailed photos.
6. For each bearing on the assembly, there are (2) set screws each that must be loosened with a 5/32” Allen
wrench. (4-6) in total depending on installed options (G in Figure-6, 7, 8).
Figure-5
Pry Bar
Figure-4
Axle End Bolt
Figure-7
Outer Bearing
Figure-6
Inner Bearing
Figure-8
Optional Bearing Extension
FF
GG
GG
GG
5. Now remove the bolt at the end of the axle, which is inside the Mudd-Ox body. One mechanic should hold the
3/4” wrench on this bolt (F in Figure-4), while another spins the axle counter-clockwise to loosen it. Note: This
will take significant force. Place a pry bar between the lug studs and use it as a lever (Figure-5).
Figure-3
Axle Spacing
EE