72
Parking Brake Cont.
Adjustment Part 2: Cable
It may be necessary to adjust the parking brake cables themselves to achieve 5-6 clicks.
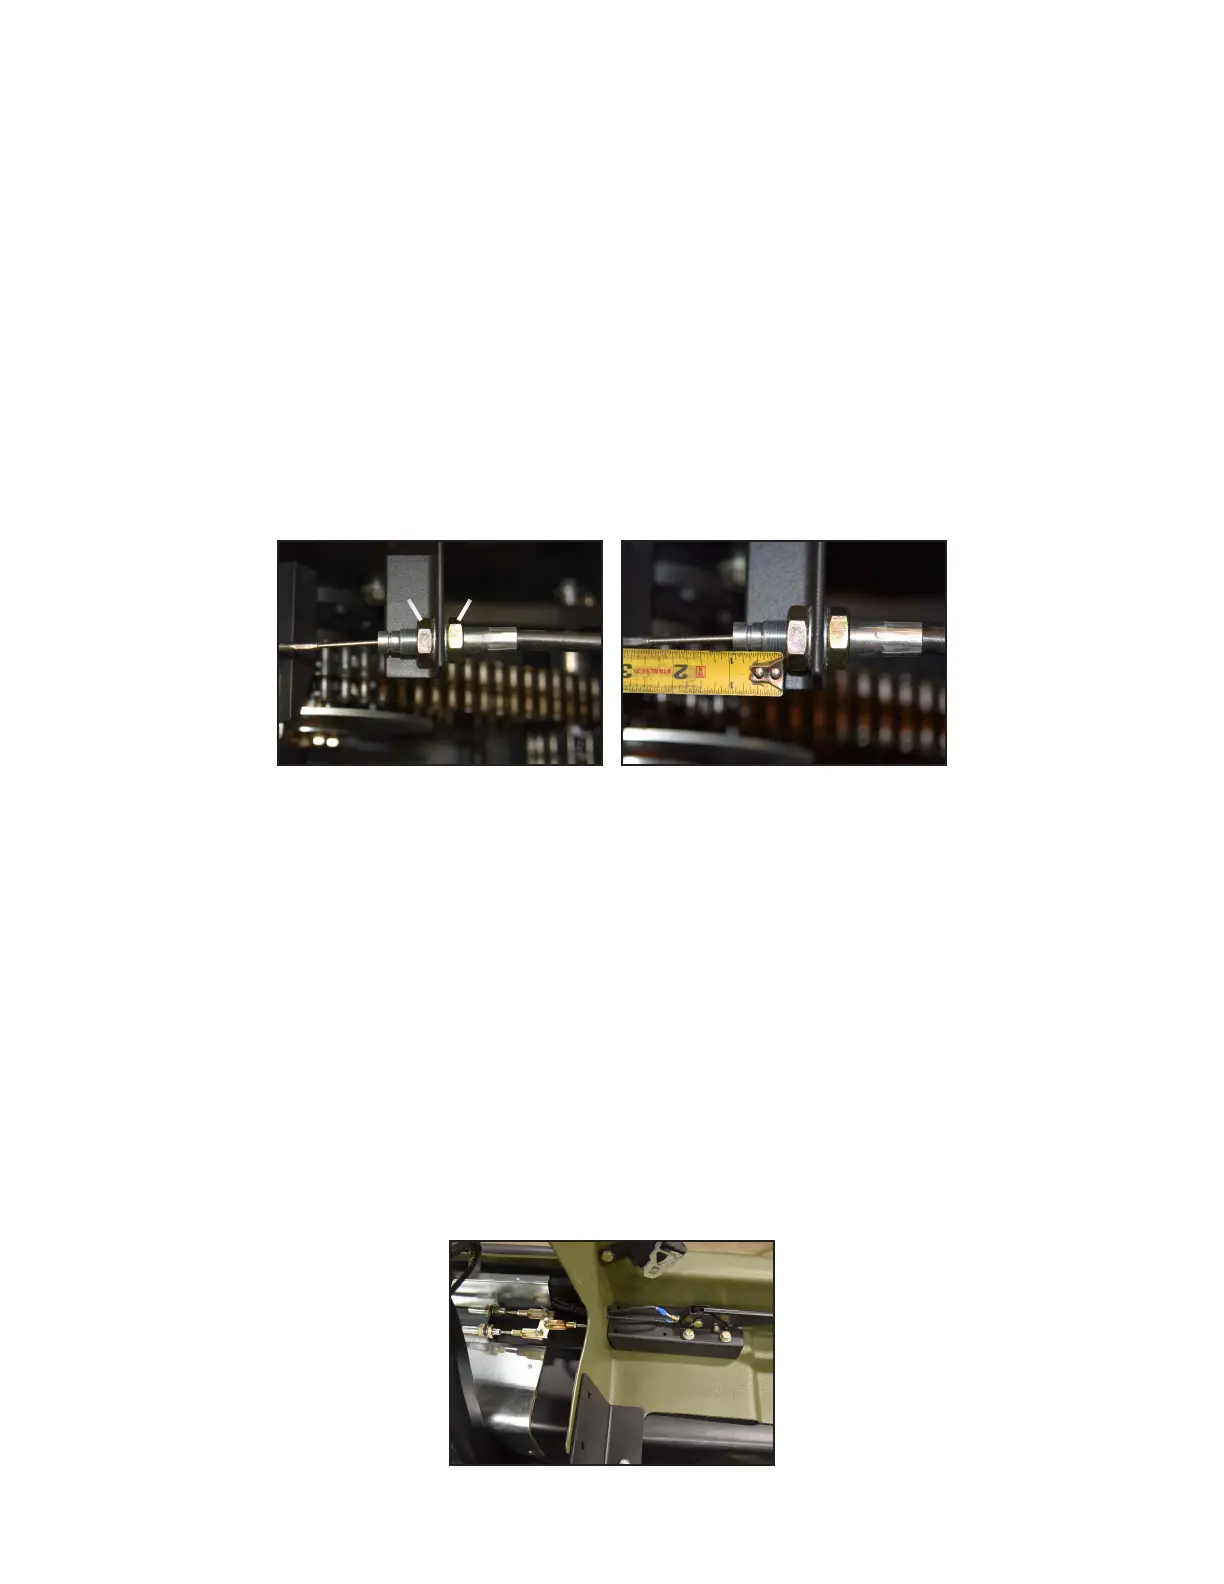
1. Use a 15/16” wrench to loosen jam nut “E” in Figure-9.
2. Use a 15/16” wrench to tighten jam nut “F” in Figure-9. This will pull the cable towards the rear of the Mudd-Ox.
Tighten approximately 1 full turn.
3. Reverse step #1 to tighten jam nut “E” in Figure-9.
4. Match the adjustment on the other brake cable. It’s best to use a tape measure (Figure-10).
5. Pull on the parking brake and count the number of clicks. Continue to adjust as necessary.
A. More than 5-6 clicks: Continue to adjust the cables towards the rear of the Mudd-Ox.
B. Less than 5-6 clicks: Adjust the cables towards the front of the Mudd-Ox.
6. Repeat steps #3-5 for the right side. Note: Adjust the same amount as the left side. It’s best to use a tape mea-
sure on the threads (Figure-10) to verify both sides are adjusted evenly.
Figure-9
Adjustment
Figure-11
EE FF
Figure-10
Match the Adjustment
Cable Replacement Part 1: Removal
If the calipers and pads are in good health (see Inspection) and the brake cables cannot be adjusted any further,
they need replaced. For best visual purposes, these steps show removing the right side cable at the parking brake
lever, and left side cable on the caliper system.
1. The front lower operator seat should still be removed from Adjustment Steps with the Mudd-Ox on flat ground.
See Accessing the Mudd-Ox to remove the rear lower operator seats and engine cover.
2. Locate the rear most ends of the brake cables. Each one is connected to the parking brake lever on the left in-
side engine compartment (Figure-8).
Note: Figures-11 to 22 are taken from a Mudd-Ox Vengeance for best visual purposes. An XL will have radiators
directly next to the parking brake mechanism.
Parking Brake Mechanism