73
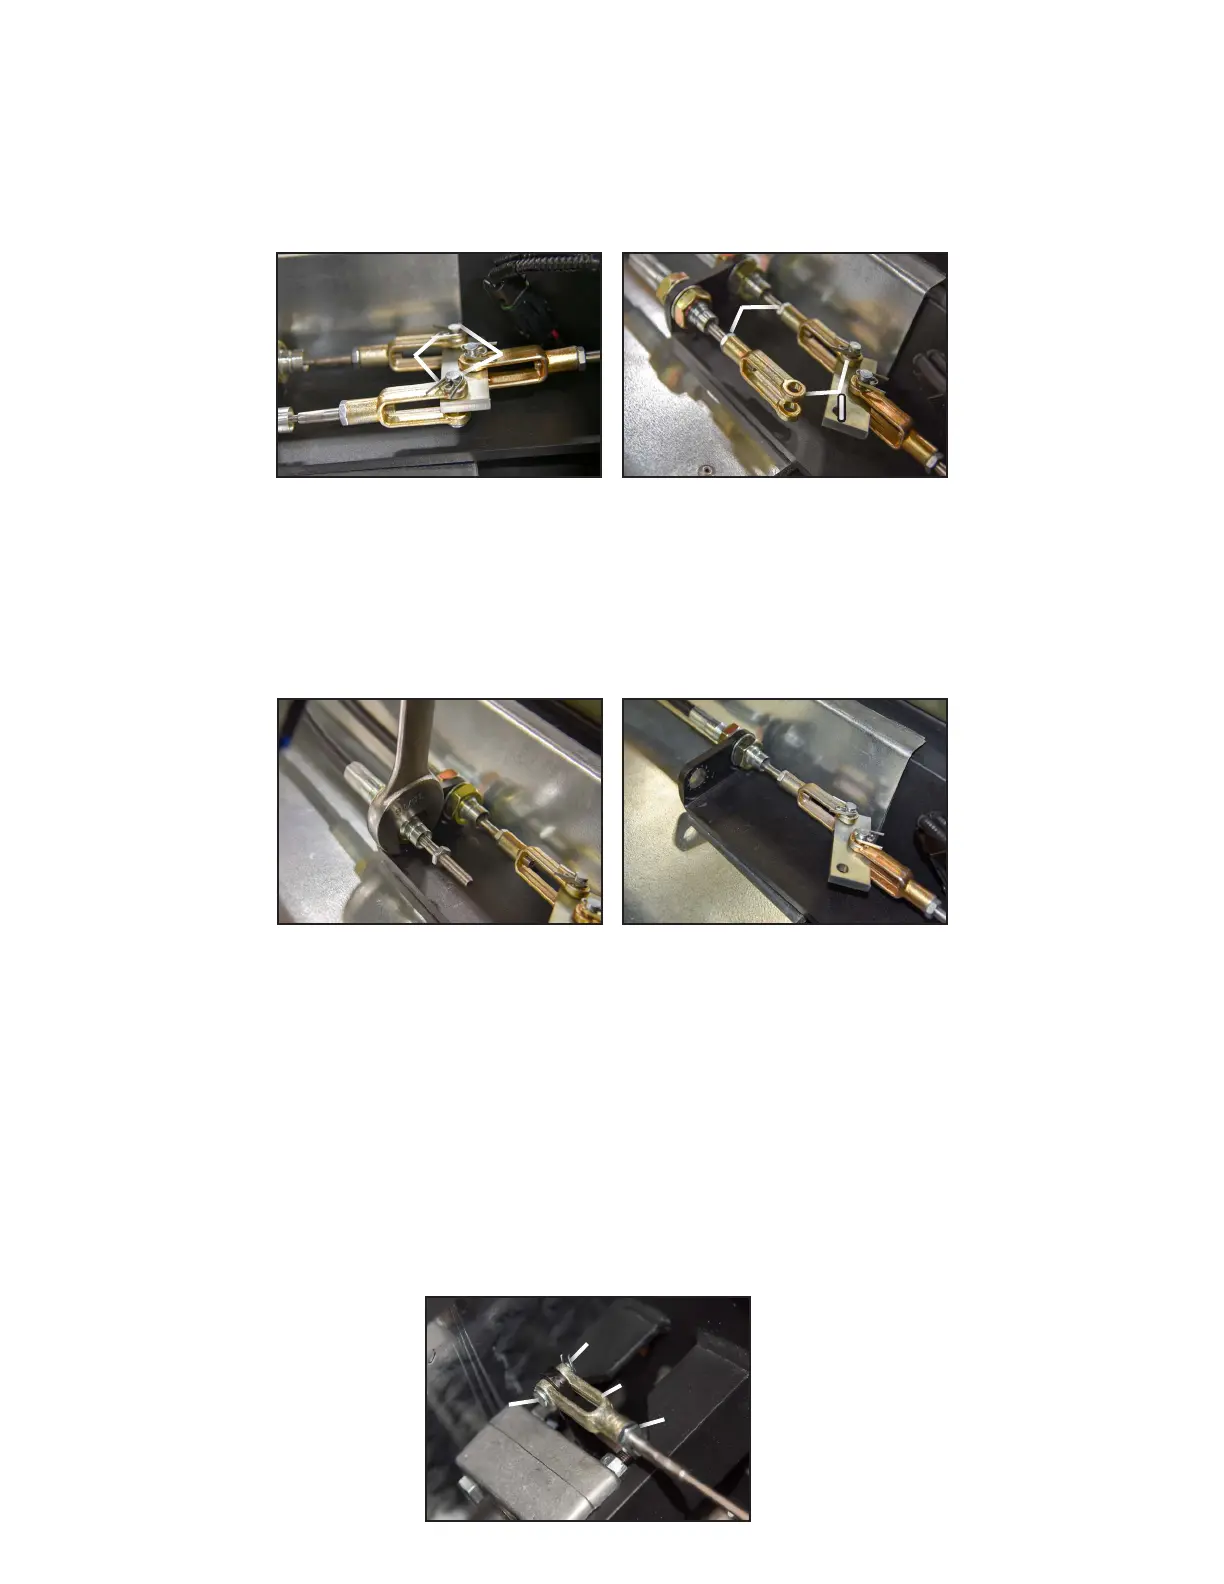
Figure-12
Cable Ends
HHGG
Parking Brake Cont.
3. For each cable there is (1) cotter pin “G” and (1) clevis pin “H” holding the clevis in place shown in Figure-12. Use a
pair of needle nose pliers to remove the cotter pins, then push the clevis pins out (Figure-13).
4. For each cable, remove its clevis shown as “I” in Figure-13. It’s easiest to use a 7/16” wrench on the jam nut “J”
and use a pair of pliers to spin the clevis off.
Figure-13
Pin Removed
II
JJ
5. Completely loosen the jam nuts “E” in Figure-14 so that they slide off the threads. Use a 15/16” wrench (Fig-
ure-15).
6. Slide the cables ends completely out of the bracket, and set them off to the side (Figure-14).
Figure-14
Nut Removal
Figure-15
Cable Removed
7. For each cable, locate their front most end which is connected to the brake caliper, (1) per each side of the Mudd-
Ox. Similar to the rearmost ends, there is a cotter pin and clevis pin shown as “G” and “H” in Figure-16 respective-
ly. Use a pair of needle nose pliers to remove the cotter pins, then push the clevis pins out.
8. Now completely loosen the front most jam nuts (E in Figure-8) so that they slide off the threads. Use a 15/16”
wrench. Note: If the cables have been adjusted over time, the threads are no longer front most of the mounting
bracket but rather behind it. Completely loosen jam nuts “E” to provide extra cable slack. The nuts cannot be
fully removed, but will loosely rest on the cables.
9. Slide the cables back to gain more room to work. For each cable, remove its clevis shown as “I” in Figure-16. It’s
easiest to use a 7/16” wrench on the jam nut “J” and use a pair of pliers to spin the clevis off.
Figure-16
Nut Removal
GG
HH
JJ
II