74
Parking Brake Cont.
10. Slide the cables ends completely out of the bracket, and set them off to the side
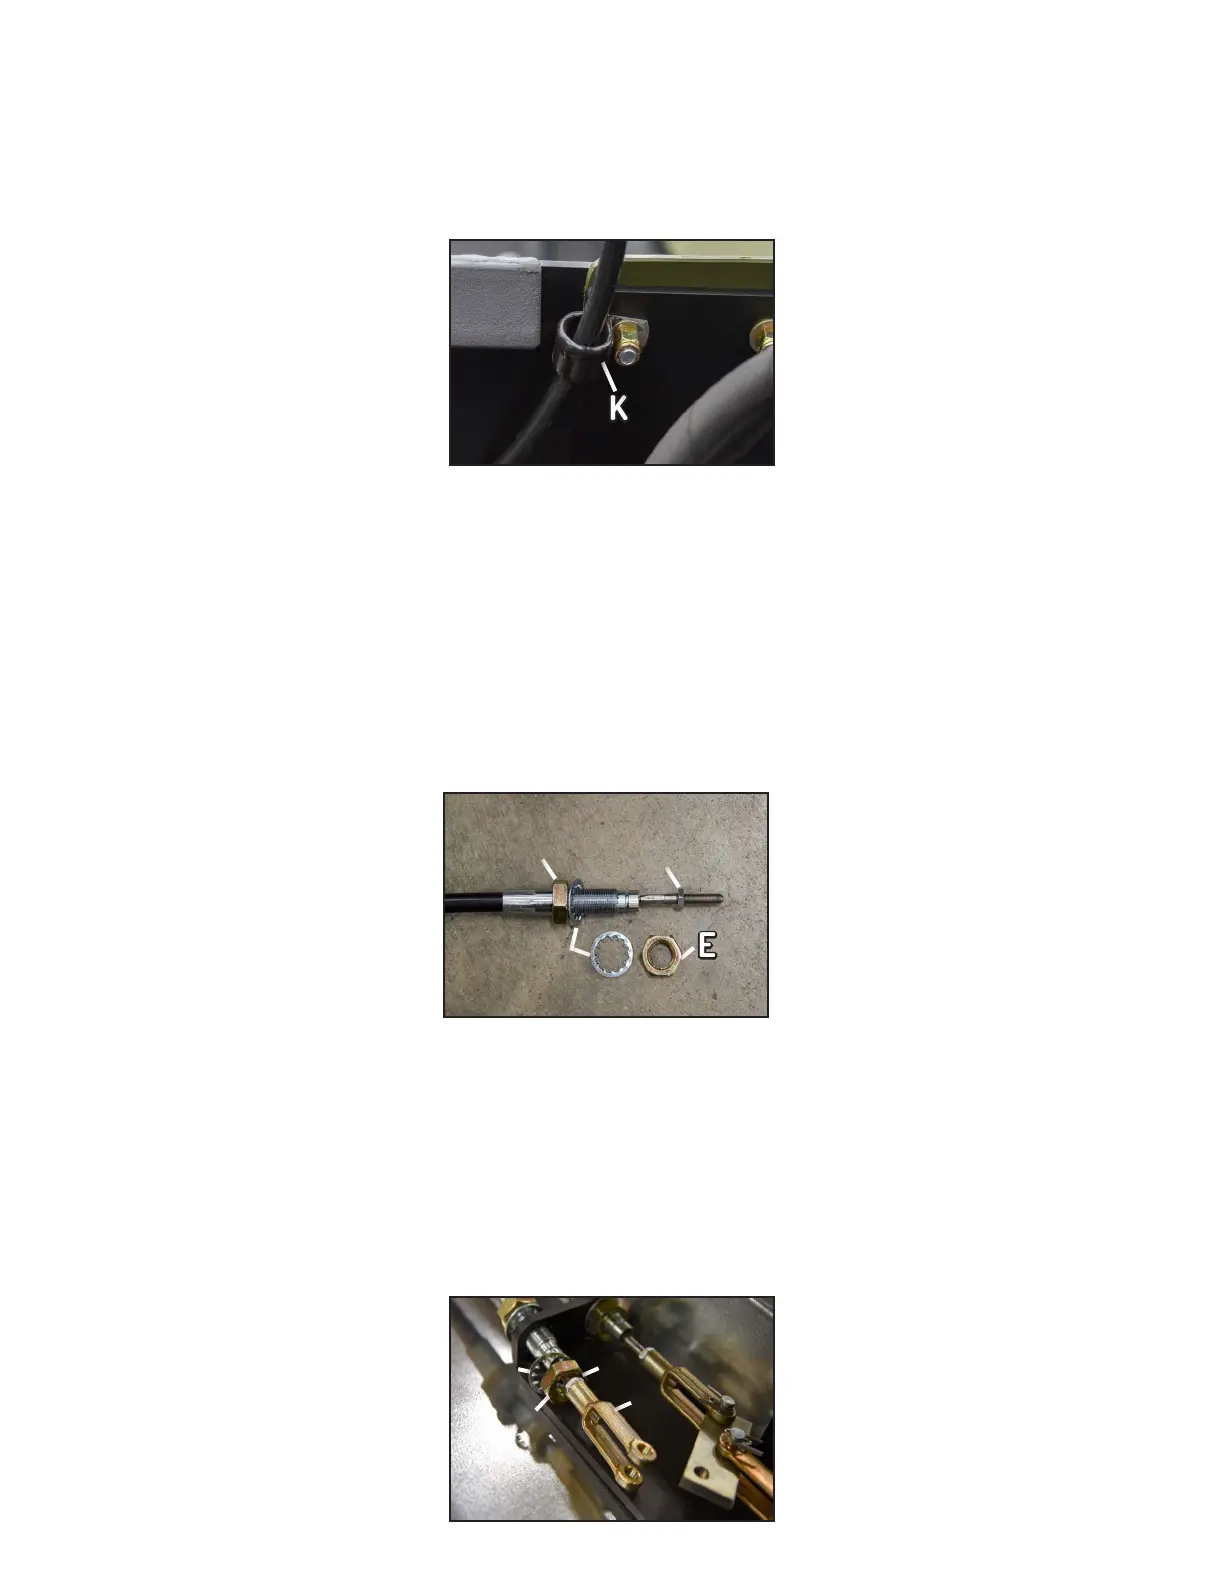
11. Lastly, locate the clamps that hold the cables behind the upper operator seat (K in Figure-17). Unbolt them from
the metal brackett and remove the cables.
Figure-17
Remove Clamp
KK
Figure-18
New Cable
EE
FF
JJ
Cable Replacement Part 2: Reassembly
Left side cable: 84” long
Right side cable: 110” long
1. The new brake cables should have new jams nut installed with washers, although loose. Remove jam nut “E” and
(1) washers “L” as shown in Figure-18. You will reinstall the hardware later between each side of the brackets.
2. Hand tighten the remaining jam nuts on the cable (F and J in Figure-18). Each one should be completely at the
end of their respective threads.
LL
3. Brake cables are non-directional, and can be installed facing in either direction. Begin with the parking brake
section in the engine compartment. Feed the 84” cable into the left hole of the mounting bracket, and the 110”
into the right. Note: Remember to install (1) “L” washer onto the cable first.
4. Once inside, loosely slide washers “L” and jam nuts “E” over the cable ends, (1) per each cable. Do not tighten
them, as leaving them loose provides room to work.
5. Install clevis’ “H” on each cable by turning them on clockwise by hand. Turn until they stop against the jam nuts
“J” (Figure-19).
Figure-19
Reassembly
KK
EE
JJ
HH