75
Parking Brake Cont.
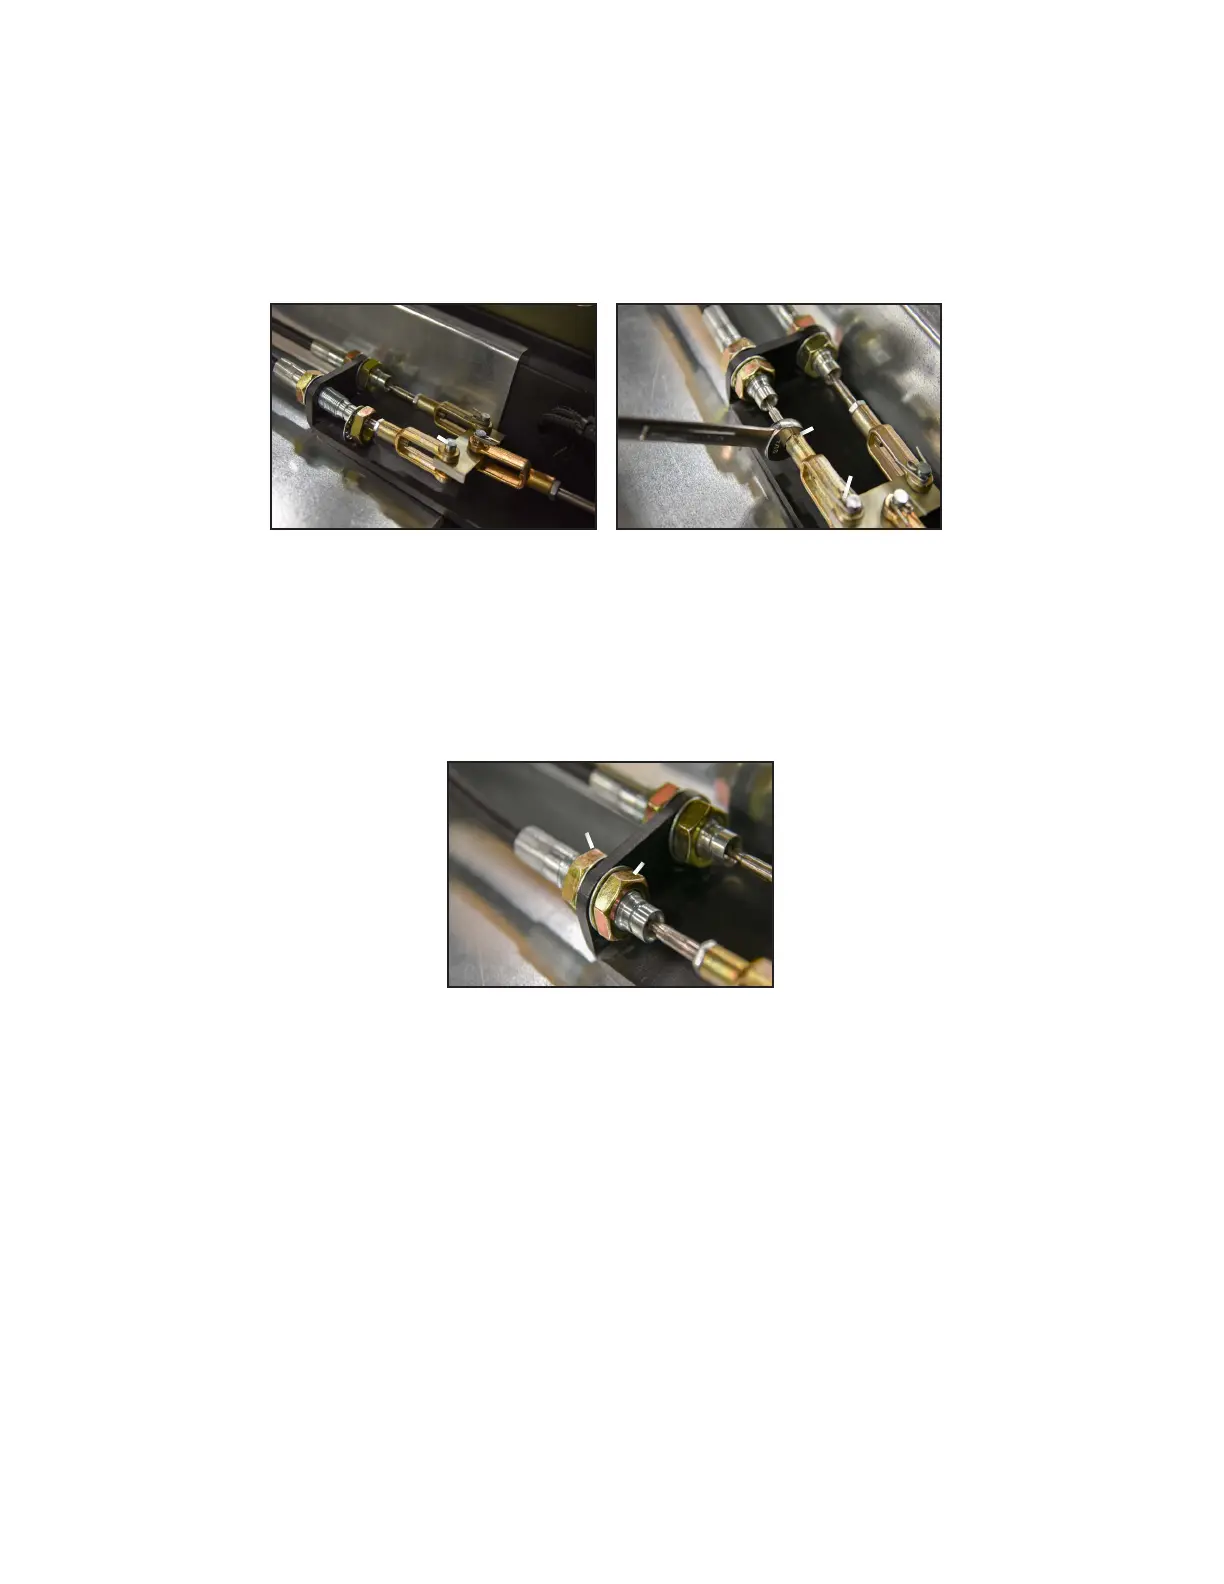
6. Now attach the clevis to the parking brake mechanism. Start from the bottom. Simply push the clevis pin “H”
through the bottom of the clevis, into the mechanism and finally through the top end of the clevis. Do this for
both cables (Figure-20).
7. Install the cotter pin for each cable (G in Figure-21).
8. Tighten jam nuts against the clevis’ (J in Figure-21).
9. The jam nuts “E” are still loosely on the cables from step #4. Turn them onto the threads, but just enough so the
jam nuts are flush with the end of the cable where it tapers out (Figure-22).
10. Tighten jam nuts “F” against the metal bracket with a 15/16” wrench. Then, ensure jam nuts “E” are tight with a
15/16” wrench as well. Note: Do not tighten jam nuts “E” until “F” have been tightened.
Figure-20
Connected to Brake Mechanism
Figure-21
Tighten Jam Nut
Figure-22
Nut Flush with Threads
HH
GG
JJ
EE
FF
11. Loop the cables through the engine compartment and reinstall clamps “K” from Figure-17. Note: The 85” cable
should be clamped on the left side of the Mudd-Ox, and 110” on the right.
12. Repeat steps #3-8 for the brake caliper side.
13. Tighten jam nuts “F” from Figure-6 all the way against the metal bracket with a 15/16” wrench. Then, ensure jam
nuts “E” are tight with a 15/16” wrench as well. Note: Do not tighten jam nuts “E” until “F” have been tightened.
There should be no threads from the cables on the rearmost section of the bracket, just as shown in Figure-9.
14. At this point the cables should be completely installed. However, they are unadjusted. See Adjustment.