78
2. Use a 15/16” wrench to loosen the (2) steering cable jam nuts (C in Figure-2 or 3).
3. Once the jam nut is loose, use the same 15/16” wrench to tighten the (2) adjustment nuts 1/4 of a turn (D in
Figure-2 or 3). Note: Do not tighten more than 1/4, as overtightening the cable will bend the mounting brackets.
4. Retighten the (2) jams nut (C in Figure-2 or 3).
5. Repeat the Inspection to verify if further adjustment is needed.
A. If passed: you are finished. Test drive the Mudd-Ox to ensure everything is working properly, and readjust if
necessary.
B. If not passed: Repeat Adjustment. If the cables are too worn to adjust, see Replacement.
Replacement
If one of the steering cables is worn too far to be adjusted, we recommend to replace all (4) cables at the same time.
The following images show a Mudd-Ox fully assembled at the hydraulic pump side.
Part 1: Removal
1. The cable must be removed from the control lever and hydraulic pump. Removal methods are identical for both
sides.
A. Control levers: Remove the rubber bellows that attach to the body. It’s held in by plastic “Christmas tree”
clips. Simply remove by gently prying the bellows away from the body.
B. Pumps: See Accessing the Mudd-Ox to remove the lower operator seat, seat back, and seat L-bracket. This
will gain access to both z-bars mounted on top of the hydraulic pumps.
Steering Cables Cont.
B. Place padding on the driver floorboard. Wear safety glasses and lie inside the Mudd-Ox in a position to see
underneath the dash. The steering cables are mounted directly behind the control levers.
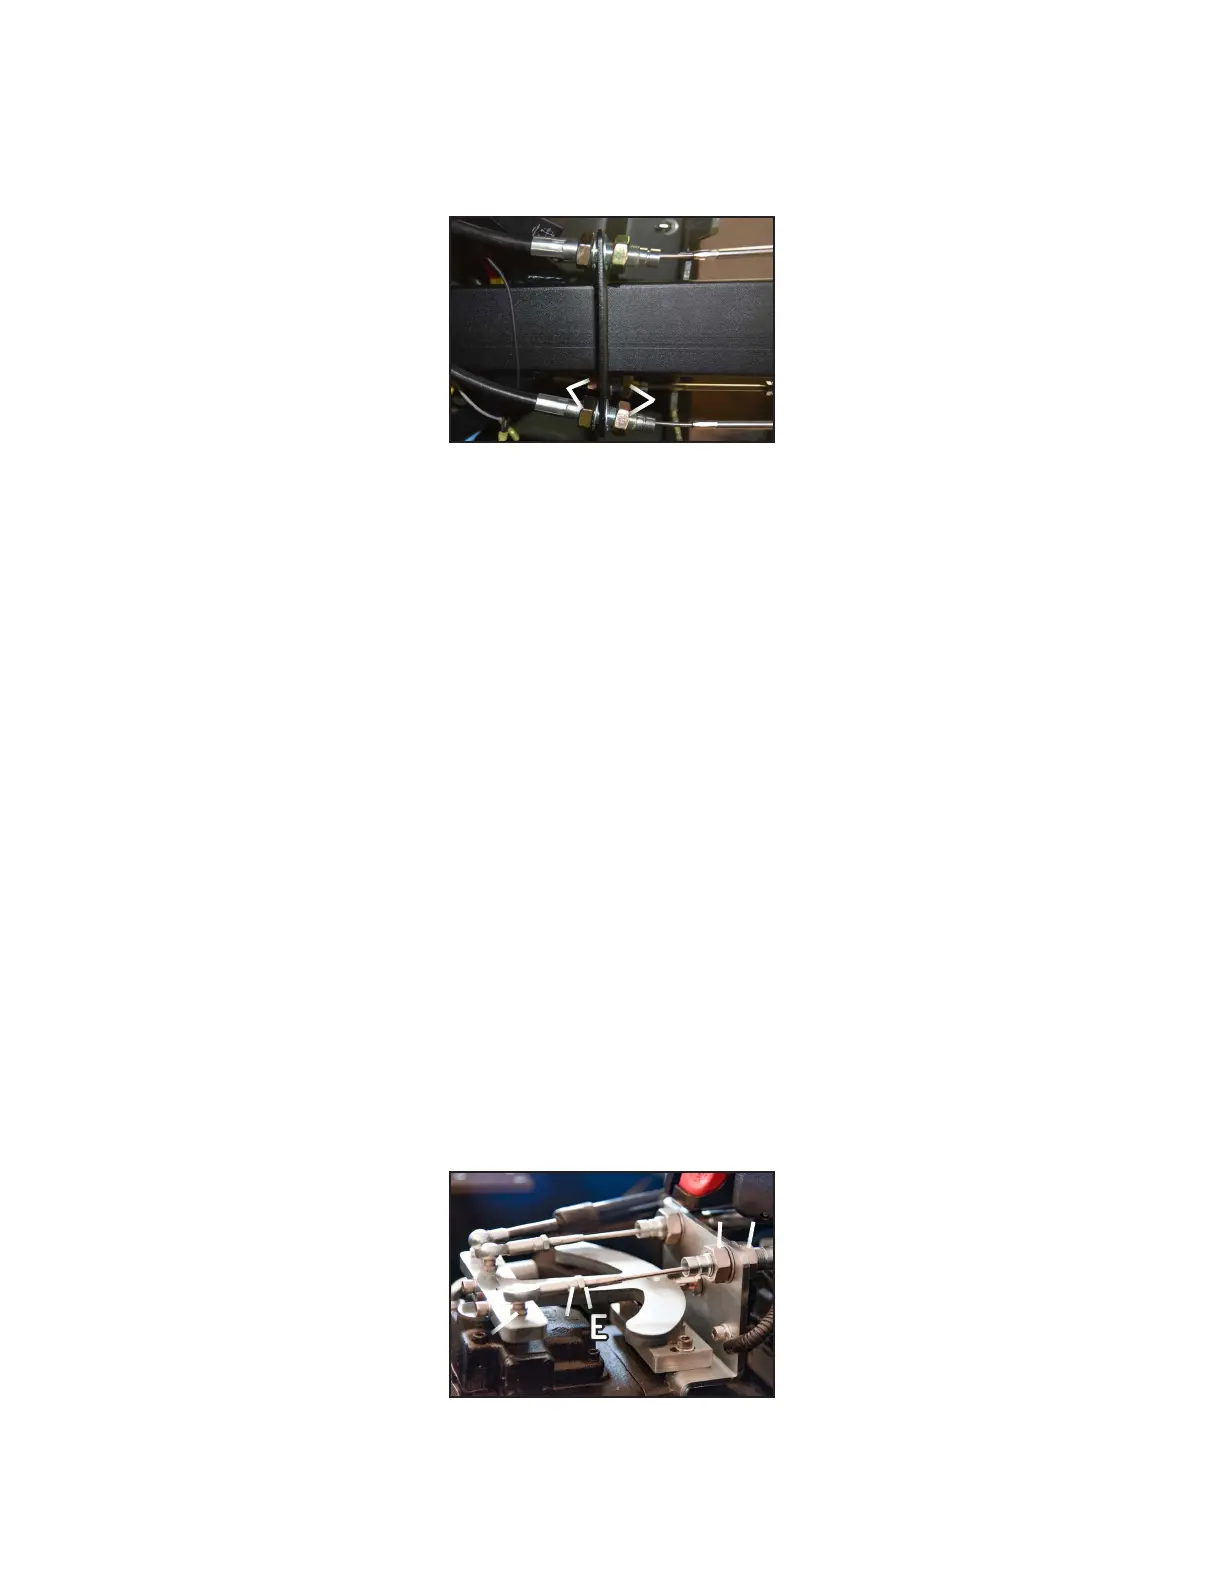
Figure-3
Under Dash View
CC
DD
Figure-4
Parts Overview
CC DD
EE
FF
GG