MD105 RIDE-ON TROWEL • OPERATION MANUAL — REV. #0 (03/29/24) — PAGE 33
FLOAT PAN INSTALLATION
Float pans attach to the trowel arms and allow early oating
on wet concrete and easy movement from wet to dry areas.
They are also very effective at embedding large aggregates
and surface hardeners.
1. Make sure the trowel blades are pitched at.
2. Lift the trowel just enough to slide a oat pan under
the blades. Lower the nisher onto the pan with the
blades between the blade stops (Figure 29).
Figure 29. Float Pan Installation (Latch Pins)
3. Route a latch pin through the holes in the blade stops
as shown in Figure 29.
WARNING
ALWAYS install oat pans either in the work area or
in an area that is next to and level with the work area.
NEVER lift the trowel with oat pans attached.
BLADE
LATCH
PIN
BLADE STOP
FLOAT
OPERATION
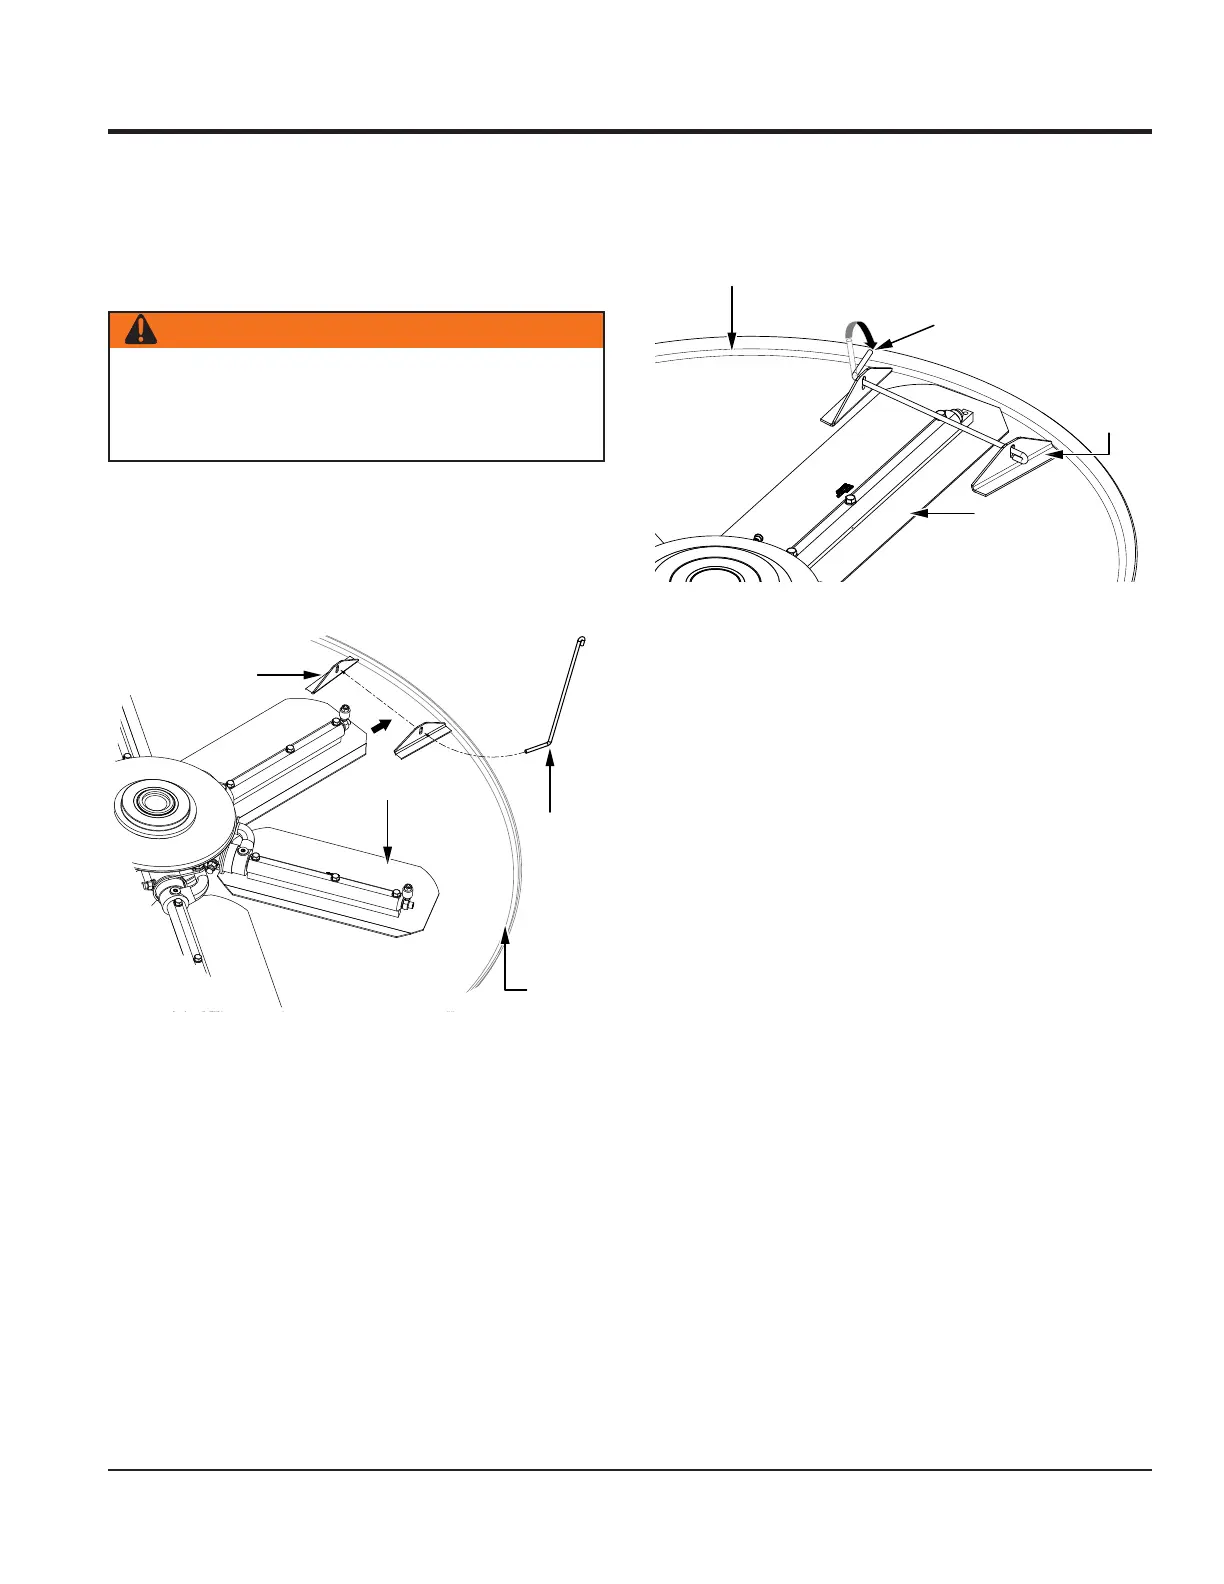
4. After it has been routed through the blade stop
holes, rotate the latch pin so the end that is bent
approximately 90 degrees lays at on the surface of
the oat pan. See Figure 30.
Figure 30. Latch Pin Placement
5. Make sure the blade edges are secured between the
blade stops, and the latch pin is secured completely
over the blade, locking it in place.
6. Repeat steps 2–4 for the remaining nisher blades.
7. Make sure the oat pans are well secured to the blades
before the trowel is put back into operation.
8. Periodically check the latch pins during normal
operation to ensure they are still in the correct position.
BLADE
BLADE
STOP
LATCH PIN
BENT (90°) END
LAYING FLAT
 Loading...