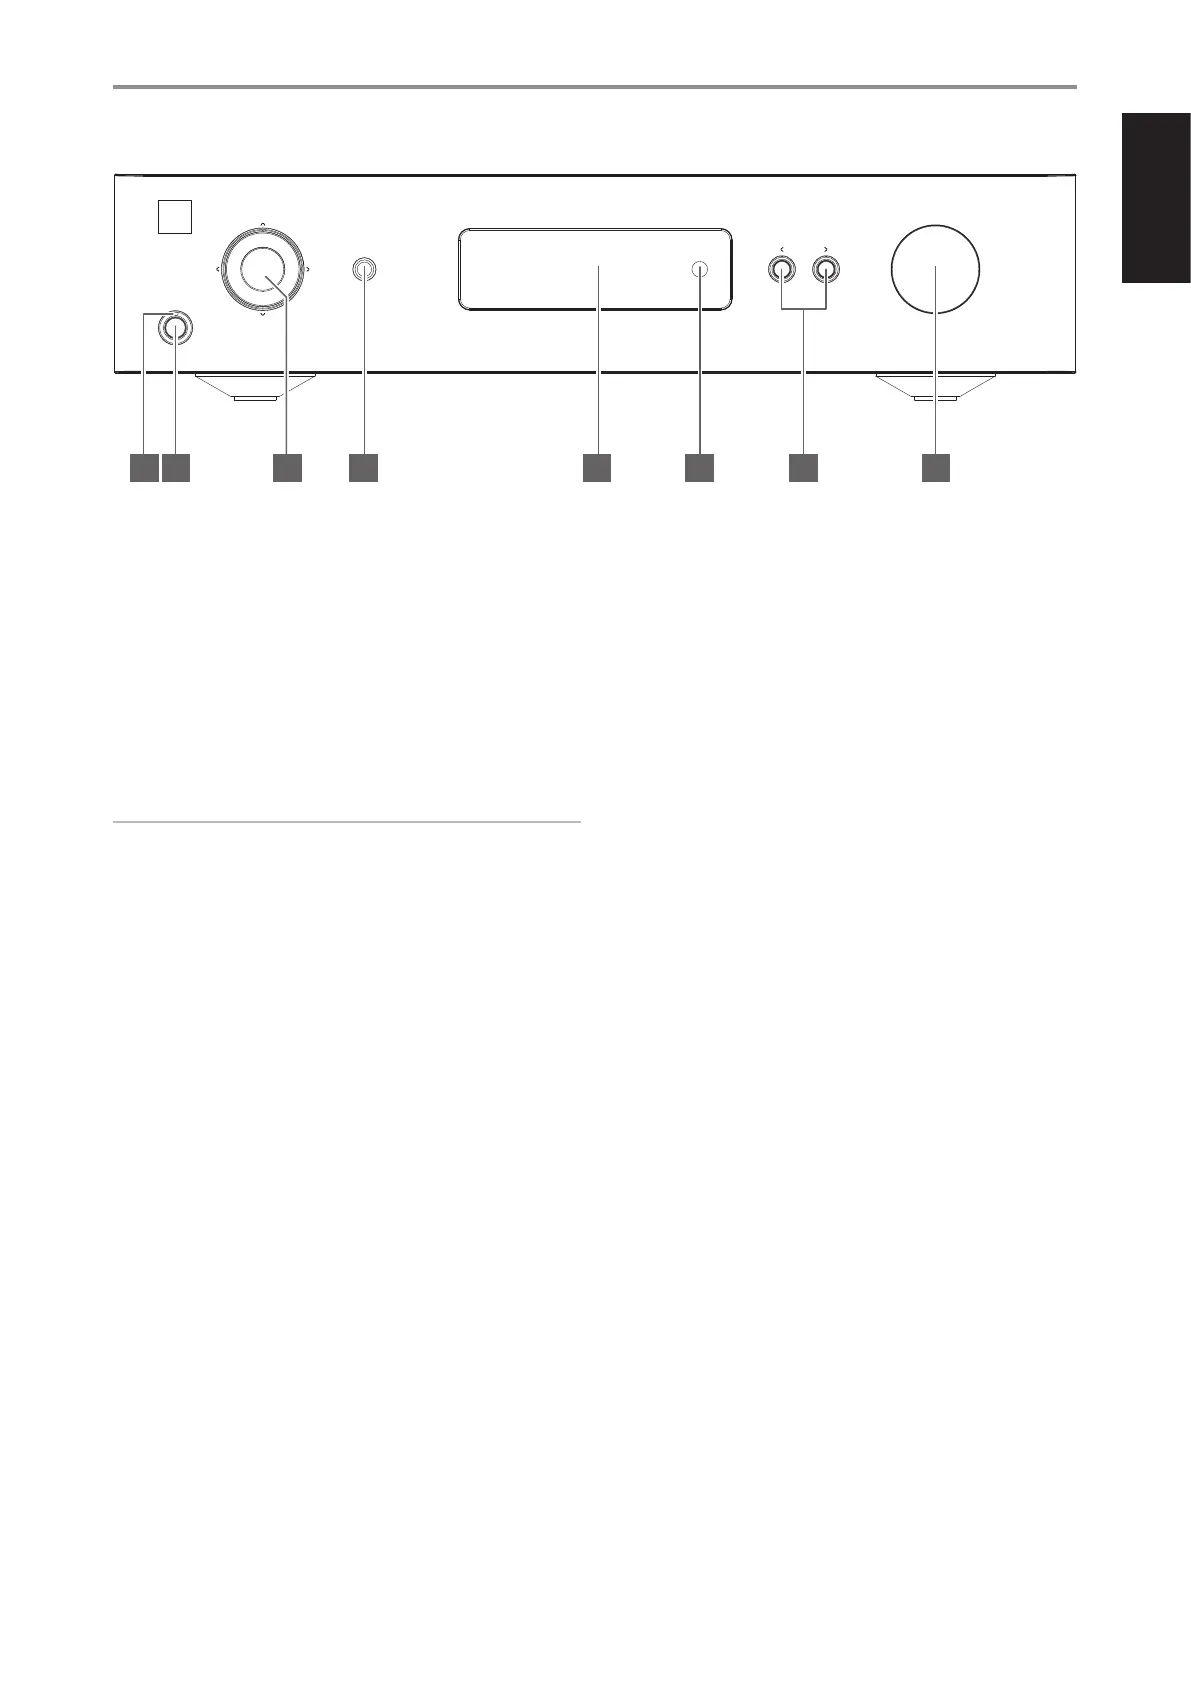
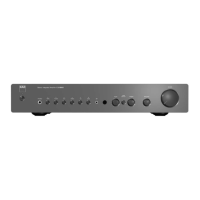
IDENTIFICATION OF CONTROLS
FRONT PANEL
1 POWER INDICATOR
• This indicator will be amber when the C 368 is in standby mode.
• When the C 368 is powered up from standby mode, this indicator
will change from amber to blue color.
2 STANDBY BUTTON
• Press Standby button to switch ON the C 368 from standby mode.
The Power indicator will change from amber to blue color.
• Pressing Standby button again switches back C 368 to standby
mode. The Power indicator will change from blue to amber color.
• The Standby button cannot activate the C 368 if the rear panel
POWER switch is o.
IMPORTANT NOTES
For the Standby button to activate, the following must occur:
a The supplied power cord from the C 368 must be plugged in to a power
source.
b The rear panel POWER switch must be set to ON.
3 NAVIGATION AND ENTER BUTTONS
• The navigation [d/f/a/s] and [ENTER] buttons are used to go
through menu options and selections.
• Use [d/f/a/s] to go up, down, left or right given options or
selections.
• The middle round button is designated as [ENTER] button. This is
normally pressed to complete a selection, procedure, sequence or
other applicable functions.
4 HEADPHONE
• A 1/4” stereo jack socket is supplied for headphone listening and
will work with conventional headphones of any impedance.
• The volume, tone and balance controls are operative for
headphone listening. Use a suitable adapter to connect
headphones with other types of sockets, such as 3.5mm “personal
stereo” jack plugs.
5 DISPLAY
• Show visual and menu information according to the selected
settings.
• The following Main menu options are shown in the display - Source
Setup, Settings and BluOS Setup (available if MDC BluOS module is
installed).
• Use the SR 9 remote control or front panel navigation [d/f/a/s]
and [ENTER] buttons to go through menu options and selections.
6 REMOTE SENSOR
• Point the SR 9 remote control at the remote sensor and press the
buttons.
• Do not expose the remote sensor of the C 368 to a strong light
source such as direct sunlight or illumination. If you do so, you may
not be able to operate the C 368 with the remote control.
Distance: About 23ft (7m) from the front of the remote sensor.
Angle: About 30o in each direction of the front of the remote sensor.
7 a SOURCE s
• Press a SOURCE or SOURCE s to select Sources.
8 VOLUME
• The VOLUME control adjusts the overall loudness of the signal sent
to the loudspeakers. The Volume control is characterized by perfect
signal tracking and channel balance. It provides a highly linear and
low noise operation.
• Turn clockwise to increase the volume level and counter clockwise
to lower it.
• The default volume level is -20 dB.
• Volume level will wake up and reset to the -20 dB default setting if
the unit goes to standby mode with a variable volume level higher
than -20 dB. However, if volume level is lower than -20 dB when
the unit goes to standby mode, that level setting will be preserved
when the unit wakes up.
Hybrid Digital DAC Amplifier C 368
NA
D
VOLUME
SOURCE
© NAD C368
7 81 2 3 4 65
5
ENGLISHFRANÇAISESPAÑOLITALIANODEUTSCHNEDERLANDSSVENSKAРУССКИЙ