1-10 | ni.com
Chapter 1 Getting Started with the cDAQ Controller
• LabVIEW Real-Time software
• NI-DAQmx driver (packaged with the cDAQ controller)
•
(NI cDAQ-9134/9135) NI-XNET software (packaged with the cDAQ controller)
• Power supply
• Number 1 and number 2 Phillips screwdrivers
• C Series module(s)
Refer to Figure 1-1 or 1-2 while completing the following assembly steps.
1. Install LabVIEW on your host computer, as described in the LabVIEW Installation Guide.
2. Install LabVIEW Real-Time on your host computer, as described in the
LabVIEW Real-Time Module Release and Upgrade Notes.
3. Install NI-DAQmx driver software on your host computer, as described in the Read Me
First: NI-DAQmx and DAQ Device Installation Guide.
Note Table 1-2 lists the earliest supported driver version for each cDAQ controller
for LabVIEW for Real-Time.
The NI-DAQmx driver software is included on the media shipped with your kit and is
available for download at
ni.com/support. The documentation for NI-DAQmx is
available after installation from Start»All Programs»National Instruments»
NI-DAQmx.
4. (NI cDAQ-9134/9135) Install NI-XNET on your host computer, as described in the
NI-XNET Hardware and Software Installation Guide.
Note Table 1-3 lists the earliest supported driver version for each cDAQ controller
for LabVIEW Real-Time.
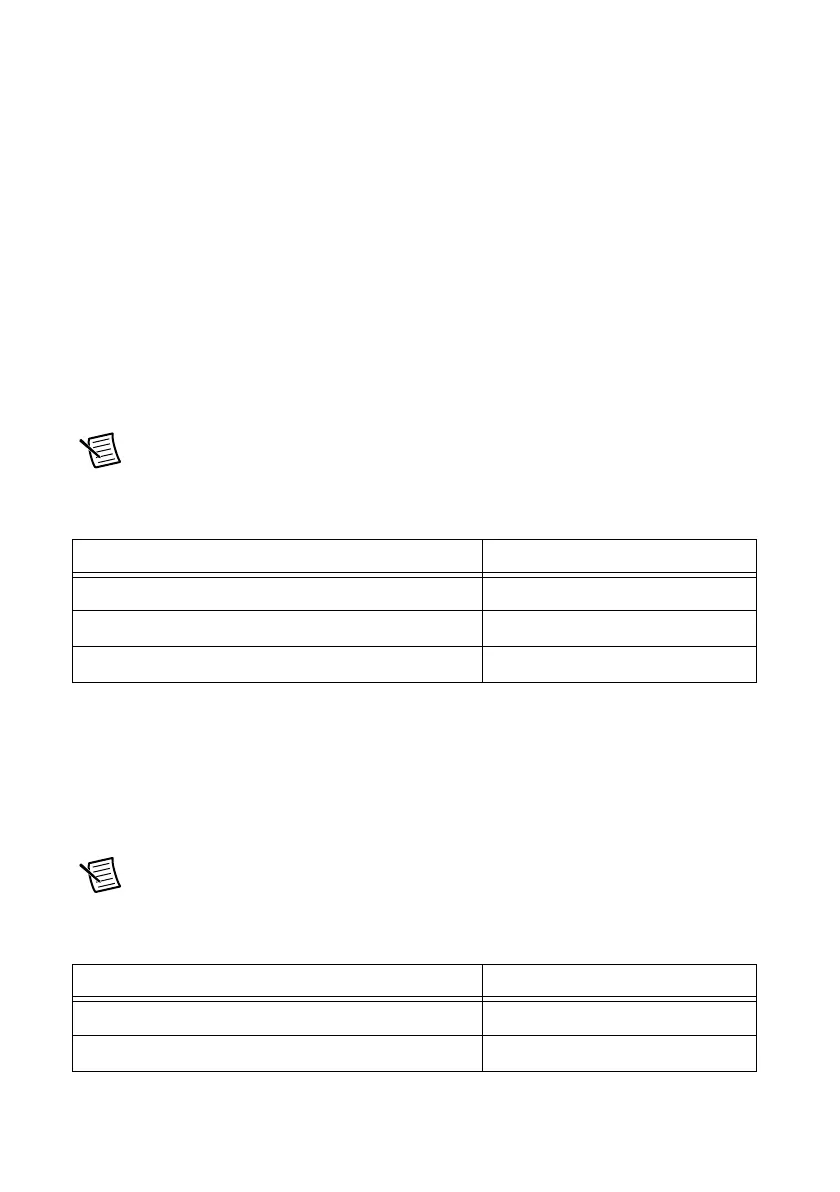
Table 1-2. cDAQ Controller NI-DAQmx Software Support
cDAQ Controller Earliest NI-DAQmx Support
NI cDAQ-9132/9134 for LabVIEW Real-Time NI-DAQmx 14.1
NI cDAQ-9133/9135 for LabVIEW Real-Time NI-DAQmx 14.5
NI cDAQ-9136/9137 for LabVIEW Real-Time NI-DAQmx 15.1
Table 1-3. cDAQ Controller NI-XNET Software Support
cDAQ Controller Earliest NI-XNET Support
NI cDAQ-9134 for LabVIEW Real-Time NI-XNET 14.1
NI cDAQ-9135 for LabVIEW Real-Time NI-XNET 14.5