21
NS-4000
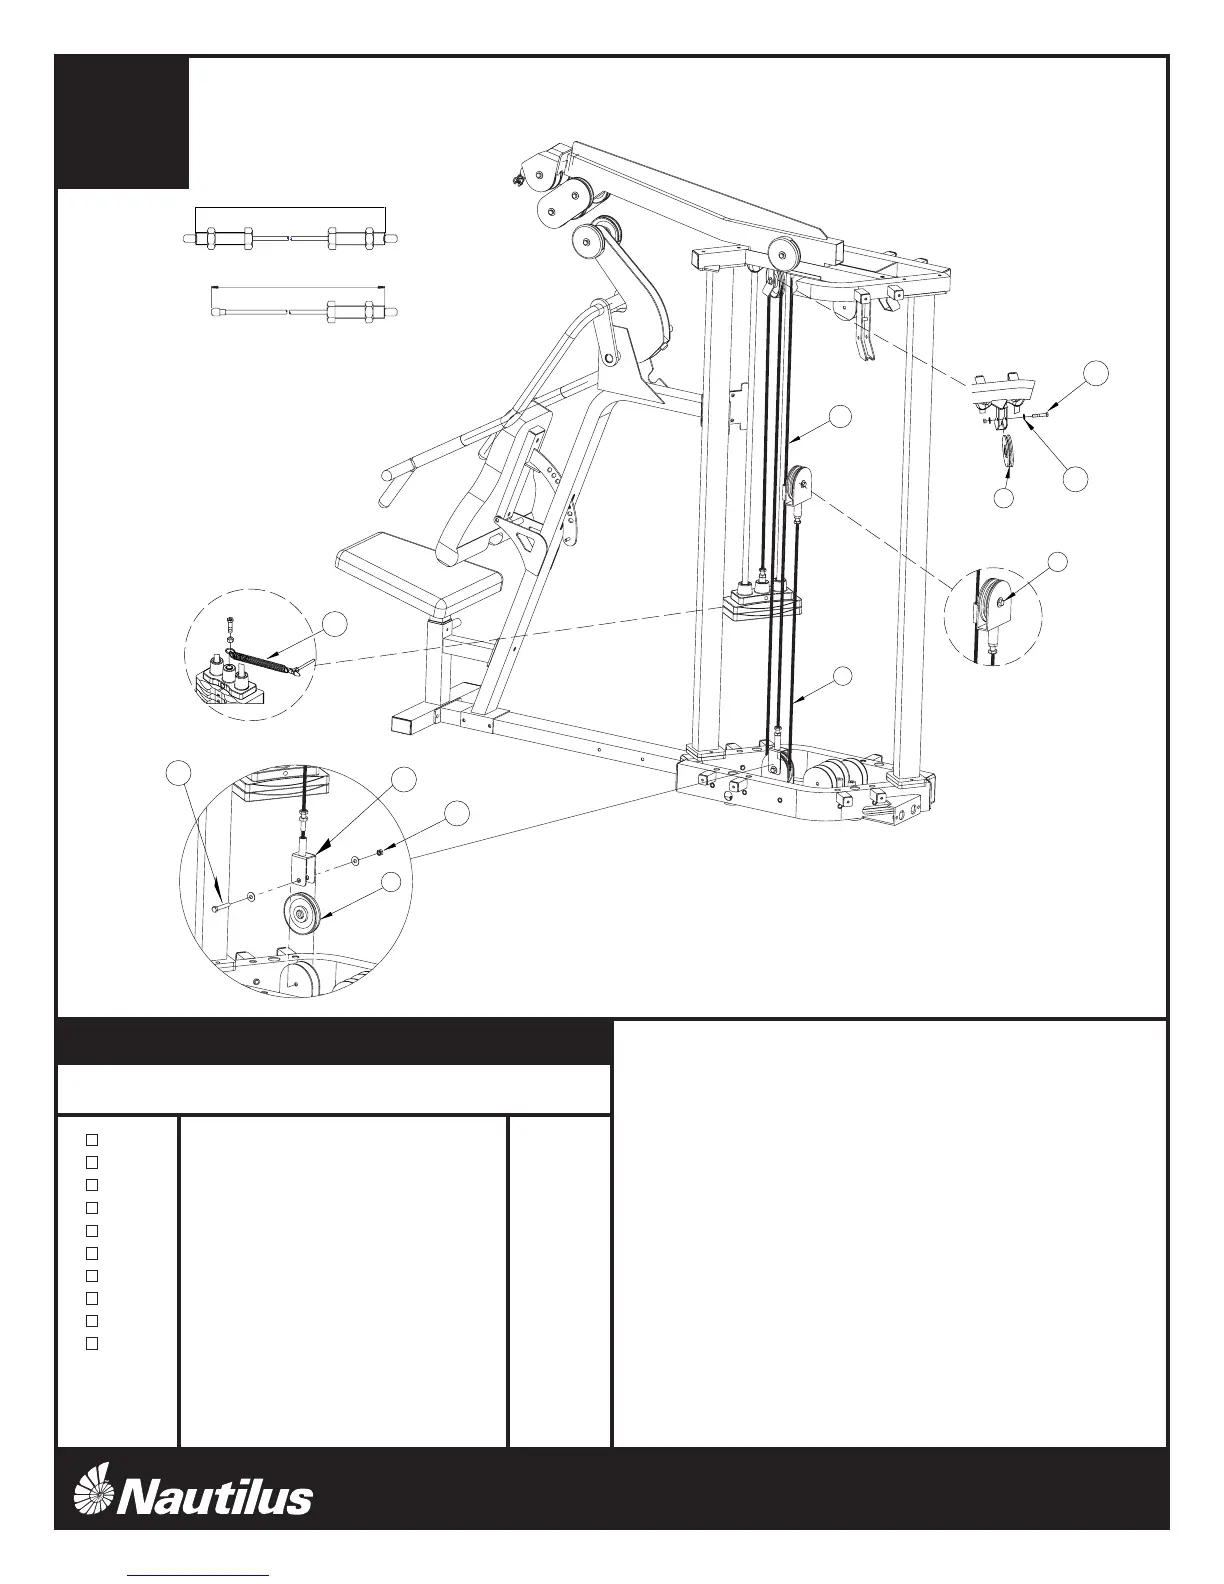
A. Place the ring of the Tethered Weight Selector Pin (145) around
the center hump of the Top Weight Assembly.
B. Thread one end of the Primary Cable (94) into the Top Weight
Assembly on the stack closest to the Press Arm station. Do not
tighten locking nut.
C. Feed the Cable (94) through the pulley bracket above the weight
stack. Draw the Cable (94) over a 4 1/2" Pulley (90). Attach the
Pulley (90) to the pulley bracket above the weight stack using
the hardware shown.
D. Loop the Cable (94) around a 4 1/2” Pulley (90) and place it in
the pulley bracket on the Main Base directly behind the press
arm weight stack. Slide the Lower Bracket (34a) over the pulley
bracket making sure that the label is facing the Leg Extension.
Secure the Pulley (90) and Lower Bracket (34a) using the
hardware shown. Do not tighten hardware.
E. Thread the opposite end of the Cable (94) into the Floating
Pulley Bracket (64) as shown.
F. Thread the screw termination of the Guide Cable (101) into the
Lower Bracket until the cable is taut and secure the nut.
G. Tighten all hardware used in this step securely. The Press arm
Cables can be tensioned by adjusting the threaded ends of the
cables. Tighten locking nuts to secure.
step
15
Step #15 Materials:
# Component Qty
34a Cable Guide Lower Bracket 1
64 Floating Pulley Bracket 1
90 4 1/2" Pulley 2
94 Primary Cable 1
101 Guide cable 1
116 Hex Bolt - 3/8" x 2 1/4"L 1
117 Hex Bolt - 3/8" x 2"L 1
130 3/8" Flat Washer 4
135 3/8" Lock Nut 2
145 Tethered Weight Selector Pin 1
 Loading...