29
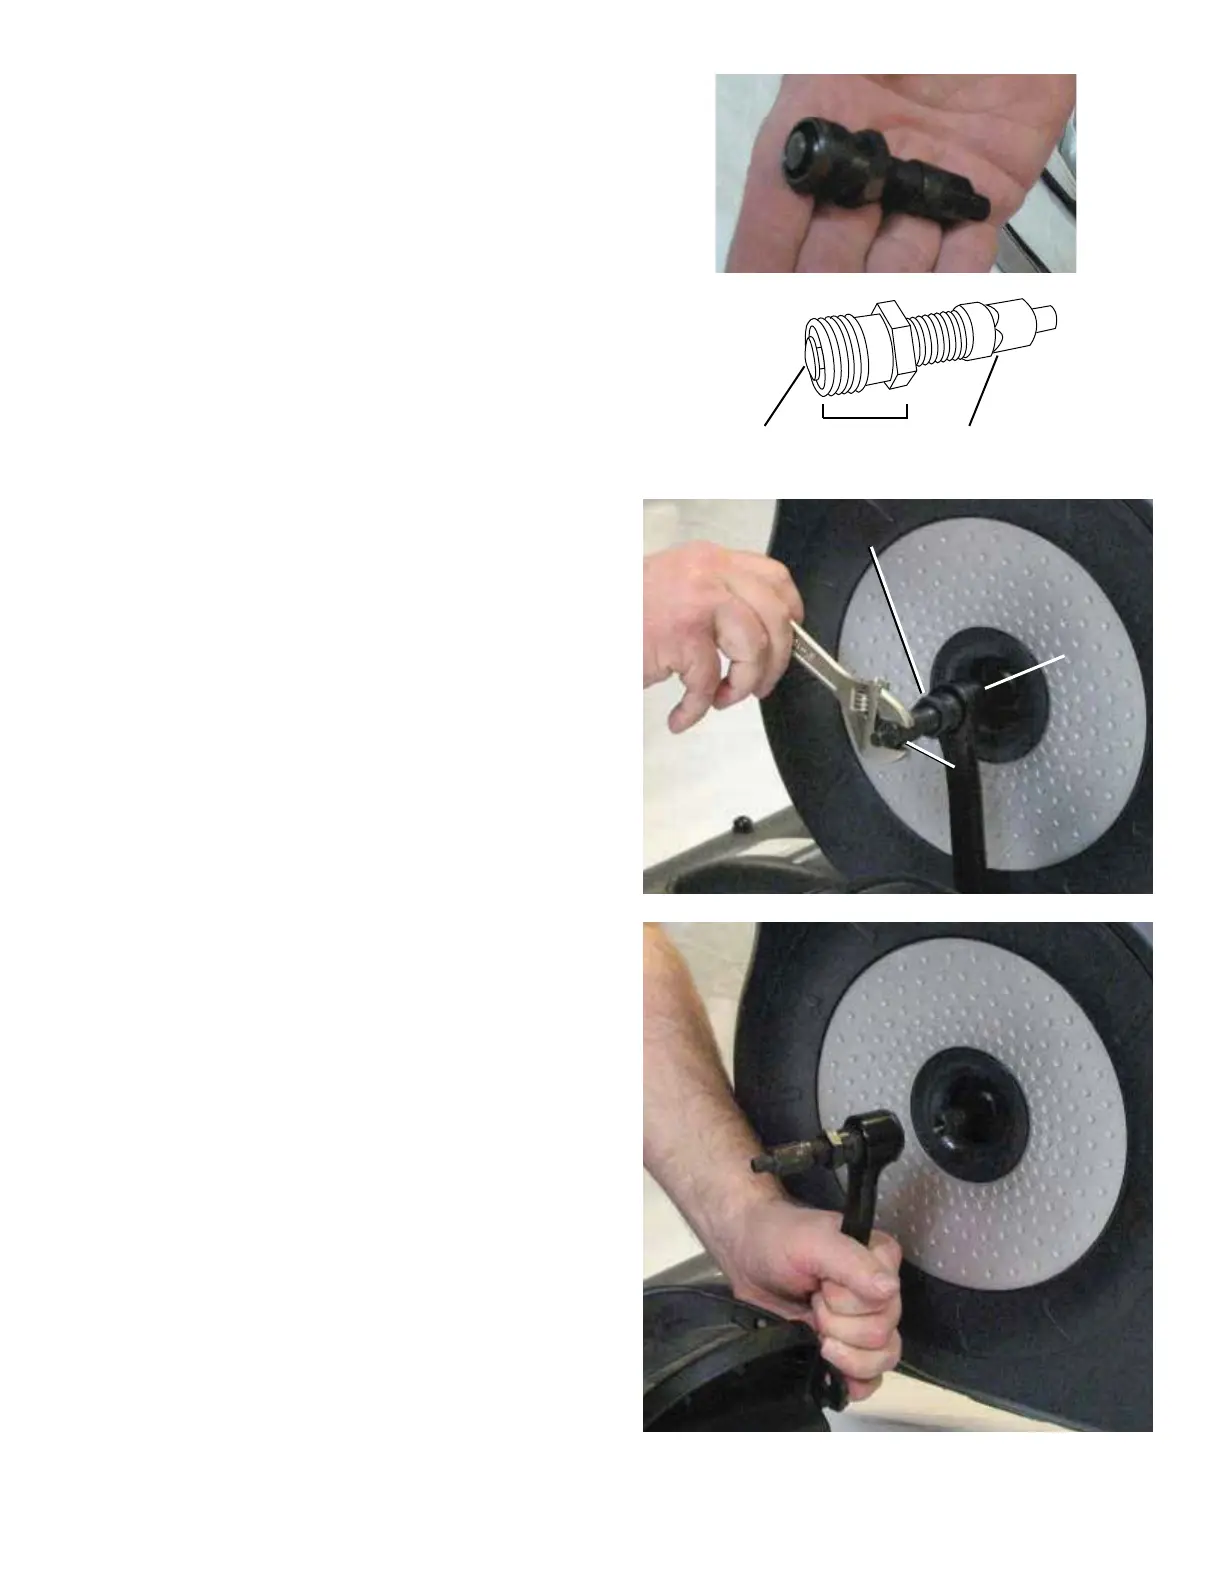
4. Thread the Crank Puller into the Crank Arm (B). When the Crank
Puller is in the correct position, only 1-2 threads on the outer portion (CP2)
of the Crank Puller should show.
Note: %HVXUHWKHHQGRIWKH%ROW&3RIWKH&UDQN3XOOHULVÀXVK
with the Nut (CP2) as shown, before use.
5. Using a wrench, turn the inner portion (CP3) of the Crank Puller
clockwise. The Crank Arm (B) will slide off as it is tightened.
CP1 CP2 CP3
B
&3
&3
 Loading...