34
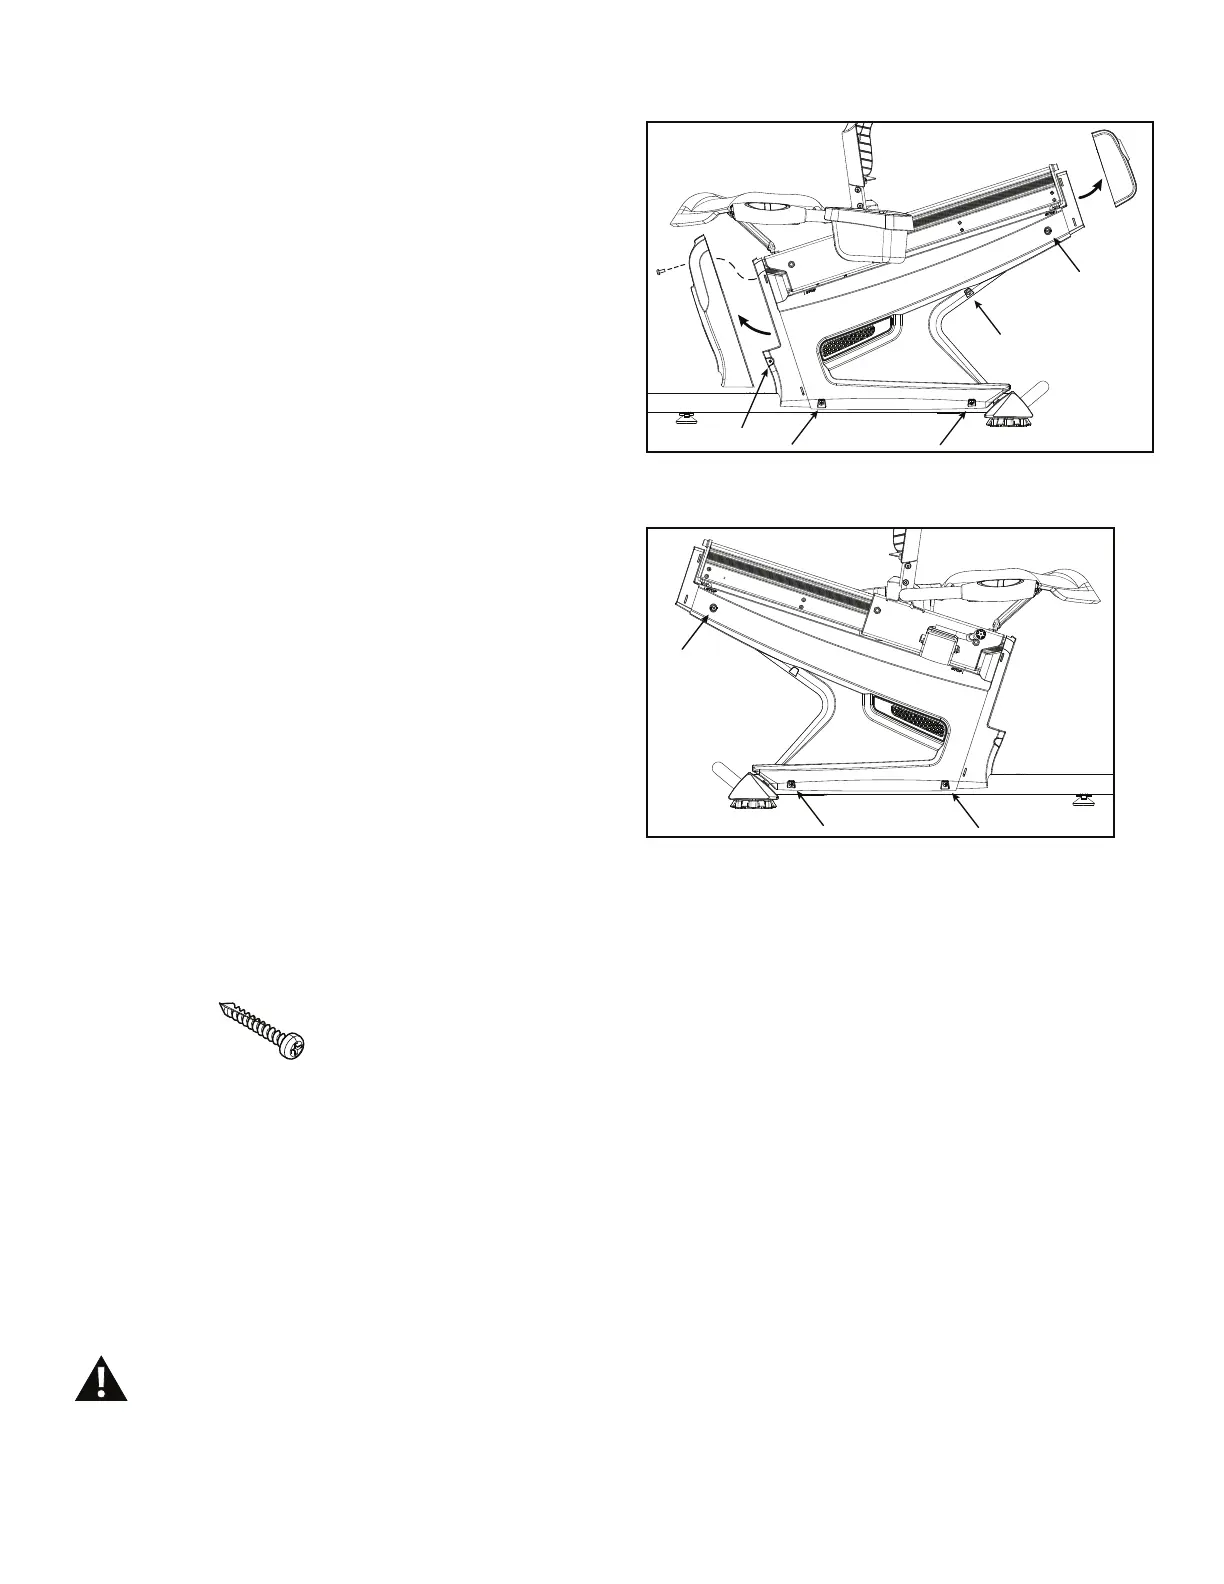
To remove the Rear Shrouds:
10. Using a #2 Phillips screwdriver, loosen and remove the
screw that secures the front Seat Rail End Cap. Bend the
edges of the rear Seat Rail End Cap to disengage the inside
tabs from the Main Assembly, and remove. Set the hardware
and Caps safely aside for reassembly.
11. Using a #2 Phillips screwdriver, remove the screws
(indicated) that secure the Left Rear Shroud. Remove the
ERWWRPVFUHZV¿UVWDQGWKHQWKHWRSVFUHZV6ORZO\UHPRYH
the Left Shroud. Set the hardware and Left Shroud safely
aside for reassembly.
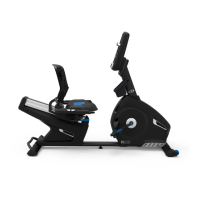
12. Using a #2 Phillips screwdriver, remove the screws that
secure the Right Rear Shroud. Slowly remove the Right
Shroud. Set the hardware and Right Shroud safely aside for
reassembly.
13. Installation is the reverse procedure. Put the Left Shroud
LQSRVWLRQ¿UVWWRDOLJQWKHVFUHZVIRUWKH5LJKW6KURXG
,QVWDOOWKHWRSVFUHZV¿UVW
Note: Self-tapping screws attach the Shrouds to the
Frame.
NOTICE: Be sure not to crimp any cables. Be sure the
tabs in the Top Shroud snap into the Main
Assembly.
Be sure the Crank Arms are connected at 180° from each
other.
14. Final Inspection
Inspect your machine to ensure that all hardware is tight and
components are properly assembled.
Do not use until the machine has been fully
assembled and inspected for correct
SHUIRUPDQFHLQDFFRUGDQFHZLWKWKH2ZQHU¶V
Manual.