Do you have a question about the NCR 7607 and is the answer not in the manual?
This book is written for hardware installer/service personnel, system integrators, and field engineers.
This section details safety requirements and warnings for the NCR POS XR8/XR8c terminal.
Provides guidance on proper grounding to reduce the risk of electric shock.
Lists related NCR POS XR8/XR8c documentation and guides.
Details the various port and connection options available for different releases of the NCR POS XR8/XR8c.
Lists the major models and corresponding CPU configurations for Release 1.x, 2.x, and 3.x.
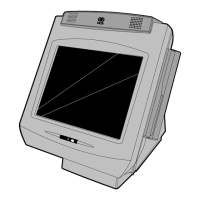
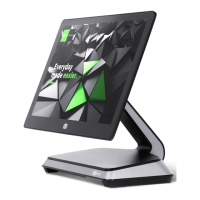
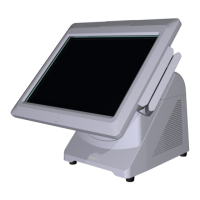
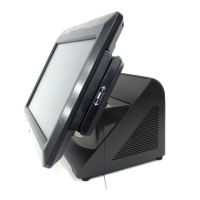
Describes the different display models available for the NCR POS XR8, including X-Series, XL Series, Touch, and Customer Displays.
Details the location of serial and model number labels on the terminal and inside the front bezel.
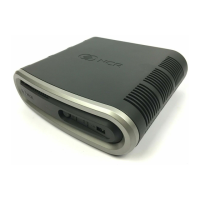
Details the external connectors on the motherboard for Release 1.x and 2.x.
Details the four USB ports provided by the 7607 Motherboard, including Standard +5V USB.
Explains the two on-board RS-232 ports, their pinouts, and power capabilities.
Explains the support for 12V and 24V Cash Drawers and the Cash Drawer Kick Out (CDKO) circuit.
Guidelines for installing the POS XR8/XR8c, including electrical outlet and static discharge precautions.
Lists the displays supported by the NCR POS XR8 and outlines installation.
Explains how printers are installed using 24V USB to Power cables or 24V USB and RS232 cables.
Explains how to connect a Cash Drawer to the terminal or transaction printer.
Lists the supported USB and PS/2 keyboards and USB mice for the POS XR8.
Provides instructions for removing and installing SSD or HDD for Release 1.x and 2.x.
Explains how the front panel LEDs function as diagnostic indicators for Release 1.x, 2.x, and 3.x.
Describes the procedure to apply/restore an OS image on the terminal using a USB Flash Drive.
Details how to start the Recovery Tool by pressing the recessed button on the I/O panel.
Describes the main screen of the Recovery Tool and its functions like Check and Repair Disk.
Explains how to save or load an image from a device using the Recovery Tool.
Describes how to create a disk image using NCR tools and the Imaging Suite.
Instructions on how to enter the BIOS Setup Utility by connecting a keyboard and pressing keys during boot.
Details various configuration choices and settings within the BIOS Advanced Menu, including Trusted Computing and NCR POS.
Details security settings within the BIOS, including Administrator Password and Secure Boot options.
Explains boot configuration options, including boot order priorities and hard disk drive/network drive BBS priorities.
Lists requirements for performing a SPI/BIOS update, including USB Keyboard and BIOS Software.
Provides step-by-step instructions for creating a bootable USB drive using Syslinux.
Details the procedures for updating the terminal SPI and BIOS using Automatic or Interactive methods.
Provides steps to configure Intel AMT on the terminal, noting potential differences in screens.
Discusses adding a second HDD and configuring RAID using Intel® Rapid Storage Technology for data protection and performance.
Details the installation procedures for configuring RAID volumes, including RAID 1 and RAID 0.
Provides instructions for cleaning the terminal cabinet, including warnings about cleaners.
Details how to clean the touch screen using isopropyl alcohol or mild soap and water.
| Brand | NCR |
|---|---|
| Model | 7607 |
| Category | Touch terminals |
| Language | English |