3 of 8
ISSUED: 09-15-11 SHEET #:125-9244-1
J
Q
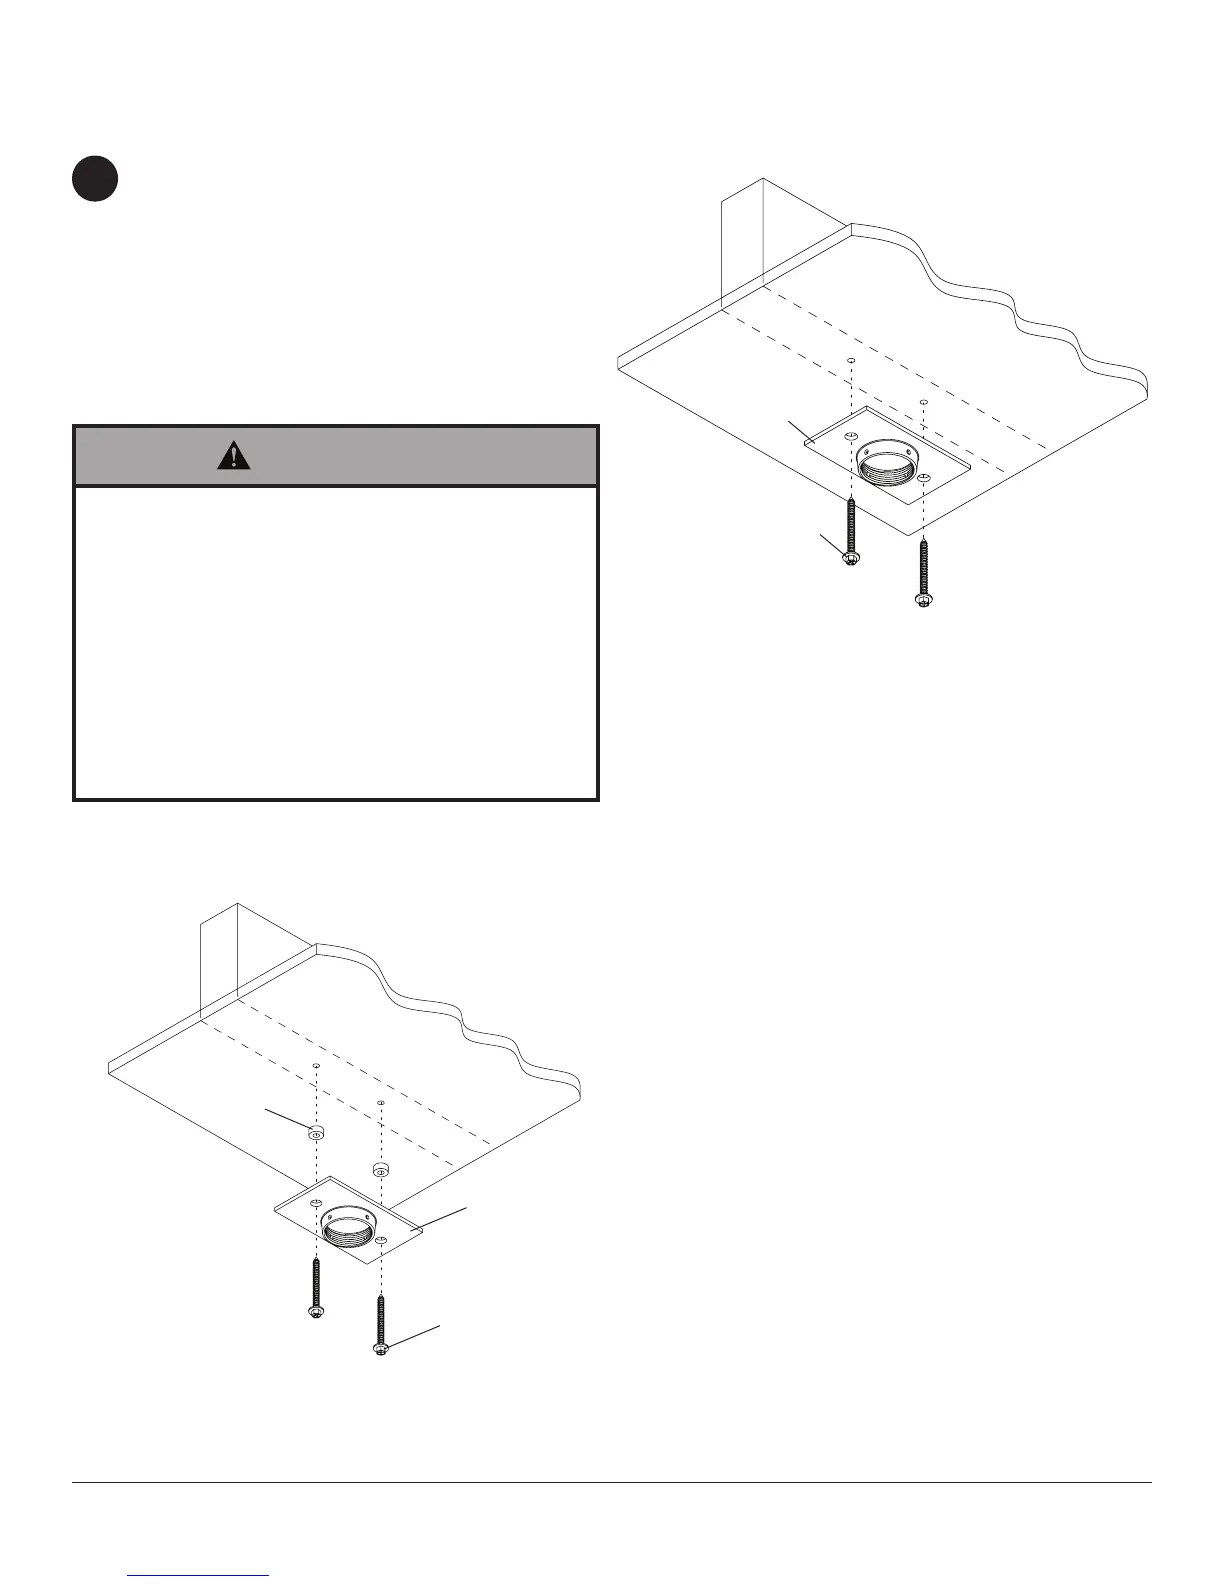
Drilltwo5/32"(4mm)dia.holestoaminimum
depthof2.5"(64mm).Attachceilingplate(J)
toceilingwithtwo#14x2.5"woodscrews(Q)
using3/8"(10mm)socketwrenchasshownin
gure1.1.
NOTE:Foroptionalcordmanagement,install
twospacers(K)betweenceilingplate(J)and
ceilingasshowningure1.2.
Skip to step 2 for ush mount installation.
Skip to step 3 for extension column installation.
Installation To Wood Joist Finished Ceilings, Exposed Wood Joists,
or Wood Beam Ceilings
• Tightenwoodscrewssothatceilingplateisrmly
attached,butdonotovertighten.Overtighteningcan
damagethescrews,greatlyreducingtheirholding
power.
• Nevertighteninexcessof80in•lb(9N.M.).
• Makesurethatmountingscrewsareanchoredinto
thecenterofthestuds.Theuseofan"edgetoedge"
studnderishighlyrecommended.
• Itistheresponsibilityoftheinstallertoverifythatthe
supportingsurfacewillsafelysupportthecombined
loadofallattachedhardwareandcomponents.
WARNING
1
IMPORTANT:BesuretodrillholesintothejoistCENTER!
WOODJOIST
WOODJOIST
CEILING
CEILING
J
Q
K
g. 1.1
g. 1.2

 Loading...


